Who are they suitable for? For which dogs?
- A paracord collar is suitable for those dogs that need to look impressive!
Paracord comes in different colors. They can be combined with each other almost without restrictions. This means you can create a collar for everyday walks under a suit, if you are using clothes for a pet, or for exhibitions. With a paracord collar, this piece of equipment turns into a reliable accessory that allows you to identify your pet favorably. - A paracord collar is suitable for cases when the dog owner wants to do something special or special for their pet with their own hands. City pet stores do not always have a sufficient and decent selection for your pet. Well, the creative process itself is doubly pleasant for a friend.
- A paracord collar can be additional and not the main one.
Many dog lovers start by making a relatively simple (light) dog collar. This collar is not removed from the dog's neck when walking. And if it gets lost, an identifier with the owner’s contact information will always remain on the dog’s neck. - When deciding whether to weave a collar for a dog, you should take into account the characteristics of your pet's coat.
If you have a short-haired breed, it is better to choose soft weaves and material so that the collar is comfortable for the dog. If your pet boasts long hair or even participates in exhibitions, then it is better to make a choke collar to make the fur less traumatic.
Can I make a dog collar myself?
With due patience and diligence, a paracord collar can be made not only by a beginning paracordist, but also by a child of 12 years old. So, “Yes! You can!”
We recommend starting with a simple collar. For example, an address collar. But this is just a recommendation. You can immediately weave something more complex.
DIY dog collar
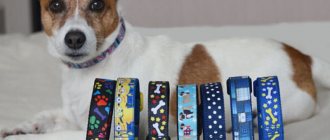
The choice of models and types of dog collars today is almost unlimited and makes it easy to choose accessories of any size, a variety of shades, all kinds of shapes and several decor options.
However, if you want to get an original and individual collar , you can make simple, effective and reliable designs yourself.
Regardless of the manufacturing method and material, you need to remember that for medium-sized animals and large breeds of dogs, only metal fittings are used. All lobster clasps, buckles, and rings or half-rings must be soldered or cast. For small breed dogs, it is enough to purchase plastic fittings or thin steel fasteners.
3️⃣ Accessories
You have decided on the color scheme. What's next? Collar accessories!
In this matter, it is important to consider what kind of temperament your pet has. For large and active breeds, it would be best to choose steel fittings - metal fastex and welded rings. This choice will ensure safety - you don’t need to worry that the ring will loosen or the latch will come loose when tugging. Also, a paracord collar must be made with wide weaves; they will provide comfort and will not cut into the animal’s throat.
If your friend is calm, then accessories for ammunition can be chosen from high-quality, strong plastic. For such paracord collars, fastex collars with stoppers and the same steel rings/half rings are suitable.
In this article we talk about collars with fastex.
We'll tell you about weaving dog collars with rings another time.
Described accessories:
Sewn collar
The most wear-resistant and safe, from the point of view of operation, is the option made on the basis of nylon tape.
In this case, it is recommended to take a closer look at a textile sling, which successfully combines strength and durability, and is also designed for long-term negative effects of external factors and a high level of load .
Such material can have different colors, and if necessary, it is decorated with velvet, water-repellent tape, artistic braid or reflective types of fabric.
Attention! For more comfortable use, the inner lining is made of fleece or any other soft fabric that prevents strong friction against the dog's fur and skin.
Step by step execution:
- correctly calculate the circumference of the accessory by measuring the circumference of the dog’s neck and multiply the results by 1.75;
- attach finishing tape to the sling, stitching it on the right side, left side and along the edges using a sewing machine;
- sew an internal lining made of soft, wear-resistant fabric;
- sew on a plastic fastex fastener and a plastic double-slit buckle, as well as a half-ring, which will serve as a fixation for the collar.
Caring for homemade nylon collars is completely simple and consists of periodic hand washing and drying at room temperature.
Roulette leash
Thanks to the internal mechanism, it twists and unwinds without sagging or dragging on the ground. may be convenient as a walking option for owners of small and medium breeds. Not recommended for strong animals, as the roulette mechanism cannot withstand sudden jerks. Such a leash can be tape or cable, but it is worth remembering that anyone teaches the animal to pull. Unfortunately, this is the only model, the manufacture of which at home is almost impossible without specialized materials.
Knitted collar
For lovers of crocheting or knitting, the best option would be to create an original, knitted collar from leftover yarn .
The most convenient and fastest is considered to be crocheting in the transverse direction from yarn with the addition of strong polyamide thread:
- knitting an initial chain 30-50 mm long based on air loops;
- at the beginning of the row, perform a lifting chain loop;
- the strip is knitted to a length that is equal to the circumference of the pet’s neck with the addition of 15 cm for wearing comfort and fastener fixation;
- upon completion of the design, one loop is decreased on both sides in the last three rows.
A decorative buckle is attached to the end. To prevent the collar from rubbing the animal's neck, it is recommended to hem a flannel lining on the reverse side. When the product gets dirty, wash it manually in warm water with laundry soap or in a washing machine on the “wool” program.
Attention! To get the most reliable and aesthetic accessory, you need to tie the collar in a circular row of single crochets, and then in a circular row of single crochets, knitted from left to right.
Step-by-step instruction
Step 1:
Cut one end of each cord at an angle.
Connect the ends of both laces with cuts into one.
Using a lighter, melt the ends and quickly press them together while they are still hot, as shown in the photo.
Step 2:
Fold the paracord in half along the “seam” you just made. Pass the fold through the loop on the female part of the buckle (see photo).
Secure the cord to the buckle by making a hitch knot:
Pull the loose ends of the laces through the loop you just made to secure the paracord to the buckle.
Step 3:
Pass the ends of the laces through the loop on the other buckle (see photo).
Now you need to set the size of the collar and fasten the laces to the other half of the buckle.
Slide the buckle along the paracord until you reach the desired length.
We measure 50 cm (20 inches) for our collar.
After measuring, wrap the end of each lace around the slot in the buckle one more time to secure it.
Step 4:
Place the D-ring on the first end of the piece and lift it up until it touches the newly attached half of the (men's) buckle.
Step 5:
Cobra braid: Bring the blue end over the rest of the threads.
Paracord collar
Paracord is a lightweight nylon rope with a special core. Initially, this material was used in the line system of parachutes, but is now widely used as a universal cable.
A collar made of paracord is characterized by low weight, high density and excellent strength . This accessory does not fade, does not deform and looks very attractive.
For weaving you will need: a couple of pieces of paracord up to 50 cm long, a half ring and a standard fastener:
- fold the pieces in half and thread them through the clasp;
- make loops, pull the loose ends through them and tighten;
- measure the circumference of the animal’s neck using a centimeter;
- measure the length of the material according to the measurements obtained and fasten the second part of the fastener;
- the first leftmost segment is moved to the right after two segments, and the rightmost segment is moved to the left, which allows you to get a kind of figure eight;
- in the process of further weaving, the two central segments serve as a kind of basis for the resulting accessory.
In a certain place a ring is woven in for the carabiner of the leash. It should be noted that you need to purchase only high-quality paracord from trusted manufacturers. You can remove dirt from the finished product under running water using a brush and soap.
Attention! To check the quality of paracord, you need to set its edge on fire. Good material burns with a smoky flame, emitting black smoke and the characteristic smell of burnt plastic.
1️⃣ Select an option
Collar weaving options
There are a huge variety of types of weaving.
The best option for a paracord collar would be to choose medium-width weaves. For small breeds this width is ~2-3 cm, for medium breeds ~4-5 cm. These types of weaving will be convenient for a dog on walks, without cutting into the animal’s throat, but will also allow you to combine several colors of paracord, which will make it stylish dog accessory.
Nooses and semi-nooses are different - for which round weaves are best suited.
It should be taken into account that immediately after production, the collar may be harsh to the touch, but during wear and washing it will stretch a little in length (~0.5 - 1.5 cm), becoming much softer.
Where to find instructions
The easiest way to find instructions for making dog collars is to search Youtube. We recommend searching something like this: paracord dog collar instructions.
Here are photos and links to some relatively simple options:
Double wide cobra
Trilobite
King cobra
These weaves are not always the best options for your dog, but they are a good place to start. Professionals, for example, recommend not using Trilobite for a dog's collar - the weave is not very stable and can crawl. At the same time, if you weave an address collar, the load on it, as well as the requirements for the collar, are somewhat less.
How much material is needed for weaving?
It is very difficult to calculate exactly how much paracord you need to take (and even if there are several colors in the weave you like) that would be enough for a collar made even of a simple “Cobra”. And, as a rule, even experienced craftsmen take the length “by eye”. If, of course, you have a very “pocket” dog, like a chihuahua or toy terrier, then you can use the same amount for a bracelet - about 2-3 m of one color. But with a dwarf bull terrier or miniature pinscher it is more difficult; here it is better to make weavings that are wide and not thick, which can take up to 5-6 meters of one color or 3 meters of different shades.
Braided collar
Most often, nylon slings are used to weave a collar yourself, as well as strips of leather or strong lacing.
Regardless of the type of material, weaving technology does not differ significantly:
- fold the lacing in half and thread it through the carabiner;
- make a loop and pull a couple of free ends of the lacing through it;
- measure the length of the collar and thread the free ends through the carabiner clasp;
- stretch the left lacing under the two central sections, and the right lacing under the left, on top of the two central sections, and then tighten the knot;
- stretch the right segment under the two central lacings, and the left one under the right, on top of the pair of central ones, and then tighten the knot.
In the central part you can weave a ring to attach a special tag with the pet’s name or the address of its owner.
The presence of available materials in the form of leftover leather, scraps of fabric or yarn allows you, with minimal time and effort, to independently make a bright and exclusive collar, which can be decorated with various accessories, fur or any decorative elements. The huge number of different options for creating an accessory makes the chance of seeing something similar on another animal minimal.
4️⃣ Creation
Weaving a paracord collar for a dog
We sorted out the fittings, chose the colors, found the instructions. Let's get creative?
You can weave without any tools. Especially at the very beginning, when you are just trying and learning. But later, when you are no longer satisfied with simple and narrow types of weaving, or the task is to weave several products, a paracord weaving machine will become an almost indispensable assistant in this matter.
We have some choice of options. You can purchase a machine just for weaving collars, or you can choose a professional tool that will allow you to create not only bracelets and collars, but even belts.
Let's consider the advantages of a weaving machine:
Our machines:
Let's start with the classics
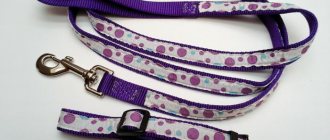
Now we will look at how to sew a classic leash.
For the one and a half meter version you will need:
- nylon or canvas tape two or two and a half centimeters wide and 180 centimeters long;
- durable carabiner with latch;
- for design, jacquard ribbon, approximately three meters;
- sewing machine;
- a thread;
- scissors.
We take the carabiner and insert the end of the tape three centimeters into the eyelet, wrap it inside. It turns out to be a hem of three layers; it must be sewn around the perimeter using a sewing machine, and then crosswise. In any case, we perform securing seams.
From the second end of the ribbon we sew a handle. To do this, wrap the tape around your hand and add three or four centimeters for comfort. Now we sew the ribbon with a hem, and you will get a loop.
Take the jacquard ribbon, fold it in the middle and cut it. We apply both parts of the ribbon to the base of the leash, while closing the seam next to the carabiner and loop. We fasten the ribbon with pins, then sew it on a machine. There you have it, a nice classic leash.
