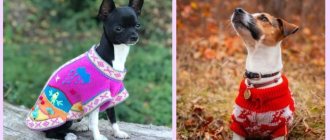
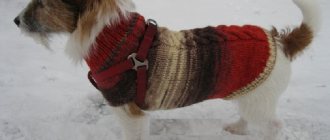
Tiny, playful pugs look very cute in a variety of outfits. From the outside it may seem that the owners are simply making fun of their pets by dressing them up, because animals do not tend to wear clothes. But there are reasons for this:
- They have short hair; it cannot protect the dog from an unfavorable decrease or increase in temperature.
- Going outside in bad weather can result in a cold or other illnesses.
Therefore, caring owners make their own or buy comfortable and sophisticated outfits. Funny creatures feel great in overalls, sweaters and bucket hats, because they simply need these accessories.
How to take measurements from a dog for overalls, sweaters, dresses, blankets and create a pattern?
Before you start work, you need to take measurements from your pet in order to correctly calculate the number of loops.
If the puppy is small, then you can prepare sock knitting needles, but for a larger animal you will need circular knitting needles. All sizes are recorded, suitable yarn is selected, preferably melange or wool blend, in two colors. For a boy, you can use a combination of blue and white, gray and burgundy, and for a girl, bright pink, yellow and white colors are more suitable. Required measurements:
- length of the body from the withers to the base of the tail;
- neck girth;
- belly length;
- waist circumference;
- diameter and height of legs;
- chest width.
Knitting fashionable and original clothes for small breed dogs does not require special knowledge and skills. Calculating the number of loops for casting on is very simple: with an average density you will get 2 loops per 1 cm. So, with a neck circumference of 30–32 cm, 60–64 loops are cast on. To assemble the finished product you will need accessories, threads, scissors and a needle. Experienced needlewomen knit a seamless sweater or dress for Yorkies, Chihuahuas and pugs with beautiful patterns, braids and weaving with circular knitting needles.
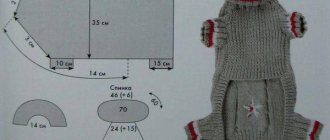
Clothes should be comfortable. This means that the knitting density should be medium. A tight item is uncomfortable to wear, while something too loose will quickly stretch and lose its shape. In some cases, you will need not only a description, but also a ready-made basic pattern in full size.
You need to prepare thin graph paper and draw a rectangle on it, one side of which is equal to the length of the pet’s back. Next, the waist line and chest circumference are noted. The back length is divided in half and 1/3 of the neck circumference is measured from the dividing point. If you connect these marks in a semicircle, you will get the required neck diameter. The shoulder cut and leg openings are calculated in the same way. On another sheet of paper, a detailed pattern for the sleeves is drawn separately, based on the measurements taken. A master class for beginners will help you understand how a pattern is made (see video).
Brief overview of knitted items
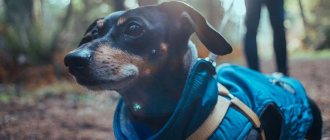
Knitted items have long been in demand among pet owners. They are especially relevant for dogs of small breeds, because it is tiny dogs that suffer the most from the cold. And pets that have no fur at all need protection from the sun. And here knitted things also come to the rescue.
What types of things can be associated with your beloved dog? In fact, you can create anything from threads using knitting needles or a crochet hook.
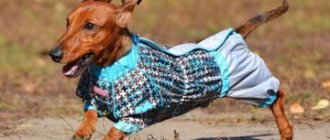
- Blankets are probably the most popular type of dog clothing and can be used for any occasion in life. By the way, hunting dogs and cats that lived in the temple were dressed in this outfit a long time ago. It is something like a vest, covers the back and tummy, and does not restrict the legs. Easy to sew, knit and very practical - putting it on quickly and easily.
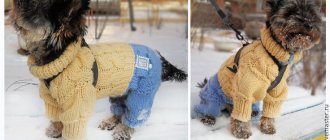
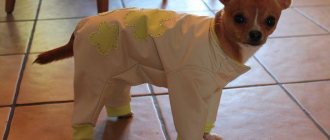
- The overalls have sleeves, pants and a collar, covering almost the entire body of the pet. Thanks to such clothes, the dog will definitely not freeze outside. Some models can cover the paws completely, and then there will be no need to buy boots. It is usually sewn from thick fabric with a lining, but can also be knitted from thick thread.
- A sweater is almost a blanket, but sometimes it comes with sleeves, and sometimes with a collar. Something like a simplified overalls. By the way, you can even create it from an old jacket - it’s quite simple.
- Suit - you can say that it is a jumpsuit divided in half. Has a blouse and pants/skirt. It may well be knitted from a thin cotton thread and put on your pet in the summer. It can be both decorative and practical.
- The dress is clothing for girls dogs. An ideal summer outfit, although the dress can also be worn for winter. The easiest one to crochet is for a small dog. By the way, it can be either simple or very elegant.
- By and large, a dog doesn’t need a hat, except for a small dog, and then only on the street. It is easy and quick to knit and you can make holes for the ears in it.
- Dog boots can also be knitted, but they are only suitable for fashion shows in an apartment in the cold. In general, it is better to purchase shoes in a store, as they will be made of dense material. Dogs need boots to protect their paw pads from chemicals scattered on the sidewalks.
How to knit a sweater for a dog with your own hands
And for beginner knitters, I will tell you all the secrets.
I knitted this striped sweater for Zosya’s dog without taking into account measurement No. 5 for the width of the tummy. And this sweater turned out to be wide across my tummy and sags a little. But despite this, it still looks cute and even touching when Zosya wears it.
Moreover, I knitted this sweater shorter, not all the way back, but only “to the waist.” That is, up to the hind legs. And this option is quite suitable for your first DIY dog sweater.
I crocheted a sweater. This is the most convenient tool, because then you get a more flexible knitting technology, more opportunities to make some unexpected “deviations” from the chosen tactics and strategy for knitting a sweater for a dog, so to speak, along the way. After all, I didn’t yet know that, in fact, a dog sweater is not distinguished by any complex technological “tricks”. Just playing it safe.
A sweater like the one on Zos can be knitted with knitting needles.
Step-by-step description of knitting a sweater for a pet
It is not necessary that the hand be full. To knit a simple sweater for a Chihuahua, some basic skills are enough. A pattern and knitting pattern for a simple sweater for a dog won’t even be useful. An elementary lesson will help you figure out how to knit a sweater for your pet.
Materials you will need:
- warm melange yarn;
- knitting needles No. 4;
- bobbin threads;
- scissors;
- needle.
For your information! Knitting begins with a collar with 1×1 or 2×2 rib. It should not be knitted too tightly so that it is easy to put on and take off. The average collar width for small dog breeds is 5 cm. After the end of the collar, the main part begins.
The main fabric is knitted in stockinette stitch. Starting from the third row, add 2 loops in each subsequent row. You need to add until the width of the product is equal to the circumference of the dog’s chest + 2 cm for allowances. At this stage, it is recommended to first try the sweater on your pet to make sure it is the right size. Next, knit 3 more rows without additions.
Knitting holes for paws
To make holes for the paws, you need to skip the required number of loops corresponding to the size. To do this, knit the first 3 cm, cover the next 6 cm, then knit to the second armhole. When a sleeve of the appropriate size is obtained, air loops are added and then knitted with a single piece of fabric. The edges are tied. You can use a hook for this.
Then, to narrow the product towards the bottom, you need to decrease 2 loops in every seventh row.
Important! As you knit, you need to regularly try on the product for the future owner. When the length of the fabric is sufficient, you need to finish the product by knitting the edge with a 1x1 or 2x2 elastic band. To assemble the sweater, the edges are sewn together with threads.
To assemble the sweater, the edges are sewn together with threads.
When the length of the fabric is sufficient, you need to finish the product by knitting the edge with a 1x1 or 2x2 elastic band. To assemble the sweater, the edges are sewn together with threads.
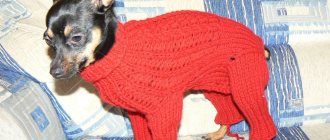
A dog in a knitted sweater feels comfortable
Crochet overalls pattern
You will need a No. 5 hook, bright thick yarn, a satin ribbon and a button or bead for decoration. The knitting pattern is as follows: chain stitch, connecting stitch, single crochet and double crochet. The product is knitted from the waist, casting on 81 stitches, closing them in a circle and knitting 7 cm. The circular fabric is divided into 2 unequal parts: at the bottom there are 14 motifs, and at the top – 12. On both sides, 2 motifs are left between them for the armhole. From it, another 10 cm is knitted and 7 motifs for the neck are set aside, and the right and left sides are knitted separately.
After 14 cm from the armhole, the product is finished, the loops are closed and the lower and upper parts are sewn together in the shoulder area. The neckline is tied in a circle in 4 rows. The sleeves are knitted by raising the stitches in the armholes and knitting about 10 cm in a circle. The last 4 cm are knitted with double crochets. The lower part starts from the waist line, knitting 20 cm down. The middle 11 motifs are set aside so that the jumpsuit can be worn.
Separately knit 7 cm on the right and left sides, gradually decreasing 2 stitches on each side. Parts of the fabrics are sewn together, leaving armholes for the paws and space for putting on the overalls. In the armholes for the hind legs, another 7 cm are knitted and finished with cuffs 2 cm long from single crochets. The lower part of the product is tied and decorated with a satin ribbon with a bead.
Schemes with step-by-step descriptions
For beginning needlewomen, it is easier to make a sweater using simple patterns with detailed descriptions. We suggest considering three simple options that are knitted in a simple way. All models are comfortable in fit for dogs and visually attractive.
Warm sweater made of melange yarn
A knitted sweater made from marl yarn looks great on small pets. Weaving the thread will hide all the mistakes of novice needlewomen, and the variegated colors will smooth out the appearance of uneven loops. You can knit with this thread without a pattern.
To work you will need:
- knitting needles No. 4;
- melange threads (100 g thick per 10 meters);
- hook No. 3;
- thread and needle for stitching parts.
Description of work:
We start working with the collar. For a dog of miniature size, its width should not be more than 5 cm. The knitting pattern is 1x1 rib.
The main part of the product is knitted together with the collar. Therefore, we continue the back with a simple stockinette stitch. Starting from the third row of the main fabric, add two loops in each row. We continue to increase until the width of the fabric is equal to the measurement of chest circumference. If earlier, when taking measurements, centimeters were not added to allowances, then this needs to be done now. Add 2 cm to chest circumference.
In the center of the back you can add a pattern - a pigtail. To do this, after finishing the collar, you need to find its middle and count 17 points exactly in two directions - the drawing (diagram) will be located on them.
Trying a sweater on a dog. If the chest is the right size, then we knit three more rows without increasing.
When trying on, for convenience, knitting can be transferred to circular knitting needles, and then back to working knitting needles.
Next we will knit the fabric, leaving slits for the front paws. To do this, you will need a measurement - the distance between the front paws. We knit, skipping the required number of loops (centimeters), knitting only the sides of the “sleeves”. First we knit 3 cm in height, then we close 6 cm, we knit the fabric to the second “sleeve”. After the desired size is reached, add air loops and continue knitting with a solid fabric.
We knit further, decreasing two loops every six rows. We strive to measure according to measurements - back length and waist size. In order not to redo it, we try on the jacket on the pet several times during the work.
We complete the length of the edge of the product with six rows of 2x2 elastic. We crochet the armholes for the paws with single crochets of 1-2 cm. We sew the jacket along the belly line.
Sweater petal
Knitting such a warm thing will not be difficult even for a beginner. The sweater consists of only two parts - petals, which are simply knitted and connected to each other. Despite the simplicity of execution, the blouse turns out to be comfortable and beautiful.
To work you will need:
- semi-wool threads;
- knitting needles No. 5;
- knitting needles No. 2.5;
- hook No. 2.5;
- ruler;
- scissors;
- needle and elastic thread.
Description of work:
- We start knitting from the top half of the product. You can knit with regular satin stitch or elastic. In the second option, the product will stretch well and fit perfectly on any figure. We cast on 22 sts and knit a “tail” that will cover the lower back. We go to increase the width, adding two loops in every second row (one at the beginning and one at the end). The width of the “tail” depends on the size of the animal. For example, for an average toy terrier the optimal width is 14-16 cm.
- Having finished the tail (9-12 rubles), we continue to knit the back. But to do this, we increase the knitting width by 20 stitches (10 on each side). Next we knit evenly without changes to the required length (measurement is the length of the back).
We finish work on the first detail by designing the neck. Decrease 12 stitches at once in the last row of the back. To work with the neckline, it is recommended to switch to thinner knitting needles (No. 2.5), then the collar will look neater. We knit the collar to the desired length (4-5 r.).
Let's start working on the second part. We cast on 10-12 stitches and knit a strip with a length equal to the length of the sweater without a tail.
We finish the piece with a neckline, as on the back, 10-14 r. thin knitting needles No. 2.5.
Let's start assembling the product. Using a needle and thread, we begin to sew the jacket from the neck. We sew to the place where we immediately decreased 12 stitches - here we leave openings for the paws (6-7 cm). In order to make the dog comfortable and the sweater not to slip, we strengthen the belly and neck area with rubber thread, simply sew a few lines under the loops. If desired, instead of strengthening the neck with a rubber thread, you can use a lace that will securely fix the throat and decorate the blouse.
The subtleties of creating clothes for dogs
When choosing a non-elastic material for sewing, be sure to add a few centimeters on each side of the product. This is necessary so that clothing does not restrict movement, especially in the throat and chest.
It is also better to place various fasteners and Velcro on the back. This is necessary not only for the dog, but also for you, since the dressing process will be much easier and more convenient. In addition, if your pet has long hair, then make sure that the fasteners do not get caught. If desired, you can sew on buttons or baby Velcro.
Of course, the process of sewing clothes for a dog is very labor-intensive. But at the same time, thanks to this you can save a lot and buy another toy for your pet.
How to knit it yourself?
What could be more beautiful than clothes for a dog that you create yourself? Here you can let your imagination flutter and come up with absolutely any variations of models. But creating a dog jacket with your own hands is a long, painstaking, but very interesting task.
Taking measurements
Before you start knitting dog clothes, you should decide on its size. To do this, we take measurements from the pet. Depending on the selected clothing model, the number of measurements may vary. We'll tell you how to take measurements for a sweater.
To get started, prepare a pen, a piece of paper and a measuring tape and call your dog to you. Give the command “Stand” and, picking up a centimeter, begin taking measurements:
- chest circumference – at the fullest part;
- neck circumference - in the place where it is widest;
- back length - from the point where the neck meets the back to the tail;
- leg height – from armpit to pastern;
- leg girth – at the thickest point.
These measurements will be enough to sew or knit a sweater with sleeves for your dog. If you want to create a jumpsuit, you need to measure the distance between the front and back legs, waist circumference, hip circumference, and the height of the hind legs. How to take measurements to sew or knit an outfit is described in the following video.
Materials and tools
To create a knitted sweater or vest for your pet, you will need:
- crochet hook or knitting needles (depending on what you own);
- required amount of yarn;
- knitting pattern;
- patterns built to your dog's measurements;
- scissors;
- threads and needles to sew parts;
- rubber.
Instructions
Instructions for creating clothes for a dog will directly depend on the chosen model and knitting pattern. But there are several points that will be common to almost all models.
- To begin with, depending on the chosen yarn, you should calculate the number of loops per 1 cm. Then we calculate how many of them are needed in accordance with the measurements of the animal. To do this, we knit a small sample of the pattern.
- We knit each part of the sweater separately: the back, sleeves, chest, collar and elastic at the waist.
- In some cases, you can knit an item in the round - this option is suitable for vests.
- We knit the blanket with a continuous thread, almost without interruption.
- If you are knitting a sweater, then, having created each of its parts separately, you must connect them together. This can be done by tying the pieces together or sewing them together.
- Lastly, when the control fitting is done, the collar and elastic at the waist are knitted.
- Sometimes you can do without long sleeves - then the sweater is knitted like a vest. Small sleeves are simply attached to the almost finished product.
Sweater for a small dog
Knitting a sweater for small dogs is practically no different from creating the same copy of clothing for a larger dog. The only difference is that for children it is often necessary to create not one, but several clothes per change. After all, a large dog does not need to be dressed as often as a baby chishka or toy, for whom any cold is like death. Such breeds are very difficult to tolerate frost.
We knit a dog blouse, always starting from the collar, and towards the end of the product we reduce the number of loops so that the sweater is fitted. Below are several patterns that are suitable for knitting dog clothes.
Loading …
Do it yourself
Everyone has probably experienced the benefits of custom-made or hand-made clothing. Every curve, groove, detail of the product seems to be weightless, and in movement it gives the impression that there is no clothing at all. A pet should feel exactly the same way in things sewn in accordance with its personal body parameters.
Sweater knitting pattern
This product is made more simply than , for example, a coat or overalls .
It is only necessary to measure the pet's sternum and front legs. Here is the knitting pattern for the sweater:
- The girth of the dog’s neck and sternum is measured, the length of the product from the neck fold to the waist, all measurements are recorded and repeated for control.
- Based on the obtained numbers, a vest pattern is created on paper, cut out, and tried on again.
- Already on the attached pattern, the circumference of the paw is measured; the shape of the sleeve attachment will be approximately the same as that of human models.
- All pattern details are placed on the fabric, outlined in chalk, and drawn along the contour with allowances of 0.5 - 1.5 cm, depending on the type and thickness of the selected fabric. All edges of the parts are processed using an overlocker or manually with a cap seam around the perimeter.
- Pieces of fabric are basted with bright thread, which must be removed after machine stitching, final fitting is performed before sewing, and all corrections are made.
- The parts are sewn together, the thread that held the parts together is removed.
- Decorative finishing is done using beads, buttons, patch pockets, fasteners, etc.
- Final fitting before walking in new clothes.
In principle, if you like to knit, then knitting a sweater pattern should not present any difficulties for you.
Winter coveralls
Overalls are considered a difficult product to make even for an experienced craftsman.
This is due to the fact that during the process of measuring, creating a pattern, basting elements, re-trying, and final sewing, you will need to constantly try on the product on a live model .
The pet will not always obediently expose its body to such manipulations, thereby delaying time.
Don't despair, a reliable assistant with a pair of free hands will help you cope faster at the most difficult stages.
The pattern of overalls for a pug should be made in accordance with the measurements taken. To do this, you should correctly apply the measuring tape to the animal’s body. You need to understand that it is better to make 1 - 2 cm of reserve, and as a result of fitting, simply cut off the excess or sew in an undercut, than to finish off the missing fabric. To sew a jumpsuit you will need:
- Fabric for external finishing or main fabric if insulation or lining is not planned.
- The same size insulation or lining if necessary.
- Bright thread for basting parts before stitching.
- Threads for the sewing machine in the colors of the chosen material.
- Sewing chalk.
- The scissors are big.
- The needles are ordinary.
- Pins, thimble.
- Accessories for fastening, decoration, etc.
The choice of fabric should be appropriate for the season, not be an allergen for the dog, and slightly stretchable for light, single-layer items.
To sew overalls for a pug, you need to follow the following instructions:
- Measure your pet's body and take measurements of the length of the back from the crease of the neck to the beginning of the tail, the girth of the sternum, the dimensions of the neck and paws. Write down all the indicators, take a control measurement after the dog eats, and make corrections.
- On graph paper, the outside of old wallpaper or other thick fabric, you should draw the outline of the pattern of all the details.
- Cut out the pattern without allowances; they are added when the contours are transferred to the fabric with a sewing chalk. For seams, you should retreat approximately 0.5 - 1.5 cm, depending on the material used, so that the item does not come apart at the seam and there is no thick scar that rubs the pet’s skin.
- Measure the parts on the pug, placing each of them so that they touch in all places. It is advisable that someone help with this, since it is very difficult to do it alone, even on an inanimate dummy without pinning.
- Apply to the selected fabric, trace along the contour, draw another line at a distance of 0.5 - 1.5 cm from the contour along the entire perimeter. If a lining or insulation is used, you need to take into account that the internal width and length of the parts will be approximately 1 - 2 cm less than the external one. This does not mean that you need to reduce the lining, it is better to make it fit the body and increase the outer material.
- After cutting out patterns from fabric, you need to try them on again, making sure that the fabric fits along the contour of the dog’s body.
- The patterns are basted along the line with a thread that is clearly visible, using wide stitches. This will make it much easier to remove after machine stitching. All sewn parts are tried on before final sewing, manipulations are made to fit the pet’s body, and, if necessary, the location and size of grooves and spacers are indicated. The pug should walk freely in the product without noticing its presence on itself.
- If you have an overlocker, trim the edges of the fabric to protect it from unraveling and increase the service life of the overalls; if not, overcast each piece with a slip stitch around the entire perimeter. Using a machine, sew all the parts along the connection lines, process the exit free edges, running a stitch along the edge folded by 0.5 - 0.8 mm. You can sew in an elastic band to keep the paws securely protected.
- Decorative trim, sewing in zippers, sewing on buttons, pockets, etc. - The final stage. Depends solely on the taste of the owner, his imagination, available materials, skill;
- Last fitting before going public.
Where to begin?
We catch our dog and take a few measurements.
- neck circumference (NC);
- chest width (SH);
- paw girth (OL);
- length, from the withers to the beginning of the tail (D).
For work we will need stocking needles or, if the dog is not quite tiny, then circular ones. And, of course, we knit a sample with knitting needles to calculate the number of loops, according to the measurements that you took. You will need yarn in two colors, preferably contrasting ones. For girls, white and pink are good, and for my brutal, but very shy macho, I took gray and red yarn.
Neck and raglan
We start knitting a sweater from the top, from the neck. We calculate the number of loops based on the OSH measurement. In the case of our example, there were 64 loops. We distribute them on four knitting needles and knit 15 rows with a 2x2 elastic band. You can do less or you can do more to make a lapel. The smaller the dog, the more the sweater should perform its function - to warm. Therefore, the collar may be higher, the sleeves, and the sweater itself may be longer.
Next, let's start knitting raglan. We calculate it and carry it out the same way as if you were knitting a sweater for yourself or a child.
Divide the number of elastic loops by 3 and distribute the resulting amount between the back, chest, and legs. Example:
64:3~22. The dog's back is wider than the chest, so we will allocate 25 loops for this part, 19 for the chest, and 20 for the paws, 10 per paw. You will understand how to do this accurately if you look carefully at your dog and at the proportions of its body. Much depends on the fatness, thinness, and characteristics of the breed. There is no exact formula for all dogs. It will not be difficult for you, as the owner of your pet, to calculate this simple formula.
Having distributed the loops, we place markers or tie threads of a contrasting color.
Next, we need to make an extension of the sweater, or raglan. To do this, we will make yarn overs.
When there are 2 buttonholes left before the first marker, yarn over, then purl two, throw over the marker, purl two again, and yarn over again. And so on with each marker.
And here is the first heart on our dog sweater. It will be on the chest. It can be placed in the center, or it can be shifted to any side.
Why inverted? For your convenience, since we knit from above!
We put the first strokes of the heart.
We continue to knit raglan, and do not forget about the heart.
Sleeves
At this stage, you can try the product on the dog so that it becomes clear how it “sits” in the shoulders and that it’s time to leave room for the sleeves.
To be sure, we will calculate the number of loops for this part using the OL measurement and check the bust size using the SH measurement.
This is where the sleeve will be.
Let's transfer the sleeve loops to another knitting needle and leave them for now. Meanwhile, we will continue knitting in the round. We will cast on a working knitting needle from 5 to 10 loops, so that the sleeve does not fit too tightly, so as not to hinder the movements of your active friend. We close the circle and continue knitting.
Body
On the back, we will perform another jacquard pattern - two hearts. You can choose any location and size of the picture. If suddenly your dog is very tiny and such a pattern simply does not fit on its back, you can knit one heart from this or the previous pattern.
Following the diagram, we get the following pattern.
Having finished knitting the pattern, continue knitting in the round. The length of the product must be chosen based on the size of the dog, but the length along the tummy should be shorter than the length of the back. Having decided on the length, we continue knitting with a 2x2 elastic band.
Having knitted about 7 rows of elastic, we close only the tummy area.
The next stage is closing the loops on the back. We transfer the knitting to one knitting needle, and knit the front and back rows, knitting three loops together at the beginning and end of each row. This way the back will be gently rounded. If your dog’s body is long enough, then you can knit two loops, and not in each row, but every other row, so the back will be longer.
Sleeves again.
Let's return to the paws. We cast on the knitting needles the 5 - 10 loops that we cast on for a loose fit. And we knit the sleeves in the round with a 2x2 rib for 10 rows, or more.
This is what the finished sweater looks like from the back and front.
Have fun and take care of your dogs!
How to knit and crochet a sweater?
For a small dog, you can knit a sweater with sleeves - raglan. They start knitting from the neckline, calculating the number of loops based on the girth of the neck. Cast on 64 stitches, place them on 4 knitting needles and knit about 15 rows with an elastic band. Start knitting raglan from the neckline, distributing the stitches equally on 3 knitting needles. It is necessary to take into account the size and volume of the pet, as well as the fact that the back of the product should be wider than the front. 25 loops are left on the back, 19 on the chest and tummy, and 10 loops on the legs, marking them with contrasting markers.
Then they begin to add loops in a circle. When there are 2 stitches left before the first mark, yarn over, purl 2, throw over the mark, knit a pair of purls and a yarn over again. The product will begin to increase in width, taking the shape of an inverted heart. The resulting blank is tried on the pet to determine the beginning of the sleeves. The loops for the sleeve are transferred to a separate stick or thread, and an additional 6-8 loops are cast on the working one, knitted in the round and finished with an elastic band on the tummy.
The length of the blouse is selected according to the size of the animal, but the back should be longer than the front. The back is knitted separately, moving the product onto one knitting needle, gradually decreasing the loops and closing them. For sleeves, cast on 5 or 10 loops and knit in a circle with an elastic band for about 10–15 rows. The finished parts are sewn together. The crocheted sweater follows the same pattern as the overalls, but without the bottom part.
Alternative to knitting
Not every needlewoman knows how to knit. Some housewives can delight their pets with hand-sewn items. To do this, you can purchase new fabric, or you can sew clothes from an old wardrobe. Let's look at how to make an original thing for a dog in a few minutes.
Jacket made from socks
Nowadays, outlandish things that can be sewn from an old sock have become fashionable. Yes, exactly one of them. For work, prepare the following tools and materials:
- a lot of old socks;
- scissors;
- ruler;
- crochet hook of the largest size;
- needle and thread in the color of the socks.
If your pet weighs about 10 kg, then approximately 35 socks will be needed to get the job done.
The work is carried out in the following way:
- Before sewing the original item, we wash and dry all the socks. We sort by color if you want to somehow compose the overall pattern. If this is not done, the product will not lose its charm.
- To sew a jacket, each sock needs to be cut. To do this, each product is leveled and cut into strips. The width of each is 2-3 cm. Each part should look like a solid loop.
- Let's start weaving the pieces to make yarn from the socks. To do this, one ring is threaded through the other.
- Let's start knitting. Take a large hook and start knitting in regular stitch. All parts of the product are prepared separately, and then they need to be sewn together with ordinary threads.
In this simple way you can dress your pet in original clothes of your own making.
Step-by-step technology for knitting a sweater for a dog
- So, I started knitting from the bottom up, from the hind legs towards the muzzle. Volume - according to measurement No. 3, full volume along the chest line through the chest and back, just behind the front paws. Here, indeed, it turns out to be a pipe. Because I knitted the sweater “one-piece”.
- Act one. We knit and knit a kind of long pipe between the hind and front legs. Once you tie it, apply it to the dog’s back. Make sure everything is in order. And then... This is where the fun begins.
- Act two. You will have to knit the back separately and the front separately to create armholes for the front legs.
The width of the back, of course, is equal to the corresponding measurement. Chest width too. Just measure with a ruler from which stitch to which you are knitting the back, and from which to which stitch you are knitting the front.
The length of such a “separate” knitting will be equal to half the volume of the dog’s front paw at its base. Best of all, just apply the knitting to the back from time to time to see how much more you need to knit to create an armhole for the sleeve.
Act three. Once you have knitted the armhole, switch to the “pipe” again, connecting all the loops together. Knit one or two rows, and then begin to gradually reduce the number of loops so that your neck is not too wide. Here, too, you need to apply the knitting to the back of the dog, since all dogs are different and I cannot tell you exactly in numbers how much you will have to reduce the knitting, by how many loops and what length should be the distance when knitting the “shoulders”. It must be taken into account that dogs, in fact, do not have shoulders.
All this can be calculated using the measurement of the length of the product and the width of the neck. You can subtract the part you have already knitted from the length of the product and compare the width of the product you are knitting with the measured width of the neck. And you will understand how and how many loops you will need to “cut”. But the neck should not be too narrow, because then it will be difficult to put the sweater on over your head.
If you're hesitant, reduce the volume a little and knit a lapel collar. It will be very nice, and you won’t have to worry about the calculations. As a last resort, if the neck is too wide, make a beautiful lace with small tassels or bobbles and thread it between the loops in the neck. You can tie it on the side or back, it will be very beautiful.
That's all. Almost all dog sweaters are knitted using this basic principle. The only thing for experienced knitters is that at the beginning of knitting, so that the sweater does not hang on your tummy, you need to start with the volume that you measured near the back legs, and then gradually add loops along the entire required length, equal to the distance between the front and back legs. Until you reach the desired volume, measured at the chest line behind the front legs.
Act four. The only thing left is to pick up the stitches at the armholes and knit the sleeves for the front legs. It is not difficult.
Good luck making clothes for your dog!
If you have questions, ask, I’m always happy to answer!
Good mood to you and your dog!
35.00 Read more:
How to knit a sweater for a dog (for beginners): features of knitting a sweater for a dog on knitting needles
How to knit a men's pullover, sweater, jumper with knitting needles and crochet (diagrams and descriptions)
How to crochet a sweater for beginners: simple openwork, on a loin mesh, summer
Crochet women's sweater: (description), step-by-step instructions for crocheting a sweater
Crochet sweater for a cat: step-by-step instructions, diagrams and description
How to sew a jumpsuit for a dog with your own hands: step-by-step instructions; from a jacket; knit for a chihuahua with knitting needles
Crochet oversized sweater: step-by-step instructions for crocheting an oversized sweater
Crochet sweater for a boy: pattern for knitting a children's sweater
How to sew and knit a hat for a dog with your own hands (models, patterns, diagrams, description)
How to knit a bat sweater (with diagrams): step-by-step instructions for knitting a bat sweater
Men's crochet sweater: men's sweater models step by step
How to knit a pullover with a round yoke on top using knitting needles and crochet: patterns and knitting steps
Crochet a collar on a dress: how to crochet a collar on a dress with diagrams and descriptions
How to crochet a basket from knitted yarn: how to crochet beautiful baskets from knitted yarn
How to knit a men's sweater with knitting needles: photos, diagrams, patterns and descriptions of models for beginners and experienced knitters
Knitting a blouse
A jacket can be made for a large dog by simply adding the number of loops. The principle of operation is the same as in previous descriptions, and knitting must begin from the neck. You can make a blouse with a waterproof raincoat lining with a zipper on the back or buttons. The left and right fronts are knitted separately according to the pattern, and then connected to the back, leaving armholes for the sleeves.
I’ll tell you how to knit a sweater for a dog step by step. This is my dog Zosya in a sweater that I knitted for her myself. Crochet. It’s already cold, one might say, winter is outside, the dog is freezing and shaking so much, even its paws are jumping. So I had to knit a sweater for her. She wears it with pleasure, even gets angry when I take it off. And he’s very happy when we get dressed. He also snatches the sweater from my hands and runs merrily around the apartment. With a sweater in his mouth. That's a lot of positive emotions for both the dog and me!
Do you want to create for your dog the same “work of art” of knitted art, as they say, “haute couture”? In this case, you yourself will act as a couturier. So, let's get started, crocheting a sweater for the dog.
Material selection
Before you make a pattern for a dog jumpsuit, you need to decide on the choice of material. In the summer, you should not dress up your four-legged friend, since the dog’s skin should breathe and not steam under beautiful clothes.
In cool weather, you should choose natural fabrics that will keep your pet warm, but also allow the body to breathe. In this case, you should choose knitwear, cotton fabrics, wool and wool blends.
In winter, you need to opt for denser, but also natural and soft fabrics that do not restrict movement and are not too heavy. Wool, thin felt, plush, faux fur, etc. are suitable.
In rainy weather, you should wear clothes with a waterproof top for your pet. In this case, raincoat and bolognese fabric are best suited.
Why does a pug need dog clothes?
Pugs have thin fur that fits tightly to the body, so it cannot create the necessary air layer that would protect against temperature changes. Because of this, dogs often get colds in the cold or overheat in the sun.
Clothing for pugs is the only barrier that protects them from heat and frost.
Separately, it is worth mentioning about shoes. This item of clothing will protect your pug's paws from heating up on hot asphalt in the summer.
In winter, boots do not allow reagents and salt crystals, which are generously sprinkled on slippery areas, to reach the paw pads.
Important! Dog clothes are a real salvation for owners. After all, in wet, rainy or snowy weather, you will only need to wash the overalls, and not bathe and dry your pet.
In addition to being protective, the suit also has an aesthetic function. Owners dress their pets so that they look cute and attract attention while walking. It's a pity that pugs don't care about this.
Clothing requirements
It is clear that a raincoat should repel water, and a down jacket should retain heat.
But there are other requirements:
- hypoallergenic material – when purchasing a suit in an online store, it is better to read the reviews to avoid buying cheap synthetic fabric that irritates the delicate skin of the pug;
- spaciousness - the suit should not restrict movement, choke the pug, or compress the chest;
- It is better that the hood is secured on the back in a comfortable position and does not fall over the eyes.
Selecting yarn and tools
What might you need to knit a sweater for a dog? The list of tools and materials is small, but it can be supplemented with other elements depending on the chosen model.
Minimum knitting set:
- yarn;
- hook or knitting needles;
- scissors;
- needle;
- threads
You may also need buckles, buttons, zippers, ribbons and other accessories to decorate and improve the functionality of a knitted item. Threads will be needed to sew together different parts of the future suit.
What to knit from?
The most important element needed to create a knitted item is yarn. Her choice must be taken with full responsibility. To make a dog sweater warm and keep you warm in cold weather, it is best to take wool or acrylic yarn. The first is a completely natural material that holds heat well and for a long time. But it has a minus - the product will quickly stretch out and become pellet-like.
Acrylic - yarn made from artificial wool, synthetics. Very durable and can come in very bright colors. But its main disadvantage is the ability to accumulate static electricity, which will cause discomfort to the dog.
Cotton yarn is the best option when it comes to dog breeds with fur. But it is too thin to retain heat in cold weather.
Based on the above, we can conclude that it is best to use mixed yarn for knitted dog clothes. Products made from it will wash well, last a long time and will not lose their appearance.
Remaking an old sweater
If you do not have knitting skills, you can create a blouse for your dog from your old sweater. For a small dog, doll clothes or a child's blouse will do just fine, but a large dog can easily fit into a sweatshirt. But such wardrobe items will require some modification.
The waist of a human sweater will be large for any breed of dog, so you can sew an elastic band there to narrow the volume of an old sweater. You can cut a fabric item and then sew the edges again, adjusting it to the size of the dog, but this option will not work with a knitted item. If you cut a sweater, it will simply unravel. So here only the option using an elastic band is suitable.
Types of clothing
Depending on functionality, all clothing can be divided:
- for raincoats (or raincoats for wet weather, there are also overalls with umbrellas);
- insulated jackets (or down jackets for winter);
- blankets and sweaters (cool weather, dry off-season);
- socks and boots;
- hats, scarves;
- T-shirts, shorts (decorative items that will be needed in the summer so that the pug does not get sunburned);
- dresses, skirts (for fashionable girls).
How to knit clothes for a dog
Each product is created according to an individual plan. It depends on the knitting pattern, model and imagination of the craftsman. However, there are general principles of knitting.
Taking measurements for knitting
Comfort is the main requirement for dog clothing.
The animal must be comfortable during the walk, otherwise it will turn into torture. Therefore, you need to take the correct measurements:
- The dog is given the command to stand or an assistant is asked to fix it during the measurements. They are carried out with a measuring tape.
- The chest circumference is measured at the fullest part, just behind the front paws.
- The waist circumference is measured in front of the dog's hind legs.
- The neck circumference usually matches the collar circumference. A measuring tape is tied around the base of the neck and the result is recorded.
- Back length is the distance from the withers to the base of the tail.
- Leg height is the distance from the armpits to the feet.
- Leg circumference is measured at the widest point.
Measurements for knitted items
These measurements will be enough to knit a sweater or blanket (in this case, exclude measurements for sleeves). To create a jumpsuit, additional measurements will be required:
- the distance between the front and rear legs;
- waist and hip circumference;
- height of the hind legs.
Add 1 cm to the resulting measurements for freedom of movement. Clothes should not fit like a glove.
A tight suit will cause discomfort to your pet and lead to chafing.
Where to begin
Where to start: knitting begins by calculating the number of loops per 1 cm of yarn. To determine the density of the product, you need to knit a small sample. Example: if 26 loops fit into 10 cm, then the density is 2.6. To calculate the number of loops for the chest circumference, you need to take this measurement and multiply it by the density. Example: 32 * 2.6 = 83 loops.
Knitted clothes for dogs
Description of work
The order of work depends on the knitting pattern and clothing model.
However, there are several points that apply to sweaters, vests and even blankets:
- Step by step calculation of the number of loops and knitting of a control sample.
- If the product is prefabricated, the back, collar, chest and sleeves are created separately.
- The finished elements are stitched or tied together.
- The collar and elastic band at the waist begin after a test fitting.
- Vests are knitted in a circle, in a continuous pattern. The same applies to blankets.
- Sweaters with short sleeves are knitted like vests. Sleeves are added after the chest and back have been knitted.
Yarn is selected based on the time of year. The main thing is that it is natural and does not cause concern to the pet. Sweater pattern for a dog with a pattern
Is assembly required?
There are two methods of knitting: seamless and assembled. Prefabricated means that all the elements are knitted separately and connected with a seam.
They do it like this:
- They start knitting from the collar. To do this, take the measurement of the chest circumference and subtract 20 loops from it: 83 - 20 = 63. 63 loops are cast on the knitting needles and knitted with a 1x1 elastic band to the end of the neck.
- The main part of the canvas is divided into three parts: the back, paws and chest. Then the density of the product is calculated. We must not forget that the back is longer than the sternum. The number of loops for the front is divided by 2.
- To visually divide the product into three parts, different types of loops are used. The front part is knitted like this: 1 purl loop, 3 knit stitches, 1 purl stitch, etc. Sleeves: knit stitch, purl stitch, 2 knit stitches, purl stitch. Back: knit, purl, knit 11, purl, knit. The back continues to be knitted in a circle until the beginning of the armpits.
- To prevent knitted clothes from stretching, use the stockinette method. If the product is knitted with an elastic band, it may lose its shape.
- Clothes should taper slightly in the abdominal area. If you refuse to decrease it, it will stretch and sag.
- The sweater or vest is finished with an elastic band so that the garment fits well to the body.
- After the product is ready, it is sewn along the edge loops. The suture is placed in the center of the abdomen.
Particular attention is paid to the seams: they should not be thick or rough.
The armpit and groin areas are especially delicate, making them easy to rub.
Knitting pattern
Seamless products are knitted by adding and decreasing the number of stitches. First of all, knit the collar, and then divide the workpiece into three parts: the sides and the back. After the parts are ready, they are connected and knitted for 3 cm. The loops are reduced in the center from the leg holes. Each 4th row contains 2 loops. This way they finish the job. Finally, the armholes and trims are tied.
In order for clothing to protect well from the cold, you need to remember gender differences.
The sweater should completely cover the belly of girls, and the jumpsuit for boys should have a cutout in the groin. Do not replace the neckline with a short length: this will cause colds and complications.
What basic measurements do you need to take to knit a sweater for a dog?
- Distance from the withers to the base of the tail. More likely, even the distance from the place where the collar will be to the base of the tail. In other words, the length of the product.
2. The distance between the front legs, measured across the back.
That is, the width of the back. Measure approximately from armpit to armpit.3. It is clear that the dog will have fun, spin around, bite your hands and will not allow you to accurately measure the width of the front between the front paws. This will be a very inaccurate number. Therefore, we do this: we measure the full volume along the chest and back of the dog immediately behind the front paws. From the resulting figure, subtract the width of the back and get the width of the chest - everything is very simple.4. Now the most interesting procedure. Stroke your dog, scratch behind the ear, back, and when she flops on her back and shows her tummy, pet him and scratch him too. And, having calmed your dog, slowly lay it on its side. Just make sure that the paws also lie calmly, preferably stretched out. Because you need to measure on the side the distance between the front and back paws. 5. Now let’s measure the volume “at the waist,” that is, immediately in front of the hind legs along the tummy and back. For what? And so that the sweater does not “hang” on the stomach. Since the volume on the stomach is almost always less than the volume near the front legs, i.e. on the chest line. At the same time, you leave the width of the back in numbers the same as that of the front legs. But the front width decreases.
6. Well, one more thing - it would be good to measure the volume of the neck so that the collar is not very wide.
7. Well, and of course, the length and volume of the front legs. And if you sew or knit overalls, so do the hind legs.
Here I have laid out the basis for taking measurements
Give up the idea of simply tying a “pipe” with holes for the front paws. These are very uncomfortable clothes. I made this sweater for Zosechka the dog from my old knitted hat. It turned out to be uncomfortable. The collar turns out to be wide, but the sweater is narrow in the chest.
Those who know how to knit or sew have already roughly understood how they can now make clothes for their dog, judging by the basic standards.
Simple model
To cut basic boots you will need two basic measurements and the height of the paw.
Even a novice craftswoman can handle the simplest sewing option.
To draw a pattern, draw a circle on paper with a diameter equal to the width of the paw. If the length and width of the foot are equal, we make the circle correct. If one of the measurements is a little larger, we “stretch” the circle into an oval, taking into account the width and length of the foot. In this case, mark a line in front of the insoles. In the figure, the diameter of the circle is marked AB.
Next, we apply a meter to the dog’s leg and determine how high the future shoe should be. This is the CD measurement. It is better to take the height of the boot with a margin so that the shoes do not fly off the paw while walking.
We cut out the front and back boots one by one.
Step-by-step instruction:
- Add one and a half centimeters of seam allowance to the circle drawn on paper and cut out the circles.
- We apply them to the fabric, pin them and cut them out.
- Place the dog's paw on the resulting part and gather the fabric around it.
- Grasping the metacarpus, we collect the excess fabric into darts and secure them with pins.
- From warm fabric we cut out a piece that follows the shape of the inner circle. This will be an improvised insulating insole.
- We adjust the insole in the middle of the main part.
- You can sew insulation or bologna fabric over the boot.
- We sew the dart lines and cut off the excess folds of the fabric.
- We add 1.5 cm to the top of the product, leaving a hole for the lace. We thread the lace.
- We form the same tie on the metacarpus of the hind paw.
It is important to remember that shoe sizes for front and back paws are different.
Knitted clothes for small dogs
In order to help your pet stay warm, it is not necessary to buy expensive clothes in specialized stores; it is enough to put in a little effort and create a wardrobe with your own hands.
Nowadays, dog fashion is developing at the same rapid pace as human fashion. The most relevant types of clothing for animals are:
- Sleeveless blouses;
- Overalls;
- Dresses and much more.
All this will help small breed dogs survive frosts comfortably without giving up daily walks in the fresh air.
The animal will feel much better if you walk it in any weather for a certain amount of time. The dog’s body requires compliance with certain rules of care, including the systematization of walks on the street.