In order to have a dog, they say, you need to be a good owner. First of all, it is important to be able to take care of your pets, feed them and pay attention to them. Thus, living next to a person, a dog participates in many events in his life. Therefore, it is very important to cultivate endurance and discipline in the animal.
Pets can not only be great friends, but also excellent students. By teaching your animal commands, you show him what it means to be able to wait for a treat, how to behave around people, to be restrained and not to get confused if there are a lot of people around. Training is a very interesting activity. If you try and set a goal, you will definitely be able to achieve the desired result. Sometimes this is a difficult path for the owner too. By working with your dog regularly, you will soon notice the first successes. True, you will have to show your best qualities so that the puppy or adult dog feels that you are taking the matter seriously. We have collected some interesting and useful tips for novice trainers. We think that you will succeed too. You just have to start your “teaching activity”, and confidence in your actions will come to you over time.
Teaching the dog commands.
- Try to be patient when explaining commands. You need to try again if the pet fails to understand you on the first try;
- Look for different ways to let your dog understand what you expect him to do. Help with gestures and hands, but do it calmly;
- Intonation should not cause concern; do not shout at the animal;
- Use encouragement;
- Remember that when training, you can give your dog treats to relieve resistance. For example, your pet follows a command, but not completely. You can cheer him up and call him to action;
"Kiss"
Many pets, demonstrating their affection for their owner, tend to lick him on the nose or cheek. This impulse can be used to teach the “kiss” command.
Say the command every time your dog is about to lick you. Praise and/or treat your pet every time after this, and do not encourage licking without a command. After several repetitions, the dog should learn the command.
The second option is suitable for calm dogs, not prone to sudden, careless movements. At the same time as the command, bringing your face closer to your pet, hold a piece of treat to the cheek so that the dog can grab it or lick it. With each repetition, reduce the piece of treat, and then completely remove your hand from your cheek.
Mastering the “barrier” command
Before you begin training, make sure your pet does not have joint pain. It is very important to take care of this in advance so that problems do not arise later. In order to check the dog's musculoskeletal system, contact a specialist, and also observe the dog's movement and activity. In order for your pet to feel healthy, it is also important to provide proper nutrition, during which its body will receive all the necessary microelements and vitamins. If the dog is young, do not use a barrier that is too high.
By teaching your dog the barrier command, you develop in him agility, courage, the ability to judge distances and his strength. This technique is widely used for official purposes, at exhibitions, in circus arts and simply for dog training.
When starting to train your dog, choose the gesture and stimulus word you will use. This could be a forward, palm-down gesture. The words accompanying the command can be different: “barrier”, “hop”, “bar”. In order for your pet to be able to perform the “barrier” command, you must first be prepared to understand the “forward” command.
It seems that teaching a dog to jump fast, high and beautifully is not very difficult. However, this is not the case; the proof of this is the mistakes made by dogs in competitions. Skill is a serious matter. A skill is an action formed through repetition, characterized by a high degree of mastery and the absence of element-by-element conscious regulation and control.
There are different skills, and many types are developed in agility. Motor skills are literally in plain sight. There are also several of them: high jump, hoop jump (this is both a high jump and the ability to fit into a narrow hole), long jump, the skill of climbing a hill (this is not a jump, this is the ability to climb), the skill of overcoming a boom (this is also the skill of climbing , and the skill of moving on a narrow board), the skill of overcoming a soft tunnel (you need to lift the fabric with your muzzle and maintain a straight-line movement so as not to get confused), the skill of overcoming a hard tunnel (the ability to move on bent paws), the skill of overcoming a swing, the skill of overcoming slalom, landing skills , laying and standing of the dog, the skill of moving next to the trainer (both on the left and right side) and moving forward on command.
Perceptual (identification) skills are less noticeable and often their presence is not recognized by the trainer, which leads to the most tragic consequences. These skills include, for example, the skill of perceiving the type of projectile and identifying it. This is a very important skill - the number of mistakes it makes and the time it takes to complete the course depend on how quickly the dog recognizes the projectile (which means how quickly it decides how to overcome it). Or the skill of perceiving and understanding commands given by the trainer - the dog must quickly recognize them and also quickly respond to them. Which, by the way, presents a certain difficulty, so don’t come up with a bunch of commands that reflect the variety of projectiles. One short, loud command is enough - for example, “Up!” - meaning for the dog to overcome the nearest or specified by the trainer projectile. And how to overcome the projectile, that is, the choice of overcoming skill, the type of projectile will tell the dog.
Intellectual skills develop most slowly. You will notice their appearance in a month, or even two or three (and maybe later, a lot depends on the talent of the dog and the trainer, training methods and training) after the start of regular classes. Intellectual skills mean that the dog easily makes decisions that help it move correctly and quickly along the track. And most importantly, when they appear, it will seem to you that the dog has finally understood you, that he is consciously walking along the route.
All skills, regardless of their type, are formed slowly, since they are based not only on functional, but also morphological changes in nerve cells. Therefore, do not demand quick success from dogs, take your time. Your motto: “Hurry up slowly!”
And one more phrase should become your motto: “From simple to complex.” This means that at the beginning of practicing the skill, you create the easiest conditions for the dog and only gradually complicate them. This phrase also has another meaning: at each specific stage, you should work on only one characteristic of the skill. Usually the sequence is as follows: correctness, complications while maintaining correctness, work on the speed of overcoming the projectile and the route.
The apparatus used to jump over the high jump include single hurdles, a wall or viaduct, and a hoop.
Single barriers. The height of single barriers in agility is 55-65 cm (for mini-agility - 35-40 cm). Barriers have well-resistant posts made of any material. They can be stationary, or - which is better - portable. Barrier strips can be narrow, resembling a pole, or solid, similar to a shield. They are made of wood and must be easily removable, so that when they come into contact with the dog’s paws, they fall without causing injuries or bruises to the dog. The brush barrier (fence) is made of natural thin rods or suitable artificial material, attached to two parallel strips. Such a barrier may not be removable, but the rods should protrude 20 centimeters above the top bar.
Viaduct or wall. The height of the equipment is 55-65 cm (mini-agility - 35-40 cm). The width of the projectile is 120 cm. The thickness is 20 cm. It is best to make it in the form of a box made of plywood or hardboard. The viaduct, unlike the wall, has 2 through holes. On the upper surface of the projectile there are removable “bricks” of a semicircular shape.
Hoop. The diameter of the hoop hole is 38 cm. The distance from the center of the hoop hole to the base: 90 cm (mini agility - 55 cm). The lower inner part of the hoop must be sealed (closed) for safety reasons. The system of chains or cables must ensure adjustment of the installation height of the hoop. The use of rigid fastening systems is not allowed. The projectile must be so stable that under no circumstances should it be knocked over by a dog jumping through it. The hoop is made from a car or motorcycle tire of the appropriate diameter. The hoop holder can be made from any material: wood, metal corner, profile or pipes.
Overcoming slalom. Slalom, like a projectile, is a long, flat base-stand with wooden slats inserted there. The number of slats is 8, 10 or 12, the height of the slats is at least 100 cm. The distance between individual slats is 50-65 cm. Slalom slats can be made specially, or you can use fairly common cuttings for agricultural implements, for example, for rakes, they are thin.
It is more difficult to make a base-stand. It can be made from a wooden block, drilling holes in it according to the diameter of the slats, or from a metal strip, welding pipe sections of the appropriate diameter perpendicular to it. It is easier and more convenient to make 3 stands, each with 4 slats. This will allow you to vary the number of slats both during training and during competitions. The delivery must be resistant to tipping over.
Practicing the skill of overcoming slalom. When we started practicing agility in a training school, we came across in foreign books on dog training methods that, from our point of view, were quite inconvenient for practicing the skill of overcoming slalom. Some provided for special devices that we did not have or were designed for a long period of skill formation. Therefore, in our agility school we mainly use two methods of training: the pointing method and the pushing method.
The guidance method is as follows. You approach the apparatus with the dog on a leash, so that the first slalom rail is to its left (the competition rules stipulate that the dog’s entry into slalom must be uniform, namely, the first slalom rail must always be to the dog’s left!), and invite it to make roundabout movements of the slats, following a favorite toy, a fetch object, a piece of food that is attractive to her, or simply an open palm.
Make sure your dog doesn't get overstimulated by the sight of the "target" he's following, otherwise he won't focus on the actions he's supposed to remember. And after completing the slalom, the dog must have what it was after. This will be her encouragement and reinforcement.
The first option of the pushing method assumes that your dog is well acquainted with the skill of moving next to the handler. Approach the apparatus so that only the dog is between the base and you. When giving the command to overcome the projectile, you reinforce it with the command “Near!” and start moving forward with a shuttle with a small amplitude, taking a step with your left foot so as to force the dog to go to the target (the target is the first pair of slalom slats) of the slalom. In this case, you can use your open left palm to push the dog. As soon as the dog enters the slalom target, you take a step forward and to the right, forcing the dog to go around the rail and take the starting position. And so on. Watch your dog carefully, don't give him the opportunity to make mistakes and don't step on his paws.
The second option of the pushing method is the simplest, but probably not the most effective. It consists in the fact that, with the help of the pushing influences of the leash, you force the dog to make the correct movements while going through the slalom.
1st stage. Remember the correctness and simplified conditions? This is where we’ll start, you don’t need to expose all the slalom slats. For the first stage, four are enough. Your task at the first stage is to explain to the dog how to overcome the projectile. Perhaps the skill of overcoming slalom is formed most slowly in dogs. Therefore, it is very convenient not to devote special time to practicing it, but to put the apparatus from the first lesson aside and make one or two passes every free minute. Don't rush to include slalom as part of the course.
Having chosen a training method, you must remember that in the form described it should be consumed only in the first 2-3 sessions. After which you need to gradually reduce the severity of your auxiliary actions.
Remember to work with your dog on a leash and correct unwanted dog behavior immediately.
Do everything very slowly at first, allowing the dog to understand your demands, and be sure to praise him. It will be very helpful if the dog bumps into the slats several times and no injury occurs, but he will notice them faster. Dogs also learn from their mistakes.
2nd stage. Increase the number of slats to 8, include slalom in the course (to begin with, 4 slats), continue working on a leash, start approaching the course from different angles, after different apparatuses. Start increasing the pace of movement on the apparatus, but only to the average level.
3rd stage. Work with the full number of slats, but on a leash. First, teach the dog to slowly overcome a fairly long projectile. Continue to train your dog to overcome the slalom by approaching from different sides, at different angles. From halfway through the stage, proceed to working without a leash.
4th stage. To increase speed, go back to 4 racks. Increase the speed of movement along the projectile slowly but constantly. To begin with, try to run towards the projectile and overcome it at speed, speed up yourself and gradually get ahead of the dog as it passes the projectile. Achieve a consistently high speed and only then increase the number of racks. Try the same thing when the projectile is included in the route.
Rules for overcoming a projectile. Refusal (this is when the dog, after a given command, does not immediately begin to overcome the projectile or stops while overcoming it) is counted if the dog starts the slalom incorrectly (a short stop during the course is not counted as a refusal or error, the dog is punished after additional time spent) .
The first pole of this obstacle should be to the left of the dog. The dog should be immediately led to the first gesture. A fault is counted if the dog misses the pole. All errors in passing through the gate are counted as one error (5 penalty points), however, the handler must praise his dog each time to the place where the error was made, without touching either the dog or the obstacle. This results in additional time being wasted, which can lead to temporary errors under certain circumstances.
The maximum number of penalty points in slalom is limited to 15, namely: - two failures = 10 penalty points; — mistakes when passing through the gate (one or more) = 5 penalty points.
If a dog crosses the line of the next apparatus or runs through it without completing the slalom in accordance with all the rules, it will be disqualified.
Overcoming the slide and boom. Ladder-bridge (boom)
Height: minimum - 120 cm, maximum - 135 cm, width of the walkways: minimum - 30 cm, maximum - 40 cm. Length of each element: minimum - 360 cm, maximum - 420 cm. Inclined surfaces are equipped with small strips fixed at certain intervals ( approximately 20-30 cm), designed to facilitate lifting and prevent slipping. The lower parts of inclined surfaces for a length of 90 cm, counting from the ground (the upper surface and narrow side surfaces), must be painted in a different color than the rest of the obstacle in order to thereby highlight the contact area. There should be no planks along the upper border of the contact zone; it can be fixed at a distance of at least 10 cm from it.
Consists of two elements located at an angle of 90 degrees to each other. Width: minimum - 90 cm, in the lower part it can be expanded to 115 cm. The maximum point in height - measured vertically to the ground - is 170 cm. Inclined surfaces are equipped with slats located at an equal distance from each other (approximately every 30 cm) , facilitating lifting and preventing slipping. The lower parts of the inclined walls at a height of 106 cm from the base (on the upper surface and on the side surfaces) should be painted in a different color compared to the rest of the part in order to highlight the contact area. The bar should not pass along the upper border of the contact zone; it can be attached at a distance of at least 10 cm from the contact zone. The top point of the inclined wall should not pose any danger to the dog; If necessary, apply a protective rubber strip.
Slide. So, the slide consists of two panels connected to each other by hinges. Shields are frames that can be made from wooden blocks, or can be welded from a metal corner. Sheets are attached to the frames, preferably made of five-layer plywood. On the inside of the shield it is necessary to make 3-4 stiffening ribs. On the outside, to prevent the dog from slipping, thin wooden strips are nailed. For the same purpose, when painting the surface, sand is applied to it. The shields are connected to each other by a limiting strip, which allows you to fix a certain angle of their joining. But it is better to replace the bar with a sufficiently long chain or rope-cable, which would make it possible to reduce the height of the projectile to 1 m and increase the cable, which would make it possible to reduce the height of the projectile to 1 m and increase the angle of joining of the shields. And this is very important.
Remember, we need to teach the dog not to jump on the projectile. We need to teach her to run on one side and run away from the other. Otherwise, you will always risk the dog jumping over the contact zone.
To do this, if you have a standard slide whose height does not decrease, you can use several methods. With the dog on a leash, you approach the apparatus (but do not run up) and, holding the dog back, invite it to run up the hill and escape from it. You can run up to the projectile, but then you will have to use a leash to pull the dog’s head down, preventing it from jumping. The same can be done with a piece of food - running up to the projectile, you bring your right hand with a treat to the base of the projectile, forcing the dog to tilt its head and follow your hand.
If the dog is hungry enough and the food is attractive enough, it will not jump. You can prevent the dog from jumping with the open palm of your right hand by running up to the projectile, bring your hand to the dog’s nose and hold it there until the projectile is overcome.
But it will undoubtedly be easier for you and your dog if you make a slide that is adjustable in height. You set the lowest height and slowly, from lesson to lesson, very gradually increase it, practicing the skills of running and escaping. And skills, as we already know, are not formed quickly.
Errors on the slide Errors related to the contact area = 5 penalty points.
A dog that jumps off a ramp before touching the ramp with all four paws is penalized for refusing to perform the exercise: 5 points.
Boom, of course, it’s easier to make a stationary one. And this is not very scary when all the other shells are portable. Making a portable boom is basically similar to making a slide. 3 frames of the appropriate size are made from a wooden block or metal corner and covered with plywood. Don’t forget to put slats on the inclined ramps and sprinkle them with sand while painting. Supplies that ensure the sustainability of the boom are made from any material like construction trestles. The ladders are connected to each other using a lock. You can come up with your own castle design, or you can use one of the proposed ones.
It will be very great if your training area has a training boom: lower and with wider ramps. This will make your task much easier.
With the dog on a leash, you approach the boom ramp, grab the dog’s collar with your right hand, and place the open palm of your left hand under the dog’s belly and, after giving the command, lead the dog to the boom. You should always be ready to catch your dog with your left hand to prevent him from falling!
Do not rush to increase the speed at which the projectile passes - as the speed of movement increases and without the practice of running along the ramp, the dog will begin to jump on the projectile.
At the 2nd stage, approach the slide and boom from different sides, at different angles, with the dog on your right and left, and include the apparatus as part of the route.
At the 3rd stage, to practice the speed of overcoming projectiles, return to overcoming single projectiles, repeating the tasks of the 2nd stage at speed and, after the results are satisfactory for you, do the same, but with projectiles on the track.
Mistakes of overcoming the boom. Contact zone errors = 5 penalties.
A dog that jumps from an obstacle without first touching the inclined part of the descent with all four paws is called for refusing to perform the exercise: 5 penalty points.
Overcoming projectiles with a long jump. The obstacles that must be overcome when making a long jump include double hurdles or triple hurdles made from single hurdles. They are installed in order of increasing height with a height difference of approximately 20-25 cm, the highest at the end can have a height of 75 cm. The total depth of the obstacle should not be more than 70 cm. Thus, a jump over this apparatus is both a high jump and a long jump .
But a special apparatus for testing a dog’s ability to perform a long jump (long jump apparatus) consists of 4 or 5 elements. The elements of the projectile are spaced at the same distance from each other to ensure a jump of 120-150 cm. The length of the elements is 120 cm, the height of the highest element is 28 cm, the height of the lowest element is 15 cm, the width of the elements is 15 cm with slight bevels. On four sides the projectile is delimited by pegs approximately 120 cm high (more on them later).
Practicing the long jump skill. Let me remind you that to prevent the reinforcement of incorrect behavior when overcoming projectiles, start working with the dog on a leash.
For a double or triple apparatus, place the jump barriers as close together as possible, setting them to a medium height. Practice overcoming the projectile by varying approaches, and gradually (!) increase the width of the projectile. 10-15 centimeters per lesson. Once you reach maximum width, hold for one session without changing height. Include such a projectile on the track, try to overcome it with acceleration. And only after that, also gradually, increase the height of the projectile to the maximum.
Practice the skill of overcoming the long jump apparatus in almost the same way. To begin, move the elements closely and work on overcoming the projectile from different sides, at different angles and with acceleration. At the same time, from lesson to lesson, increase the distance between the elements by 5 centimeters. Somewhere in the middle you can include the projectile in the route.
Errors in overcoming the long jump apparatus. The elements of the long jump apparatus are installed in such a way as to provide a jump with a length of 1.2 - a maximum of 1.5 m. A jump performed in the width of the apparatus or passing past it is assessed as a refusal to perform the exercise and is punished with 5 penalty points. Touching an element, knocking it over, or placing a paw between elements is penalized by 5 points.
Excerpt from the rules
2.5. Progress of the competition. No training is permitted on the course or testing and competition grounds. It is only allowed for the handler to familiarize himself with the route, without the dog. Before the start of each test (competition), the judge gathers the competitors to inform them of the exact details regarding the test (competition), the standard time and the maximum time for completing the course that he has assigned. At the same time, the judge reminds the competition rules and evaluation criteria.
The dog's handler heads to the start. His dog is in the starting position (standing, sitting or lying) behind the starting line. He releases the dog's leash and removes its collar, which is not allowed to be worn during competitions to ensure safety. The dog handler must not hold anything in his hands during the competition. He must not touch the dog or any of the implements. The dog handler himself must not jump over obstacles.
The handler gives his dog the starting command as directed by the judge, who starts the stopwatch as soon as the dog crosses the starting line. Throughout the entire distance, the use of any optical and acoustic signals and signs is allowed.
The dog's handler carefully monitors that the numbered obstacles are overcome by the dog strictly in the specified sequence.
The end of the distance and timing is reached at the moment when the dog crosses the finish line.
(We have specifically highlighted the start and finish. Although they are not obstacles, as you noticed, their passage is associated with some rules (see lesson 3).
The start and finish are marked by an imaginary or real line, delimited (like the long jump projectile) by a peg about 120 cm high. The pegs must have a stand that provides them with stability and a rounded, but not pointed, top.
To make life easier in the future, it would be good to teach the dog to pass the start and finish gates without problems and organize special classes for this).
4.3. Mistakes that lead to exclusion from the competition: - incorrect handling of the dog; — exceeding the maximum time for completing the distance; - upon the third refusal to perform the exercise at all distances; - if obstacles are not overcome in the specified sequence (this also applies to passing under an obstacle, jumping or running over obstacles that are not in the specified sequence); - missing one of the obstacles; if the dog “knocks down” an obstacle before overcoming it; — overcoming an obstacle in the direction opposite to that indicated; — the dog’s handler jumps over the obstacle himself; — the dog’s handler passes the obstacle below or runs over it; exception: the judge gives his consent before the start of the competition; — the dog’s handler is holding something in his hands; — the handler brings his dog to the starting line again after it has already crossed the starting line (exception: the judge’s command); - if the dog is wearing a collar; — if the handler interrupts the dog’s work at a distance without special instructions from the judge; - if the dog “breaks away” at a distance; - if the dog leaves the course, for example, jumps over the fence of the distance (does not count as “leaving the distance; - if the dog, in order to move from one obstacle to another, quickly crawls under the bottom of the fence, while remaining completely under the control of the handler) ; - if the dog is not under the control of the handler.
Exclusion from the competition entails disqualification, in which case the handler and his dog must immediately leave the course. Disqualification is signaled along the distance (whistle or horn) by the referee.
All cases not listed here are assessed by the judge, and it is understood that the judge must be equally lenient or equally strict throughout the course of the competition - both at the beginning and at the end.
4.4. Force majeure (unforeseen) cases. In the event of an incident without the conductor's participation, such as an obstacle falling or a fabric tunnel becoming entangled, the judge can stop the conductor and, of course, the timing.
After the obstacle has been put in order again, the judge gives the command to start the stopwatch again and lead the dog back to the place where its work was interrupted. All penalties awarded prior to the incident remain in effect.
5. Qualifications/grades. The following “qualifying marks” are assigned for the tests: - with a total number of penalty points of 0-5 = excellent; — with a total number of penalty points of 6-15 = very good; - with a total number of penalty points of 16-25 = good; - if the total number of penalty points is over 25 = no assessment.
The total number of penalty points means the number of penalty points for mistakes made when overcoming obstacles + penalty points for exceeding the standard time.
An Agility Diploma is awarded to each dog that scores excellent or very good in 2 competitions in Agility 1.
The test is considered passed with distinction if the dog receives excellent or very good marks.
Overcoming the swing. An agility swing is an almost ordinary and very common children's swing: a board fixed in the middle on a stand, but so that one of its sides is slightly heavier than the other and is always lowered to the ground.
Board width: minimum - 30 cm, maximum - 40 cm; length: minimum 365 cm, maximum - 425 cm; height of the distance of the central axis from the ground = 1/6 of the length of the board.
For example, board length 365 cm = height 60 cm; length 425 cm = height 70 cm.
The “contact zone” is the same as on the “ladder bridge”.
When used in mini-agility, a counterweight should be provided for more favorable balancing.
The swing board can be made entirely from one board of a suitable size, or the frame can be made from a wooden block and covered with plywood. It is more difficult to make a stand with a lock for the board - it is best if you make the board removable. The supply can be welded from a metal angle, or it can be made from a wooden block.
The simple lock shown in the picture consists of two metal plates with 8-10 cm cutouts attached to a board. A board with such a lock is placed on top of a metal pin threaded through the risers of the stand.
It is advisable to start mastering the skill of overcoming a swing, having already mastered climbing a hill and boom with your dog. If you are ahead of the curve, be prepared for the dog to try to jump on and off. Be careful with unsuccessful jumps, the dog may injure itself or become very frightened, then it will be difficult to accustom it to the apparatus.
Option 1. Start practicing the skill with an assistant. An assistant takes one side of the swing board with both hands and lifts it so that the opposite side of the board touches the ground. You and your dog on a short leash approach the lowered side of the board, grab the dog’s collar with your right hand, place the open palm of your left hand under the dog’s belly and, after giving the command, lead the dog onto the swing board to its middle. In this middle you must command “Stop!” secure the dog. After a moment's pause, the assistant slowly lowers the board to the ground. You again give the command to overcome the projectile and slowly (!) move the dog along the board, preventing its attempts to jump off the projectile.
By the end of the first lesson, the dog begins to understand what is required of it, and the helper stops holding on to the board. He stands at the side of the board, ready to hold it if the dog gets through the middle of the swing too quickly.
After two or three lessons, the need for an assistant disappears, and after another five or six lessons, you can abandon the auxiliary techniques.
Option 2. You and your dog on a short leash approach the lowered side of the board, grab the dog’s collar with your right hand, place the open palm of your left hand under the dog’s belly and, after giving the command, lead the dog onto the swing board to its middle. In the middle of the board you give the command “Stop!” and fix the dog. After a second pause, give the overcoming command and, as soon as the dog takes a step and the board begins to descend, you restrain the dog, not allowing it to move until the opposite side of the board touches the ground, and slowly bring the dog down.
Increase the speed of overcoming the projectile very slowly; the dog quickly learns to run onto the projectile, but will continue to try to jump off it for a long time, which must be prevented. Do not rush to abandon the auxiliary techniques - the dog will need quite a lot of time until he understands that he needs to stop in the middle and slowly lower the opposite side of the board. This is just an example of the formation of an intellectual skill.
As with other implements, train your dog to overcome the swing by approaching from different angles, from your right and left, and finally with acceleration. And after all this, include the projectile in the route.
Mistakes in overcoming swings
Contact zone errors = 5 penalties.
A dog that jumps off an obstacle before it has passed the axis of the swing board (before the board begins to swing) is penalized as for failure to control: 5 penalty points.
A dog that jumps off a swing board before the board touches the ground (even if the dog has already entered the contact area) is penalized as a fault: 5 penalty points.
Excerpts from the rules
2.3. Determination of the standard time for completing the route. The basis for determining the standard time for completing a distance is the speed in m/sec, which is set for moving along the distance. This setting is given taking into account the category of the test and the complexity of the distance.
The speed of movement along the distance is 1.8-3.5 m/sec.
The standard travel time for a certain distance is obtained (per second) by dividing the exact length of the distance by the recorded speed of progress (in m/sec).
For example, for a distance of 150 m long and a fixed speed of 2.5 m/sec, the standard time for moving along the distance will be: 150: 2.5 = 60 sec.
2.4. Determination of the maximum time to complete the distance. Basically, the judge takes twice the standard time for completing the distance as the maximum time for completing the distance. For a standard distance completion time of 60 seconds, the maximum distance completion time will be 120 seconds. This value should never be less than 1.5 times the standard course time.
Overcoming the table. The easiest way is to make a table entirely of wood; the tabletop can be a frame made of blocks with plywood attached to it. The upper surface of the tabletop is covered with a corrugated rubber coating.
Table board (tabletop): minimum - 90x90 cm, maximum - 120x120 cm, height 65 cm (mini-agility - 40 cm).
The table must be secured against tipping over and have a non-slip coating.
The dog must remain on the table for 5 seconds, namely, in a position determined by the judge: - on the first step: lying position; - on the second foot: before the start of the competition, the judge determines the required position - lying, sitting or standing,
The chosen position will then be the same for all competitors.
In the prone position, the front legs can hang off the table; however, the elbows should rest on the table.
If the dog jumps off the table before 5 seconds have elapsed and before the judge’s command is given, then it will be punished with 5 penalty points.
She must jump onto the table again and spend the rest of the time frozen in the prescribed position. Otherwise, she will be disqualified.
Timing begins only when the dog takes the prescribed position. It is interrupted as soon as the dog changes the prescribed position and begins again as soon as he takes it again. Jumping onto the table is allowed from three sides, namely sides A, B and C. If a dog passes by the table and uses side D to jump onto the table, it is penalized for refusing to perform the exercise, but is not excluded for overcoming obstacles in the wrong direction.
If the dog slides off the table and jumps back onto it from the side, this is counted as a fault, but the dog is not disqualified.
If the dog passes under the table, then this is counted as a refusal with all the ensuing consequences.
Teaching a dog to jump on a table is not very difficult, but it will take time to teach a dog to slow down (no matter how fast it is moving) in front of the table and jump vertically up. In addition, it is necessary to ensure that the dog immediately takes the required position on command. Therefore, start practicing the skill with your dog on a leash and do not rush to unfasten it.
Dogs develop a time reflex very quickly and therefore will inevitably begin to anticipate your command to jump off the table and jump off it or change position. Both the first and second are undesirable. Therefore, it will be very useful during training to force the dog to maintain a given position on the table for at least 10 seconds, this way you will prevent it from spontaneously jumping off during tests and competitions.
The rest is as usual: train overcoming the projectile from approaches at different angles, to the right and left of you, after various projectiles, including, for starters, a table in a combination of two or three projectiles, try to accelerate and, finally, overcome the table as part of the route.
Excerpts from the rules
6. Classification/ranking. Places are distributed taking into account the following: 1) The amount of penalty points (mistakes made while passing the distance + penalty points for exceeding the standard time). 2) In the event of the same amount of penalty points, first place goes to the dog that made the least number of errors while covering the distance. 3) In the case of the same amount of penalty points and the same mistakes made while completing the distance, the actual time for completing the distance is taken into account.
For example: standard time to complete the distance = 60 seconds. If when timing sec. If tenths or hundredths of a second are taken into account when timing, then the points are rounded up when assigning a “qualifying score”.
For example: fines for exceeding standard time = 5.80. When distributing places, the value of 5.80 is retained, but when assigning a “qualifying score” this figure is rounded up to 5 points.
Teach your dog the “forward” command
The ability to move forward is very important. This is not only a starting and basic exercise for some teams. This skill allows you to take your puppy with you into nature, for a walk without a leash. By moving along the path, you can let your dog know that he needs to move forward and walk in front of you. In fact, the “forward” command is one of the most indispensable in many cases. You should also consider the dog's age and knowledge of other commands. If the puppy has reached 5-6 months and has already been trained in “Near” and “Towards me”, start practicing the “forward” skill.
To teach your dog the “go” command:
- Conduct your training while playing;
- When practicing a skill, you can use a long narrow corridor, path or board thrown over a ditch;
- To let your dog know that he should move forward, we recommend using a treat. You can also use a clicker. When you are ready to follow a command, throw a treat in front of her;
- When your dog runs towards a piece of food, use the clicker or say “Go.” Then go up to your pet, reward and say “okay”;
- To make training easier, use a leash;
- Further, the training is made more difficult by using a boom or crossbar that the dog must walk over;
- The owner with the dog at his left leg approaches the boom and speaks forward, pointing in the direction. To help your pet move forward, use a treat. Next, the skill needs to be practiced and consolidated;
- Don't forget to praise your dog.
Do you want your dog to be obedient? Order a walk with elements of training!
Find out more
submit your application
"Snake"
Many have seen a trick where the owner walks, and at the same time the dog “winds like a snake” between his legs.
You will also need a treat to teach this trick. Place your dog next to you and show him that you have something tasty in your hands. Next, you will walk widely, at the same time giving a vocal command and sticking your hand with a treat under the knee, alternately to the left and to the right, so that the dog follows it. Start training with just 1-2 steps, encouraging your pet. In the future, you will be able to walk a whole path of steps in this way, and even without a treat.
In the same way, this trick is taught to a pet when the dog walks like a snake not between your legs, but between stick stands.
A more complicated variation of the exercise is the “backward snake”.
Teaching a dog to climb stairs
The next step in teaching the “barrier” command is to teach your dog to climb stairs. Start training with a regular, simple ladder. Move close to your pet. Approach the start with your dog, telling him “Nearby”, then give the command “Forward”, climb the stairs with your pet, go down and give the order to be nearby by commanding “Come”. At the end of the task, reward your dog with a treat or petting.
"Bow"
Everyone has seen how dogs stretch, focusing on their outstretched front paws, or crouch to the ground in exactly the same way when playing with their owner or relatives - this position can become the basis for learning the “bow” command.
Command the dog “Near!” and, holding the leash with your foot, move your hand with the treat forward from the dog’s nose, and then down. As soon as the dog begins to reach with its nose to the ground (towards the hand with a treat at the very surface), immediately give it the command “Bow” and with the other hand under the belly fix the standing position of the hind legs, not allowing the dog to lie down. At the initial stage, even a slight tilt of the dog’s body is considered successful execution of the command. With each repetition, try to make the bow “deeper.”
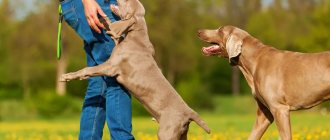
The first way to teach a dog a barrier
This is the most popular training option. Start the exercise with your dog on the left side. Run up to the obstacle, stopping 5-6 meters from it. Next, run up to the barrier with your dog and jump over it, while using the verbal command “Barrier!” When the dog understands what result you are trying to achieve, allow the pet to jump over the obstacle itself. It is advisable to start practicing this in the next lesson, when the skill of jointly overcoming a barrier has already been practiced.
This training allows the dog to overcome the barrier on its own. During training, you only walk alongside, running up to the obstacle with your pet. Next, you should give him a verbal command, and after the dog jumps over the barrier, give him a treat. At the same time, you are standing on the other side of the barrier. Don't forget that it is important for you to be patient and supportive. For your pet, your attitude towards the learning process and towards the dog itself is of great importance.
If the dog has already learned to overcome low barriers, you can gradually increase their height. When the obstacle reaches a high, but manageable, height for your dog, training difficulties may arise. In order to further train your pet, you can teach the dog the barrier command with the front paws hooked. In this case, use a curbstone or special bridges or fences as a barrier that your pet can jump over.
In order to teach a dog to overcome a barrier by hooking its front paws, conduct training according to the following algorithm:
- In front of the barrier, pick up your pet, helping him to catch on with his front paws. This is done so that the dog understands the technique of performing the jump;
- After he pulls himself up and overcomes the barrier, reward him;
- If the animal resists jumping, make the barrier lower;
- Be sure to end each workout with a successful jump. This will not only “motivate” the dog, but will reinforce positive emotions. This way, the dog will enjoy the training more and will feel your love, care and recognition.
Nothing helps? We have an online school. Sign up!
Find out more
sign up
"Ask"
Some dog owners call this command “bunny” or “serve” - the essence does not change, the dog should, sitting on its hind legs, simultaneously wave its front legs, as if begging for something from the owner.
The training technology is also simple - sit the dog down, take a treat and, holding the pet by the leash, bring the tasty piece to the dog’s nose, and then smoothly lift it higher. The first reaction will usually be to lift the front paws off the ground in an attempt to reach the treat. Encourage this movement with a simultaneous “beg” command and immediately give the treat. And so on several times.
A complication of this trick is to carry out the command while standing on its hind legs, and later even walking and jumping on two legs.
The second way to teach a dog a barrier
To begin the exercise, approach the barrier. Stop with your pet near him. The distance to the obstacle should be about 2-3 meters. It is easier to train this skill at a barrier 50 cm high or a ditch of the same depth. Next, go over the obstacle and order your pet to “sit.” By tightening the leash a little, you let your pet know what you expect from him. Call the dog by giving it the command “Come to me!” Due to the fact that the leash is taut, your pet will not be able to get around the obstacle. When the dog approaches, say the command “barrier”. After the jump, reward your dog.
What to do if the dog doesn't jump?
It also happens that while overcoming an obstacle, you are unable to force the dog to jump over. In this case, we recommend that you reduce the height of the barrier. For example, place it at a level that is convenient for you to simply step over. The owner stands on the other side of the obstacle, giving the dog a treat or enticing him with his favorite toy. Of course, you can also make the dog follow you. Then you need to let her jump over the obstacle herself. In this case, the stimulus word is introduced a little later and sounds like “barrier.”
The third way to teach a dog a barrier
You can use an object for fetching, and it is important to teach the dog this command in advance. A stick or toy is thrown over a barrier. Next, you should shout the command “Barrier” to the dog. To consolidate the skill, the command is practiced regularly, several times. But try not to overload the dog during training. Especially if this is your first lesson. 30-40 minutes will be enough. Also take care of the animal’s nutrition, which we will discuss below.
Training using the “Hop” command
This option is suitable for those dogs that can jump over a barrier or the trainer’s leg on the “Hop” command.
Stand in front of the dog, command “Hop” and vigorously move your hand from bottom to top. Not finding nearby objects suitable for jumping over, most dogs simply jump up. When your pet does this, praise him and give him a treat. Reward your dog at first, even when he just jumps up. However, in the future, make sure that she makes a full jump up.
Encouraging the dog to jump into the air
Repeat the exercise several times and eventually replace the “Hop” command with “Up”.
Please note that jumping exercises are best practiced in short sessions to avoid putting undue stress on your dog's joints. This is especially true for large animals.
What is important to consider when training a dog?
- Try not to let your pet start training hungry. But even a well-fed dog will not be able to train. The optimal amount of time between two meals depends on the age and size of your pet. So, if a puppy should be fed 5-6 times a day, then an adult dog should be fed 1-3 times.
- Build the most trusting relationship with your dog. To do this, communicate with her and spend time when you are at home.
- Be lenient with the dog. That is, don't ask him to perform impossible or overly difficult tricks. But don’t let the animal go, don’t allow it to be lazy and sabotage.
- The dog can be taught simple commands from 16 weeks of age.
In the article, we looked at the main ways to teach a dog the barrier command, as well as the basic techniques that will help the owner find a common language with his pet during training. Whatever breed or age your dog is, love him for being your friend.
"Voice!"
There are several ways to teach this command. The simplest one is to show your dog his favorite toy or treat and then hide it behind his back. Usually an active pet immediately begins to demand them back, barking loudly. At this moment, the required item should be immediately given to the dog, while simultaneously accompanying your action with the command “Voice!” After a few repetitions, your pet will learn to bark just by hearing the command.
A more “advanced” variation of the “voice” command is its volume variations - when your dog will be able to respond to the commands “louder” and “quieter” (the latter skill is very useful, because it allows you to prevent the dog from barking inappropriately in a given situation) .
Dog breeds for agility
Agility is a very democratic sport in which dogs of any breed and even mongrels can take part. You do not need to present any documents confirming your pedigree to participate in competitions. The main requirement for a dog is the ability and desire to carry out the orders of its owner. In addition, to successfully overcome obstacles, it must be light, flexible and quick. Young and adult healthy dogs are allowed to compete (with the exception of pregnant ones), but agility classes are recommended for pets older than 1 year, since their backbone is already formed and the risk of injury during exercise is significantly reduced.
What breeds are suitable for agility? Although technically any dog can participate in competitions, not every pet exhibits the qualities necessary for this sport. The most popular dogs are herding breeds (border collies, shelties, Australian shepherds, etc.), since historically they have spent a lot of time with people in team work and have developed the closest contact; they are easier to train. However, this does not mean that other dog breeds are not suitable for agility - all pets are individual, so the success of training depends not only on their innate qualities, but also on the owner’s ability to unleash the potential of his ward.
In agility, division is accepted depending on the height of the dog at the withers. Typically, these are the following three categories:
- S (small) – for dogs whose height at the withers is less than 35 cm;
- M (medium) – for dogs from 35 cm (inclusive), but less than 43 cm;
- L (large) – for dogs from 43 cm at the withers and above.
In each category, there are the best breeds for agility, distinguished by the most optimal set of necessary qualities. Animals of different categories never mix with each other either during training or competitions, since obstacles of different heights are installed for them. In class S, Spitz are most often used, in class M – sheltie, in class L – border collie. The latter are considered the fastest, and therefore many breeders try to breed smaller dogs of this breed to participate in S and M class competitions. The competitions themselves take place in an increasing order - first animals of class S participate, then M and finish with L, while the height of the obstacles increases.
Types of obstacles in agility
The competition course is a complex of sequentially located obstacles. The rules may establish different sizes of agility equipment, angles of inclination and other parameters. At the same time, their general form and principle of operation remain unchanged. Depending on the nature of the interaction between the dog and the obstacle, agility equipment is divided into the following types.
Contact obstacles
Such agility obstacles require the presence of zones of direct contact with the dog’s body:
- The slide consists of two shields connected at an angle, raised at the top 1.5-2 meters above the ground. The contact zone of the obstacle is painted yellow or red, and transverse strips are fixed on its surface to make it easier for the dog to move. To get a dog over a hill, the handler usually uses the commands “Hill!” or “Home!”
- The swing is made in the form of a board that rotates around the base as the dog moves from one end to the other. In order for the animal to run up an obstacle, the balance of the shield shifts slightly towards one of the ends. To overcome a swing with a dog, domestic trainers use the command “Swing!”
- A boom is a type of slide in which a horizontal board is located between inclined surfaces. It also has a yellow or red painted contact area and cross strips. At this obstacle, the handler gives his dog the command “Boom!”
Agility classes
Today, FCI rules establish two official classes of agility competitions.
- Standard. This class is a classic agility sport that includes all three types of obstacles. For beginner athletes, a platform with 15 apparatuses is used, while for experienced participants their number can reach 22.
- Jumping. A special feature of this class of competitions is the presence of only jumping obstacles and a starting platform. Depending on the specific competition, the agility course may also be supplemented with tunnels and slalom. Due to the absence of contact projectiles that slow down movement, jumping dogs develop the highest speed.
Competitions may also include the following types of agility that are not approved by the International Canine Association.
Joker or jackpot. This competition is divided into two periods:
- during the introduction, the dog overcomes obstacles at the handler’s discretion, earning points;
- Finally, the animal must overcome a series of obstacles selected by the judge in a short time.
The difficulty is that in the second period the handler must not cross the line, which is drawn at a distance of 3-6 m parallel to the obstacle course, thereby he has to control the dog from a distance.
Snooker. Developed on the principle of a billiard game, this type of agility involves overcoming numbered obstacles - three red ones for jumping over with the number 1, and six other types, numbered 2 to 7. The competition is divided into 2 stages:
- at the introductory stage, the dog passes the first one of the red obstacles with number 1 and one of the additional ones with numbers 6-7, then this is repeated with the remaining two main equipment;
- at the final stage, the dog must pass consecutive obstacles numbered 2 to 7 to gain additional points.
Relay race. At this competition, 2-3 teams of handlers with dogs sequentially pass an obstacle course located on the agility site (each with its own section), passing batons to each other.
Preparation
Before class, you need to give your dog a good walk and make sure it is healthy. It is either not recommended to feed her before training, or you should wait at least 3 hours after eating. While jumping, a dog may experience a stomach volvulus, which in most cases leads to the death of the pet. Another reason is that a treat for following a command will motivate the animal.
Compliance with these conditions will allow the dog to fully concentrate on the exercise. The exercise should be carried out in sunny weather, as during rain the exercise becomes traumatic.
What is agility
Agility for dogs began in the 70s of the last century in Great Britain. On February 10, 1978, the first obstacle course competition was demonstrated during a break between the main events at the Crufts exhibition, organized by John Varley and Peter Minuel. It is believed that the example for the new sport was the equestrian competitions , of which Varli was a fan. The enthusiastic reaction of the audience gave impetus to holding a repeat competition a year later, and then agility gradually turned into a full-fledged sport for dogs with its own rules and program, the popularity of which went beyond the borders of the United Kingdom and spread throughout the world, including Russia.
Agility for dogs - features, types, rules, suitable breeds
It is believed that friendship between a dog and a person is based on complete trust and mutual understanding. It is the animal’s ability to feel the thoughts and mood of the owner, his willingness to carry out any order that speaks of complete harmony in their relationship. Agility is a great way to demonstrate and strengthen this friendship between a person and his pet, as well as keep the dog in excellent shape and channel its irrepressible energy in the right direction.
Where can you learn agility in Russia
| City | School name | Contacts |
| Moscow | Dog training center “Sokolniki” | +79161564436 |
| Moscow | Cynological center “Yasenevo” | +79261766641 |
| Moscow | Kennel club “Rublyovka” | +79152000705 |
| Moscow region | Canine training center “Nafani” | +79165216556 |
| Saint Petersburg | Association for the Development of Cynological Sports (ARKS) | [email protected] |
| Permian | Rudashevsky School of Agility | +79226406235 |
| Tver | TRFKS | +79108365246 |
| Samara | SOOO TsLS Image Dog | – |
| Kazan | Federation of Sports and Applied Dog Breeding of the Republic of Tatarstan FSS RT | +79053100383 |
| Rostov-on-Don | RROO FKS | +79281459527 |
Errors
When performing the exercise, the trainer may make the following mistakes:
- Setting the barrier height inappropriate for the pet's age and skills.
- Lack of reinforcement . Without encouragement, treats and play, the animal loses interest in learning, and its nervous system becomes overloaded.
- Punishment for fear . It depresses the animal, causes inhibition processes and refusal to work.
Maintain your pet's confidence and exercise regularly. Be positive and everything will definitely work out!
Photo: istockphoto.com