Everyone knows that dogs are very smart animals. However, like any other animal, it is difficult for them to immediately understand when something suddenly cannot be done that they have always done. For example, scratching an itchy area or licking a wounded place on the body.
Photo: Todd Dwyer
In this situation, you have two options. You can try to constantly monitor your pet and not allow him to scratch his sore ear or lick the surgical suture. In the second case, you just need to put a protective collar on it.
How to train a dog to wear a collar
The collar should only be worn on a calm dog.
This is the main condition for the pet to react normally. You can distract him, appease him with a treat . As soon as he allows, carefully dress him, securing the product. Be sure to praise the dog
If he doesn’t like the new accessory, it’s better to remove it for a while and try again later. The main thing is to ensure that the size is appropriate. Perhaps the animal is uncomfortable, so it resists.
Important! Usually after a couple of days the dogs get used to wearing the cone. It is important not to scold or punish, but to show patience
A dog needs a collar at least once in its life. You can buy it or make it yourself, using scrap materials
It is important to make correct calculations and measurements so that the animal is comfortable
Terms of use
It is not enough to make or buy a collar. You also need to use it correctly. While wearing the collar, the animal must be constantly monitored. During feeding, you will have to remove it all the time, because the pet simply will not be able to reach the bowl. Also, owners will have to monitor when the cat or dog wants to drink.
If the pet’s treatment continues while the collar is being worn, the device must be put on so that it does not interfere with the injections (they are given to the animals at the withers). It is very important that the collar fastener does not fall into this place. She can rub.
Some animals cannot come to terms with the innovation for a very long time and constantly try to remove the structure. During this period, it is important to show maximum love and patience. Experiment, your dog may not like the hard plastic collar. But your pet will wear fabric or foam rubber without objection.
Types of protective collars for dogs
We choose a ready-made or sew our own protective collar for a dog.
The classic version is the Elizabethan collar.
, which is shaped like a truncated cone (lampshade). Made of flexible, transparent, non-obstructive, translucent or colored plastic. Plastic collars for dogs are easy to clean, low cost, perhaps these are the most important advantages. The disadvantages are that plastic models make noise when they come into contact with other objects, crack or break over time, and most dogs do not feel comfortable wearing them. Attached to a collar or harness using 3 or 4 plastic fastener strips. The circumference is adjustable using special fastener tabs.
There is another type of plastic collar, which is a plastic tube
, closed in a circle, on top of which a protective removable cover is put on. It limits the mobility of the neck, thereby preventing the animal from reaching with its head to damaged areas on the body and licking them.
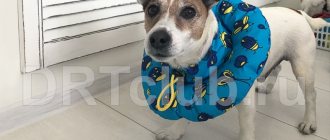
There are soft cone collars
for dogs, made of durable water-repellent non-woven material, non-toxic and non-allergic. Lightweight and flexible, they do not interfere with the free movement of the neck; the animal can eat, sleep and not experience discomfort. The advantages include increased wear resistance, because such models will not tear even when chewed by animals. In addition, after use, the soft collar can be compactly folded and stored away. However, not all soft models are suitable for large dogs, which have strength, long limbs and can reach their paws to the head or tongue to the body, crushing an unreliable barrier. Soft models are not suitable for dogs with long necks because they do not cover the head enough.
Another type of soft collar is also a cone, made of soft, water-repellent nylon fabric, but with a plastic insert inside that is about half the size of the cone. A plastic insert at the bottom of the cone adds rigidity, which prevents the animal from bending the barrier. For convenient and reliable fixation to the collar there are Velcro.
Inflatable collars for dogs
There are different types and are classified according to the type of material from which they are made. All of them are shaped like an inflatable lifebuoy. Flexible and soft material is used for manufacturing. There are transparent models and models with nylon removable covers. Inflatable barriers are easy to use, cause the least discomfort, do not obstruct vision, and at the same time perform a protective function by limiting neck mobility. However, they are less wear-resistant, since dogs can tear through the collar with their claws when trying to reach the head with their paw. But when using an inflatable model with a durable nylon cover, there are no problems with damage to the material. Effective when used for dogs with short limbs who are physically unable to reach the protective barrier with their paws.
Elastic protective neck corsets
made from soft foam are no less effective than other types of collars. They are worn around the neck and secured with Velcro, preventing neck movement. Convenient in cases where there are injuries on the animal’s body, and not on the head.
Price
The price of a protective collar for a dog depends on its size, type, and manufacturer. So, an ordinary Elizabethan collar costs from 90 rubles, the cost of other types varies between 200-1000 rubles. Soft collars are more expensive, for example the Procone model costs 840-1000 rubles, and the cost of the Procone elastic neck corset exceeds 1500 rubles.
If it is not possible to purchase a ready-made protective collar, you can make it yourself from available materials, but at the risk of causing the animal even more discomfort.
How to properly put protection on your pet
Protective collar for dogs
You need to properly accustom your dog to a new accessory:
If you have to use the product after a planned operation, you should introduce the dog to the protective device in advance. First, you just need to put it in the dog’s line of sight, let it sniff it and get used to it. Only after complete adaptation can the collar be put on the pet for a while. The wearing period should be increased gradually. To make the process easier, you need to distract your pet with games, kind words, and affection. If the dog begins to respond calmer to the protective device, it is necessary to praise it and treat it with its favorite treat. The first fitting time should not exceed 3 minutes. You need to increase the wearing time very little. The next step is eating in the collar
It is important to stop any attempts to remove the product and praise for calm behavior. When the dog stops reacting negatively to the collar at home, you can go outside in this form. If the collar is needed urgently, for example, as a result of an injury or after urgent surgery, there is no time for psychological adaptation. Then you will have to act according to the circumstances and comprehensively help the dog cope not only with pain, but also with the new accessory. You need to play with your pet and constantly distract him from the unusual and constantly disturbing thing.
The collar should not interfere with the dog's sleep and eating.
Attaching the collar to the pet's neck is usually done using a lace, collar or rope. This mandatory condition allows you to limit the dog’s mobility and creates a much-needed barrier between the body and head.
It is very important to gradually accustom the dog to the collar, and only after “getting acquainted” should you put the protection on your friend
Note! If the collar was purchased and not made yourself, it is important to read the instructions before using it
Regardless of what kind of collar you decide to purchase, it is very important to approach its choice with maximum responsibility. The comfort of the pet depends not only on the chosen material, but also on how to accustom the dog to the new accessory.
You cannot traumatize the dog’s psyche at this moment.
Julia
Zhulya The time has come for her to give birth, she suffered all night, but never gave birth.
In those distant times, private clinics were just emerging, so we urgently learned the doctor’s address and rushed to save the life of my favorite. Just as women undergo caesarean sections, they cut my Zhulya. The doctor warned that the operation itself was not complicated; the postoperative period was dangerous, when the dog, while licking the wound, could bite the threads and the stitches would come apart. You can’t tell her that she can’t do this. After the operation, I “wrapped” my dog in a blanket: I took a piece of fabric, cut out 4 holes for the legs, and laced the back. While my Zhulya was recovering from anesthesia, everything was quiet and calm, she lay in her crib, snoring through her nose.
But then she began to get up, and imagine my surprise when I saw my Julia without this blanket. How she managed to free herself, I have no idea.
Manufacturing instructions
DIY cat collar
For most materials, the manufacturing instructions are absolutely identical:
- Measure the circumference of your pet's neck.
- Draw a circle of the appropriate diameter, its radius should be an order of magnitude larger than the actual size of the neck. This is necessary so that it is not difficult to put the resulting product on the dog.
- The next step is drawing the outer circle. The distance between the two circles should be 5 cm less than the length of the pet's muzzle. It is these indicators that will allow you to make the “right” accessory that will not cause the dog any discomfort.
- Cut out the outer and inner circle. For convenience, it is best to make a cut in the center.
- After fastening the sides of the collar with tape or a stapler, you should end up with a cone with the top cut off.
- Then you need to put the collar on the old collar and secure the resulting product to it.
Advice! To draw a circle you need to use a compass; it will allow you to create the most correct and accurate product.
From a plastic bottle
You can make a collar from an ordinary plastic bottle according to the example described above for a small dog. If a large dog needs this accessory, you can use a 5-liter bottle.
From cardboard
Cardboard is a very convenient material for crafts, but it has a number of shortcomings and quickly becomes unusable. It can tear and get wet.
From fabric
Fabric products are very comfortable for the dog, but they are a little more difficult to make. First you need to make the base, and only then sheathe it or cover it with fabric.
Fabric collars are more often used in the form of corsets that protect not only the neck, but also the upper part of the animal’s body. They are equipped with a whole set of Velcro and even a special attachment for a leash.
A fabric corset is usually required in cases of serious injury
From foam rubber
Foam rubber is a very soft material; just like fabric, it requires the manufacture of a frame. What it will be made of is decided by the dog breeder himself. It can be plastic or the same cardboard.
More often, polymer foam, rather than foam rubber, is used to make a collar. This corset is as elastic as possible and only limits the mobility of the dog’s neck.
The product is made of polymer foam and is very comfortable for the dog.
Inflatable
It is very difficult to make an inflatable collar yourself. But you can buy such a product in specialized pet stores.
It is convenient, absolutely non-hazardous and, most importantly, hygienic. This type of protection is the most popular among experienced dog breeders.
The soft and absolutely hygienic material does not cause any inconvenience to the pet and does not interfere with eating or sleeping.
On a note! There are several models of inflatable collars on the market, some even equipped with a special rigid insert.
The inflatable product has an external resemblance to an inflatable ring
Knitted
A knitted product can be made independently, but to do this you need to know how to knit. Similar accessories are also sold in dog stores. They have more of a decorative function than a protective one.
Product options and their features
Collars for dogs differ according to the following criteria:
- Purchased at a pharmacy or veterinary clinic, or made independently (from fabric, plastic, for example, from a bucket or bottle).
- Material of manufacture, shape and other features.
The following options for protective collars are available:
- Elizabethan (classical);
- plastic tube (closes into a circle, and a removable cover is put on top of it, which does not allow the neck to move freely, fixing it securely);
- soft collars;
- inflatable;
- elastic neck corsets (made of soft foam, secured to the neck with Velcro, limiting its mobility) - recommended for protecting problem areas on the body, not on the head.
Elizabethan collar
Soft
The design is made of waterproof hypoallergenic material.
Product advantages:
- flexibility;
- ease;
- safety;
- strength;
- Suitable for reusable use (the item can be neatly folded and stored).
Flaws:
- the device is not suitable for large dogs, since the animal can reach the collar and crush the pliable material;
- if the dog has a long neck, this design will not protect the head well enough;
- lack of free view.
Another type of soft postoperative collar is a cone-shaped design made of waterproof nylon and equipped with a plastic insert at the bottom. The latter gives additional rigidity to the device. As a result, the pet cannot bend the barrier. The collar is fixed with Velcro.
On a note! The advantage of soft products is the most comfortable use: the animal can eat and sleep in it without any problems. This collar does not make sharp sounds when in contact with the environment. The fabric base ensures normal air exchange and thermoregulation.
Soft collar for dogs
Inflatable
This type of collar includes many variations, which differ in the type of material from which they are made. A common feature of all such structures is a shape reminiscent of a lifebuoy. The item is made of a soft and flexible material that can be transparent or include a nylon cover.
Advantages:
- comfortable use;
- free review;
- good fixation;
- easy transportation.
Flaws:
- rapid wear (dogs can easily tear the material with their claws when trying to reach the problem area) when used without a cover;
- not suitable for dogs with long limbs.
Inflatable collar
Plastic
This is a classic Elizabethan collar. The shape of the structure is a truncated cone. Material: transparent, translucent or colored plastic.
Advantages:
- transparency of the material (in most cases);
- flexibility;
- ease of care of the device (very easy to clean);
- low cost;
- availability (sold in every pet store).
Disadvantages of the product:
- noise when in contact with surrounding objects (the sounds are sharp and loud, which makes the dog scared);
- short service life (such a collar quickly becomes unusable because the plastic cracks and breaks).
Manufacturing process
Before creating a pattern, you need to measure the girth of the dog’s neck and the length of the head. Then you need to take the material from which you plan to make it.
Step-by-step instructions for creating a pattern:
- A dot is placed in the center of the prepared material; you will need to draw three circles.
- The radius of the first is found as the ratio of the neck circumference to the number 6.28.
- The second one is drawn larger than the previous one. To the radius of the previous one you need to add a second value - the length of the head. Measure the resulting number from the center of the circle. This will be the radius of the new circle. You can add a few more centimeters. It is better to make a collar with a margin and, if necessary, shorten it in the future.
- The smallest circle is 4-6 centimeters smaller in diameter than the first. You will need it to make fastenings on the collar.
Then you need to cut out a large circle. Next, draw a line on the product from the center to any point on the resulting circle. Then you need to make a cut along this line. You will get a strip or an unfolded product. Next, you need to cut out the smallest circle and make notches from it to the middle one. They can be folded, attached to the base, and threaded through them, for example, a lace.
From a plastic bottle
For your dog, you can make a protective cone from a bottle that holds five liters of water.
How to make a dog collar with your own hands:
- Cut a plastic strip and fold it into a funnel shape.
- Fix the edges, they should fit snugly against each other. To do this, use tape or adhesive tape.
- To tie the collar, you need to make several holes in the plastic using an awl. All that remains is to thread the lace through the holes.
A bottle collar is very easy to make
From cardboard
The cardboard dog collar can be made permanent, then you need to make a pattern with two radii. If you want to periodically remove it, you will have to make loops by drawing a small circle.
From fabric
A post-operative dog collar can be made from fabric. You need to choose a cotton base and a seal. Felt or non-woven fabric will do. Next, you need to prepare two identical parts from soft fabric and one identical piece from dense fabric. The latter needs to be sewn inside. To fasten the collar, it is convenient to attach Velcro.
From foam rubber
A soft collar can also be made from foam rubber. In addition to the material itself, you will need fabric that will be on top.
Manufacturing procedure:
- Cut a circle from a sheet of foam rubber.
- Prepare two pieces from fabric. They need to be sewn together along the outside.
- Turn the product inside out, place foam rubber inside and sew it up along the inner diameter.
- Make a part that resembles a belt.
- Prepare two long strips of fabric that will be sewn to the base of the collar. They will later be used for the lace.
- Attach the strips to the almost finished product and connect them to each other. Leave slits on the side where a cord is inserted to tie the collar to the collar.
Inflatable
Inflatable collars can be purchased from veterinary pharmacies. They are convenient if the dog travels a lot with the owner. The materials from which they are made do not cause allergies in pets.
Knitted
A knitted collar requires a base. You can prepare two identical parts and sew them, for example, on top of cardboard or plastic. It will work out in the same way as in the case of a fabric collar, using felt as a sealant.
Boots
Dog boots are necessary for those pets who live in cold regions. They will protect the dog's paws from frostbite. They are also necessary to protect the pads from the salt that is sprinkled on roads in many cities. Boots are made not only for small dogs, but also for large breed animals.
Sewing instructions
To make boots for a dog with your own hands, we will need thick fabric, material for the sole, elastic bands and fasteners. Let's start work.
- We take measurements - this is the diameter of the sole and the height of the paw to the wrist joint, as well as the thickness of the paw.
- The sole is a circle cut from thick leather or fabric along the diameter of the foot. We prepare two for the front legs and two for the hind legs.
- We cut out four rectangles from the fabric, the height of which is the length from the floor to the wrist, and the width is the thickness of the paw. We sew them together to make “socks”.
- Above the paw and in the area of the hock joint we make drawstrings into which an elastic band is inserted with clamps.
- We sew on the sole, and the shoes are ready.
We knit ourselves
Dog boots can also be knitted. To do this, we create ordinary stockings from any dense yarn. We use the same measurements as in the previous version. After knitting the stockings, we sew the sole to them and make drawstrings with an elastic band. For craftswomen who own knitting needles, knitting shoes will be even easier than sewing them.
Loading …
Making a protective product for a pet
You can make a collar for your pet yourself. There are several different ways to make it, depending on the materials chosen.
Express version made from cardboard
If you don’t have time to purchase a collar, but you need it urgently, you can build it in a short time from what you have at hand. You will need:
- thick cardboard;
- tape measure;
- compass;
- stapler;
- scissors;
- scotch.
The procedure is as follows:
- On a sheet of cardboard we draw a semicircle (diameter - 20–25 centimeters).
- Cut out the part and roll it into a funnel.
- Using a measuring tape, we find out the circumference of the pet’s neck.
- At the base of the cone we make a hole, the diameter of which is equal to the circumference of the cat’s neck.
- After you wrap the future collar around the cat’s neck, its side sections will need to be secured with a stapler or tape.
Video: making an “Elizabethan” collar with your own hands from cardboard
Collar made of plastic
To make a plastic collar you will need:
- two-liter plastic bottle or stationery folder;
- Velcro;
- stapler;
- scissors;
- adhesive plaster.
A plastic collar is not the most comfortable option available. But if the animal does not have too long a rehabilitation period, then it is quite suitable, especially since this product can be made more comfortable.
Do not give in to provocation - any animal will try to remove the collar
It is made as follows:
Cut a two-liter bottle in half (or unfold a plastic folder), draw and cut out a collar in the form of a semicircle (it is also better to limit its diameter to 25 centimeters). Fold the semicircle into a cone. At its base, cut a hole with a diameter determined by the thickness of the cat’s neck. Attach Velcro fasteners to the side sections of the cone with a stapler. You can also make holes at the edges of the cuts using sharp scissors and connect them with a soft cord or ribbon. Cover the top and bottom edges of the collar with adhesive tape. This will soften the edge adjacent to the cat's neck and strengthen the one that will encounter obstacles
It is very important that all edges of the homemade plastic collar are even and smooth.
Possible problems
Even the most expensive and high-quality cat collar does not guarantee that there will be no problems with it. Most often you encounter these.
- The animal clings to everything. Most likely the protective part is too long. The simplest way out is to trim the edge by a centimeter and a half and see if this measure helps the cat.
- The same symptoms plus the cat’s inability to jump onto a chair and a constantly bowed head position. The collar is made of too heavy plastic - it will have to be replaced.
- Neck chafing. Usually near the loops, but can be along the entire line of contact with the neck. Too sharp edge; You should cover it with tape to prevent scratching.
How to choose the right flea and tick collar
There are certain criteria based on which you can choose a collar:
- The collar should not be too cheap. Poor quality ingredients can be harmful to your pet's health.
- Listen to the opinions of veterinarians and choose products from trusted manufacturers.
- Domestic and European brands will be a more reliable choice.
- The size of the collar should correspond to the circumference of the dog's neck, allowing for a small margin for comfortable wearing.
How to choose a collar for a puppy?
There is an age limit for using a collar for small puppies. It is not recommended to use it on an animal under 6 months old. Some brands of ecological products can be used starting from 2 months.
Can it be used on pregnant and lactating dogs?
Flea collars should be used with caution on pregnant and lactating dogs. The manufacturer always indicates limitations and possible consequences, so read the instructions carefully
Option for quick production of a veterinary collar
In emergency cases, there is no time to sew a veterinary collar or look for one in pet stores. If you need to put such a device on your head urgently, you can use a temporary option.
- You need to flatten the cardboard and cut a semicircle out of it. Then the material should be twisted, this will make it softer.
- The blank must be tried on the animal, cutting off the excess.
- The edges of the cardboard may be sharp; you need to cover them with tape.
A temporary option is used when urgent protection is needed for the cat’s wounds. You can also use it when treating your pet antibacterially, when applying a spray against fleas or ticks.
. The pet should not touch its fur or skin for a while. Then the simple collar is thrown away without regret. The best material for construction is thick cardboard from a shipping box or shoe box. If the cardboard is very thick, it is better not to use it for cats; it is only suitable for a dog collar.
The simplest option for a cardboard collar may be if it is needed only for a short time
(before visiting the veterinarian, before purchasing a more serious design).
Manufacturing process
Before creating a pattern, you need to measure the girth of the dog’s neck and the length of the head. Then you need to take the material from which you plan to make it.
Step-by-step instructions for creating a pattern:
- A dot is placed in the center of the prepared material; you will need to draw three circles.
- The radius of the first is found as the ratio of the neck circumference to the number 6.28.
- The second one is drawn larger than the previous one. To the radius of the previous one you need to add a second value - the length of the head. Measure the resulting number from the center of the circle. This will be the radius of the new circle. You can add a few more centimeters. It is better to make a collar with a margin and, if necessary, shorten it in the future.
- The smallest circle is 4-6 centimeters smaller in diameter than the first. You will need it to make fastenings on the collar.
Then you need to cut out a large circle. Next, draw a line on the product from the center to any point on the resulting circle. Then you need to make a cut along this line. You will get a strip or an unfolded product. Next, you need to cut out the smallest circle and make notches from it to the middle one. They can be folded, attached to the base, and threaded through them, for example, a lace.
From a plastic bottle
For your dog, you can make a protective cone from a bottle that holds five liters of water.
How to make a dog collar with your own hands:
- Cut a plastic strip and fold it into a funnel shape.
- Fix the edges, they should fit snugly against each other. To do this, use tape or adhesive tape.
- To tie the collar, you need to make several holes in the plastic using an awl. All that remains is to thread the lace through the holes.
A bottle collar is very easy to make
From cardboard
The cardboard dog collar can be made permanent, then you need to make a pattern with two radii. If you want to periodically remove it, you will have to make loops by drawing a small circle.
From fabric
A post-operative dog collar can be made from fabric. You need to choose a cotton base and a seal. Felt or non-woven fabric will do. Next, you need to prepare two identical parts from soft fabric and one identical piece from dense fabric. The latter needs to be sewn inside. To fasten the collar, it is convenient to attach Velcro.
From foam rubber
A soft collar can also be made from foam rubber. In addition to the material itself, you will need fabric that will be on top.
Manufacturing procedure:
- Cut a circle from a sheet of foam rubber.
- Prepare two pieces from fabric. They need to be sewn together along the outside.
- Turn the product inside out, place foam rubber inside and sew it up along the inner diameter.
- Make a part that resembles a belt.
- Prepare two long strips of fabric that will be sewn to the base of the collar. They will later be used for the lace.
- Attach the strips to the almost finished product and connect them to each other. Leave slits on the side where a cord is inserted to tie the collar to the collar.
Inflatable
Inflatable collars can be purchased from veterinary pharmacies. They are convenient if the dog travels a lot with the owner. The materials from which they are made do not cause allergies in pets.
Knitted
A knitted collar requires a base. You can prepare two identical parts and sew them, for example, on top of cardboard or plastic. It will work out in the same way as in the case of a fabric collar, using felt as a sealant.
How to choose a size
The correct size of the product is of great importance. This parameter determines the degree of collar fixation and the comfort of the animal (the ability to eat, sleep, walk normally)
It is important that the structure does not come into contact with the problem area
The size of the product depends on the width of the barrier (7.5-25 cm). For example, 10 and 12 are suitable for small breeds, 15 for medium-sized ones, and 20 and 25 are used for large animals (shepherds, St. Bernards, Great Danes).
On a note! It is not always possible to try on an item before purchasing, as some manufacturers pack the collar in film. In this case, you need to consult the seller.
Your doctor will help you choose the right option depending on the size, age, breed of your pet, purpose of use (limiting access to the body or head) and characteristics of the injured area.
The main criterion when choosing the right size is neck circumference. You can measure it at home using a measuring tape.
Recommendation! If the animal has a long, mobile neck (this is typical for breeds such as Great Danes, Collies, Shepherds, and Spaniels), it is better to choose restraints that completely cover the nose. Low collars are suitable for dogs with short necks (bulldogs, pugs, Pekingese, boxers) - these pets do not require maximum fixation and limited mobility.
The height of the cone for dogs is selected depending on the location of the painful area on the animal’s body. For example, a low barrier will not allow you to touch your back, but it will not prevent you from scratching your face.
Collar for large dogs
Types of collars for dogs
Dog neck cones are made from different materials. Each of them has its own advantages and disadvantages.
Fabric
The fabric construction is hypoallergenic, waterproof and reusable. Among the disadvantages are a poor viewing angle and low strength. The accessory wrinkles easily, so if the dog really wants to, he can quickly get rid of it.
Plastic
A product made of transparent plastic is a classic option with a minimal price. Its main problems are its short service life and loud noise when in contact with other surfaces.
Inflatable
It differs not in material, but in shape. Resembles a life preserver, providing a very good viewing angle. Suitable for animals with short legs and neck.
You can take pills
You can take tablets. Liquid medicine can be injected from a syringe without a needle: pull back the corner of your lower lip and pour in the mixture.
You can use tricks, but this doesn’t always work: chew a piece of boiled meat, roll it into a ball and put a tablet in it.
You may find some life advice regarding our favorite animals useful, but it would be better if they were never in demand, so that we would always be cheerful and healthy!
And these are my four-legged friends!
When is a protective collar needed?
This device is necessary in order to protect problem areas on the animal’s body from external influences, to avoid their damage and infection in the wound. A neck cap for a dog is made in the form of a cone - this shape eliminates possible contact of the pet (with the help of paws or tongue) with the injured area. The device frees the owner from the need to regularly bandage the wound, causing significant inconvenience to the animal. Note! The dog gets used to the collar in 2-3 days. Veterinarians advise training your pet to wear the accessory in advance (at least a week in advance) if surgery is planned soon. Indications for wearing a collar are:
- rehabilitation period after surgery (abdominal surgery, castration, sterilization);
- false puppyhood (so that the dog does not lick the nipples and does not stimulate milk production);
- diseases of the ears and eyes;
- skin pathologies;
- deworming (to prevent re-infestation);
- healing of cropped ears;
- burns;
- treatment of fur to protect against skin parasites, such as ticks or fleas (if you do not wear a protective dog collar, the pet will lick the drug, which can lead to poisoning of the animal).
This is interesting! The medical headband for dogs was invented by veterinarian Frank L. Johnson in the 70s of the last century.
He drew attention to the similarity of the device with a collar for ladies of the court. Thus the design received the name “Elizabethan collar”
Historical excursion
Why did the protective veterinary collar receive such an interesting name? The fact is that in the 60s of the twentieth century, veterinarian Frank L. Johnson noticed an interesting similarity. The barrier structure that prevents the animal from reaching the wound is very similar to the collars of the dresses of the ladies of the court during the time of Queen Elizabeth of England.
Puffy starched collars were very popular at that time. They came to England from Spanish fashion and were tight, starched structures with numerous folds. They were not sewn onto the suit, but were put on over it and tied tightly.
By the end of the 16th century, collars had reached incredible sizes. The width of about 30 cm greatly limited the view and made it difficult to turn the head.
How to choose a size
Whatever model the owner prefers, it is necessary first of all to take care of the correct choice of protective device according to the size of the pet. In this matter, they are guided by the width of the protective field. Sizes No. 10 and 12 correspond to a width of 10.5 and 12 cm and are suitable for dogs of dwarf and miniature breeds.
A protective structure with size No. 15 should be chosen for a medium-sized pet with a neck circumference of no more than 15 cm. For dogs of large breeds, it is necessary to purchase protective products in sizes No. 20 and No. 25.
Collar Size Chart
Elizabethan animal collars are usually sold unassembled for ease of transportation. Assembling the collar is easy, following the instructions. As a rule, the structures are given the appearance of a cone and secured with special clamps. If the size is chosen correctly, the protective cone protrudes slightly beyond the boundaries of the dog's head.
A well-chosen protective design does not limit the pet’s view, does not hinder its movement, and does not interfere with the intake of food and water.
When is a protective collar needed?
As a rule, a collar is used to protect the affected areas - on the head from scratching, and on the body, tail and limbs from licking. This protective barrier is useful in a number of cases:
- postoperative period - sutures after surgery require time to heal, which is accompanied by pain and itching. This causes the dog to lick or scratch the area that is bothering him, and if he is allowed to do this, the stitches may come apart or the wound may become infected, leading to complications;
- limb injuries - dogs usually do not like having foreign objects placed on their legs, so they will, of course, try to remove a cast or splint placed on an injured limb, which will disrupt the healing and recovery process; Photo: Rick Cameron
- diseases of the eyes and ears - usually accompanied by inflammation and itching, so you need to protect the diseased organ from outside influences. Plus, treatment often uses ointments and other products that should not be washed off after application;
- skin problems - various skin diseases (dermatitis, allergies, fungal and bacterial skin diseases) and wounds also require special treatments and aseptic conditions, however, canine intervention can aggravate the disease - contribute to the spread of the pathogen to other parts of the body or the introduction of additional infection. Also, after treatment with flea and tick products, licking the fur is dangerous to health, since such drugs are often toxic.
Useful video
To learn how to properly put a protective collar on a dog, watch this video:
Similar articles
- How to treat a dog's wound, treat purulent, lacerated... For this purpose, the wound surface can be covered with a bandage or a special collar can be put on the dog. ... This leads to the body’s defenses engaging mechanisms aimed at the formation of pus. Read more
- Candidiasis in dogs: symptoms, damage, incl.
skin... After applying the treatment, the affected area of skin is covered with a bandage, and a special collar is put on the dog to prevent licking. Read more - A broken paw in a dog: how to determine the front...
A broken paw in a dog: first aid, surgery, recovery after. Dogs are mobile and active... if they attempt to lick or chew post-operative sutures, a special protective collar should be used. Read more - How to remove fleas from a dog, how to do it with folk...
You should not use drops or sprays designed to combat cat fleas to treat your dog. ... If necessary, use a special protective collar to prevent licking... Read more - Caring for a dog's coat: how to care for long...
During the combing procedure, the fatty protective layer is distributed throughout the dog's body. ... To learn how to choose a shampoo for a dog, watch this video: Which breeds have less hair. Read more
How to make a dog collar with your own hands?
The easiest way is to make a collar with your own hands from a plastic bottle for small dogs. An old x-ray, a thin plastic folder, or corrugated cardboard will also work. You can wrap your neck with thick fabric in 2 layers.
Making a collar for a dog after surgery with your own hands is quite simple. For this you will need:
- plastic, cardboard or other selected material;
- scissors;
- stapler, tape;
- soft cloth or collar.
- Measure the animal's neck. Its diameter will become the starting point of the future drawing.
- On the prepared material we draw a circle, slightly larger than the dog’s neck. For convenience, use a compass or a regular plate of a suitable size.
- Draw an outer circle. The distance between the circles should be equal to the distance from the neck at the place where the collar is attached to the extreme point of the dog’s nose.
- Using scissors, cut out the outer circle, cut towards the center and cut out the inner circle.
- We overlap the edges of the collar slightly to create a trimmed cone. We secure the edges with tape or a stapler.
- We carry out a preliminary fitting on the “patient”. We make sure he is comfortable.
- We make small vertical cuts along the edge of the small circle.
- We put on the old collar, fold in the cuts and secure the structure.
- Two fingers should fit comfortably under the collar. Otherwise, your pet will feel uncomfortable wearing it.
- The edges of a product made of rough material must be processed to protect the pet from sharp surfaces. You can cover them with adhesive tape or soft cloth.
- If you don’t have an old collar, you can use a tourniquet or strong fabric instead.
- Cardboard protection is short-lived, but its service life can be extended. Apply tape over the entire surface of the structure. Thus, saliva and any other liquid will not be able to soak the material.
Postoperative nutrition for the animal
Specific recommendations on what the dog can do after surgery
, the attending veterinarian will tell you. This directly depends on the type of surgery and anesthesia.
The dog breeder wonders why
what to feed the dog after surgery
? We offer the following:
- Feeding should be done little by little so as not to burden the body, since a lot of energy is spent on digesting food.
- After surgery, the dog does not eat or drink for several hours. This is especially true for operations performed on the peritoneum.
- There is no need to worry that the dog does not go to the toilet after surgery
. This is natural, because she doesn’t eat anything. And to avoid constipation, you need to stick to a diet. It is better to give dietary food, which is sold in special canned food. Hard food softens in warm water. This type of diet is observed for about 30 days. It is better to return to your normal eating rhythm gradually.