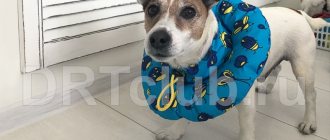
Protective collar for dogs
Dogs, like people, also get sick, but unlike people, animals do not understand that they should not disturb a wound, comb problem areas of the skin, or lick postoperative stitches.
Therefore, to speed up the healing process of damaged areas of the body and prevent infection, animal owners have to resort to using a special protective collar for dogs.
Barrier therapy is also used in other cases, for example, during the period of action of an external drug against parasitic insects in order to prevent the possibility of an animal licking the product applied to the fur and skin, which can lead to poisoning.
A protective collar may be needed for the period of treatment of eye and ear diseases, skin diseases, as well as for the period of healing of cropped ears, burn wounds, during the period of false whelping, so that the bitch does not lick the nipples and does not stimulate the mammary glands, which leads to increased production milk, but this cannot be allowed.
Julia
Zhulya The time has come for her to give birth, she suffered all night, but never gave birth.
In those distant times, private clinics were just emerging, so we urgently learned the doctor’s address and rushed to save the life of my favorite. Just as women undergo caesarean sections, they cut my Zhulya. The doctor warned that the operation itself was not complicated; the postoperative period was dangerous, when the dog, while licking the wound, could bite the threads and the stitches would come apart. You can’t tell her that she can’t do this.
After the operation, I “wrapped” my dog in a blanket: I took a piece of fabric, cut out 4 holes for the legs, and laced the back. While my Zhulya was recovering from anesthesia, everything was quiet and calm, she lay in her crib, snoring through her nose.
But then she began to get up, and imagine my surprise when I saw my Julia without this blanket. How she managed to free herself, I have no idea.
Types of protective collars for dogs
The classic version is the Elizabethan collar , which is shaped like a truncated cone (lampshade). Made of flexible, transparent, non-obstructive, translucent or colored plastic. Plastic collars for dogs are easy to clean, low cost, perhaps these are the most important advantages. The disadvantages are that plastic models make noise when they come into contact with other objects, crack or break over time, and most dogs do not feel comfortable wearing them. Attached to a collar or harness using 3 or 4 plastic fastener strips. The circumference is adjustable using special fastener tabs.
There is another type of plastic collar, which is a plastic tube closed in a circle, on top of which a protective removable cover is put on. It limits the mobility of the neck, thereby preventing the animal from reaching with its head to damaged areas on the body and licking them.
There are soft cone-shaped collars for dogs made of durable, water-repellent non-woven material that is non-toxic and does not cause allergic reactions. Lightweight and flexible, they do not interfere with the free movement of the neck; the animal can eat, sleep and not experience discomfort. The advantages include increased wear resistance, because such models will not tear even when chewed by animals. In addition, after use, the soft collar can be compactly folded and stored away. However, not all soft models are suitable for large dogs, which have strength, long limbs and can reach their paws to the head or tongue to the body, crushing an unreliable barrier. Soft models are not suitable for dogs with long necks because they do not cover the head enough.
Another type of soft collar is also a cone, made of soft, water-repellent nylon fabric, but with a plastic insert inside that is about half the size of the cone. A plastic insert at the bottom of the cone adds rigidity, which prevents the animal from bending the barrier. For convenient and reliable fixation to the collar there are Velcro.
Manufacturing process
Before creating a pattern, you need to measure the girth of the dog’s neck and the length of the head. Then you need to take the material from which you plan to make it.
Step-by-step instructions for creating a pattern:
- A dot is placed in the center of the prepared material; you will need to draw three circles.
- The radius of the first is found as the ratio of the neck circumference to the number 6.28.
- The second one is drawn larger than the previous one. To the radius of the previous one you need to add a second value - the length of the head. Measure the resulting number from the center of the circle. This will be the radius of the new circle. You can add a few more centimeters. It is better to make a collar with a margin and, if necessary, shorten it in the future.
- The smallest circle is 4-6 centimeters smaller in diameter than the first. You will need it to make fastenings on the collar.
Then you need to cut out a large circle. Next, draw a line on the product from the center to any point on the resulting circle. Then you need to make a cut along this line. You will get a strip or an unfolded product. Next, you need to cut out the smallest circle and make notches from it to the middle one. They can be folded, attached to the base, and threaded through them, for example, a lace.
From a plastic bottle
For your dog, you can make a protective cone from a bottle that holds five liters of water.
How to make a dog collar with your own hands:
- Cut a plastic strip and fold it into a funnel shape.
- Fix the edges, they should fit snugly against each other. To do this, use tape or adhesive tape.
- To tie the collar, you need to make several holes in the plastic using an awl. All that remains is to thread the lace through the holes.
A bottle collar is very easy to make
From cardboard
The cardboard dog collar can be made permanent, then you need to make a pattern with two radii. If you want to periodically remove it, you will have to make loops by drawing a small circle.
From fabric
A post-operative dog collar can be made from fabric. You need to choose a cotton base and a seal. Felt or non-woven fabric will do. Next, you need to prepare two identical parts from soft fabric and one identical piece from dense fabric. The latter needs to be sewn inside. To fasten the collar, it is convenient to attach Velcro.
From foam rubber
A soft collar can also be made from foam rubber. In addition to the material itself, you will need fabric that will be on top.
- Cut a circle from a sheet of foam rubber.
- Prepare two pieces from fabric. They need to be sewn together along the outside.
- Turn the product inside out, place foam rubber inside and sew it up along the inner diameter.
- Make a part that resembles a belt.
- Prepare two long strips of fabric that will be sewn to the base of the collar. They will later be used for the lace.
- Attach the strips to the almost finished product and connect them to each other. Leave slits on the side where a cord is inserted to tie the collar to the collar.
Inflatable
Inflatable collars can be purchased from veterinary pharmacies. They are convenient if the dog travels a lot with the owner. The materials from which they are made do not cause allergies in pets.
Knitted
A knitted collar requires a base. You can prepare two identical parts and sew them, for example, on top of cardboard or plastic. It will work out in the same way as in the case of a fabric collar, using felt as a sealant.
How to choose a protective collar for your dog
The main thing is to choose the right size, as well as the model, depending on the breed and purpose of use (limiting the animal’s access to the body or head). The choice should be made according to the width of the protective field, which most often is 7.5, 10.5, 12, 15, 21.5, 25 cm. Among the existing options, you can easily choose the right collar for a dog of a particular breed and any age. An incorrectly selected barrier can obstruct vision, cause inconvenience when eating, sleeping, playing, and can also slide down to the shoulder blades, thereby not providing any protection.
Criterias of choice
For comfortable wearing, it is important not to make a mistake with the size and appearance. These points need to be decided in advance, since in most cases fitting is not provided.
Size
The size determines the reliability of the fixation and the comfort of the animal. The neck girth and cone height will help you make the right choice:
20-26 cm and 7.5 cm – XS-S;
25-32 cm and 10.5 cm – S;
30-37 cm and 12 cm – SM;
36-43 cm and 15 cm – M;
44-53 cm and 21.5 cm – L;
50-58 cm and 25 cm – L-XL.
The longer your pet's neck, the higher the structure he will need. XS-S is usually used for puppies, S and SM for small breeds, M for medium breeds, L for large breeds, and L-XL for giant breeds.
Type and clasp
When choosing a type, you need to take into account not only the parameters of the neck, but also the location of the painful area. High barriers prevent scratching of the face, and low barriers prevent scratching of the back.
The material will have to be chosen by trial and error, since each animal has its own preferences. You can choose only fasteners to suit your taste: plastic clips or Velcro.
Price
The price of a protective collar for a dog depends on its size, type, and manufacturer. So, an ordinary Elizabethan collar costs from 90 rubles, the cost of other types varies between 200-1000 rubles. Soft collars are more expensive, for example the Procone model costs 840-1000 rubles, and the cost of the Procone elastic neck corset exceeds 1500 rubles.
If it is not possible to purchase a ready-made protective collar, you can make it yourself from available materials, but at the risk of causing the animal even more discomfort.
DIY dog collar
For small breed dogs, the collar can be based on an x-ray, and for larger breeds, it can be a plastic dishcloth, thick cardboard or corrugated cardboard. The workpiece is given the shape of a cone, and the edges of the lower and upper diameters should be wrapped in soft cloth (gauze), secured with tape, or covered with adhesive tape to avoid injury to the animal’s neck.
The bottom circle should be equal to the diameter of the fastened collar. The width of the collar is the length from the neck (where the collar is) to the tip of the nose and an additional 5 cm.
Some dog owners simply wrap a towel around their dog's neck, securing the edges with a bandage or tape to prevent the towel from falling apart. The towel acts as a neck brace, preventing the neck from turning.
We do it ourselves
You can build a protective collar for dogs with your own hands and in various sizes, depending on the breed of dog, starting with the smallest (for Chihuahuas) and ending with voluminous ones (for shepherds and bulldogs). The choice of materials for this project is unlimited, so look around your home for various items that may be useful to you. This is how they use soft plastic buckets, x-rays, cans, cardboard, thick tablecloths, in general, everything that is visible to the eye. For small dogs, it is better to use a softer material, and for large dogs, a denser one, so as not to get to the wound, especially since it won’t be difficult to do it yourself.
Materials and tools
For the collar you will need:
- plastic or cardboard (or other material that you have);
- scissors;
- tape or stapler;
- soft material or your dog's collar.
Step-by-step instruction
Making the collar will not take very long.
So:
- We measure the diameter of the pet's neck. This will be the starting point for further drawing.
- Draw a circle on the material of your choice, the radius of which should be slightly larger than the dog’s neck. For a correct drawing, it is better to use a compass, but if you don’t have one at home, you can take an ordinary plate, which will be larger in diameter than the neck.
- Draw the outer circle. The distance from the inner to the outer circle should be 5 centimeters less than the length of the dog’s muzzle. This will provide a comfortable view and will not cause discomfort.
- Cut out the outer circle, then make a cut towards the center so that you can cut out the inner one.
- We fasten the sides of the collar with tape or a stapler, overlapping them slightly on top of each other. This should create a cut cone.
- Then you should first try on the collar on your dog so that everything is comfortable.
- We make short vertical cuts along the rim of the middle hole.
- We place the headband on the old collar and, turning these cuts, fasten the entire structure together with a stapler or tape.
- It is imperative to ensure that there are no sharp corners or surfaces, otherwise the dog may get hurt.
- Two fingers should fit freely between the collar and the neck so that the pet can wear it comfortably.
- If you do not have a collar that is suitable for using this device, you can use various tourniquets and fabrics instead.
- If you are thinking of making a collar out of cardboard with your own hands, then most likely it will not be durable. However, you can improve it by wrapping tape around the entire surface so that saliva and water do not soak it.
How to train a dog to wear a collar
Many dogs express their reluctance to wear something they don’t understand, which causes discomfort, by numerous attempts to pull off the collar. Therefore, if it is known in advance that the pet will undergo barrier therapy, for example, after surgery, then the animal should be prepared before the operation.
To begin with, the collar should be placed next to the pet so that he can sniff it and understand that the item is safe. Then you should put the barrier on the animal for a short time and try to engage the dog in a game, give a treat, pet it or otherwise encourage it in order to evoke positive associations. Animals usually get used to wearing the barrier within a few days.
How to properly put protection on your pet
You need to accustom your dog to a new accessory correctly:
If you have to use the product after a planned operation, you should introduce the dog to the protective device in advance. First, you just need to put it in the dog’s line of sight, let it sniff it and get used to it. Only after complete adaptation can the collar be put on the pet for a while. The wearing period should be increased gradually. To make the process easier, you need to distract your pet with games, kind words, and affection. If the dog begins to respond calmer to the protective device, it is necessary to praise it and treat it with its favorite treat. The first fitting time should not exceed 3 minutes. You need to increase the wearing time very little. The next step is eating in the collar
It is important to stop any attempts to remove the product and praise for calm behavior. When the dog stops reacting negatively to the collar at home, you can go outside in this form. If the collar is needed urgently, for example, as a result of an injury or after urgent surgery, there is no time for psychological adaptation. Then you will have to act according to the circumstances and comprehensively help the dog cope not only with pain, but also with the new accessory. You need to play with your pet and constantly distract him from the unusual and constantly disturbing thing.
The collar should not interfere with the dog's sleep and eating.
Attaching the collar to the pet's neck is usually done using a lace, collar or rope. This mandatory condition allows you to limit the dog’s mobility and creates a much-needed barrier between the body and head.
It is very important to gradually accustom the dog to the collar, and only after “getting acquainted” should you put the protection on your friend
Note! If the collar was purchased and not made yourself, it is important to read the instructions before using it
Regardless of what kind of collar you decide to purchase, it is very important to approach its choice with maximum responsibility. The comfort of the pet depends not only on the chosen material, but also on how to accustom the dog to the new accessory.
You cannot traumatize the dog’s psyche at this moment.
Why do dogs wear a cone?
Why or why do dogs and cats wear a cone around their neck?
A cone or protective collar is indeed sometimes placed on dogs. But this is a forced and temporary measure that is necessary for dogs, or rather for their protection. Such a collar is usually made of flexible plastic (branded) or cardboard (homemade). It does not particularly restrict the dog’s movements, but still prevents it from performing certain actions. When is it indicated for dogs?
Not all dogs like this “decoration”; some begin to actively resist, so you need to gradually accustom the dog to the collar. It is usually removed when eating. I made such a collar for my cats with ear mites, lichen lesions, and after operations. In principle, animals get used to it quite quickly and can wear it, if necessary, for quite a long time.
Typically a medicated collar is placed on dogs or cats to prevent licking. For example, after castration or other surgery. By licking the animal, it irritates the sore spot, it becomes infected with pathogenic bacteria and fungi, and eczema can develop. Such a collar deprives our pets of peripheral vision and they will bump into furniture and doors, so in such cases it is better to wear it when the animal is left alone at home. I believe that you should not wear such a collar on walks - the dog is already under supervision on a leash. When I treat a dog’s ears or eyes, there is no need to wear such a collar. After treatment, the dog feels better and does not scratch with its paws. Although everything is very individual.
Good day! Most often this happens due to some kind of disease in the dog; the cone is put on them so that the dog cannot hurt itself and make the disease much more severe. But the dog will still be mentally traumatized when wearing a cone and will be limited in its actions.
The animals are given a cone to prevent them from scratching their wounds. My pit bull terrier's ears hurt, or rather not inside, but some kind of infection that caused sores. Therefore, in addition to medications, it was recommended to wear a cone to prevent it from scratching the wounds.
The cone, or protective collar, is put on dogs for a reason; it is a forced (temporary) measure necessary for the dogs and their protection. The collar is made of flexible plastic (branded) or you can make it yourself from cardboard (homemade).
Dogs are given a cone to prevent them from itching, chewing their paws, or licking their paws.
A dog does not always enjoy medical care or grooming procedures. It also happens that after surgery or injuries, you should not allow the animal to lick, scratch or comb the wounds. In order not to sit over the dog and prevent it from scratching where it wants, it is better to use a protective collar. It is also called postoperative.
This device is a truncated cone, which with a narrow diameter is attached to the dog’s neck. It prevents him from scratching a wound on the head with his paw (for example, cropped ears) or licking a wound on the body.
When is a dog collar used?
They are used quite widely:
Processing the seam
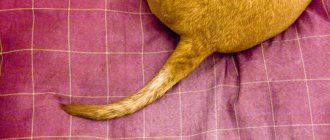
After sterilization, the suture is located on the dog’s underside, along the so-called white line - from the navel to the tail. The length of the suture depends on the size of the dog and can be from 2 to 10-15 cm. Doctors recommend removing the sutures 10-14 days after the operation. In some cases, removal is carried out earlier (if healing is good or, conversely, if the suture material is rejected). The seams are treated daily 1-2 times a day.
As a rule, seam treatment does not cause any discomfort to dogs. On the contrary, some pets enjoy having their belly scratched, especially after a few days when the stitch may itch a little as it heals. Cats, for example, endure this procedure much more painfully, because... their groin area is “inviolable” for strangers.
Immediately after the sterilization operation, the dog is put on a special blanket so that it cannot lick its stitches. You should immediately purchase a second blanket to replace it, because... In the first days after sterilization, there may be slight bleeding from the suture. In addition, the blanket will become dirty during the walk.
It is most convenient to treat the seam with sterile gauze wipes. Ready-made napkins are sold in packs of 10 pieces at the pharmacy (price 10-15 rubles). You can use a sterile bandage and simply fold the piece into several layers.
The napkin is generously moistened with a solution of hydrogen peroxide and applied along the entire length of the seam. It is preferable to use peroxide because... it will well soak up the bloody crusts, which must be removed. Use a second napkin along the seam to remove all dirt so that the seam is clean. Then blot dry.
After general wound hygiene, the suture is treated with any wound-healing and anti-inflammatory agent (see section Drug postoperative support).
The seam can then be treated with the following means (optional):
| The ointment is applied to the cleaned seam 1-2 times daily. A sterile gauze pad is applied to the seam on top and a blanket is put on top. A 40 g tube of ointment costs 110 rubles. |
| This is a veterinary drug. You can treat the seam with it once every 3 days. This may be beneficial for owners of aggressive dogs, or for dogs kept in kennels and kennels. The cost of the aerosol is 520 rubles. |
Aluminum sprayAfter application to the seam, a thin film is formed that prevents the penetration of bacteria and contamination of the wound. Treatment can be carried out daily. The price is about 800 rubles. An analogue could be the “Second Skin” spray, its cost is 380 rubles. |
Why do they put a cone around a dog's neck?
Dogs, like people, are susceptible to illness, injury and surgery. Unlike people, dogs do not understand that a wound should not be touched, licked, scratched or simply disturbed, since it is a gateway to infections.
In order to protect problem areas of your pet’s skin and avoid self-injury, veterinarians advise using a special cone that is placed around the animal’s neck. It performs an important medical function. This is a special protective collar that prevents the animal from coming into contact with the wound.
It is shaped like a cone and is placed on the dog's neck with a narrow part. With such a collar, the animal will not be able to reach the wound on the head either with its tongue or paw. And this, in turn, is the key to successful healing.
In addition, you do not have to wrap and unroll the wound every time, causing discomfort to the dog. Getting used to the collar occurs after 2-3 days. Doctors recommend accustoming your dog to it in advance (at least a week in advance) if surgical intervention is planned.
What does rehabilitation include?
High-quality rehabilitation is a set of measures, each of which is aimed at improving the patient’s health. They are selected individually. To achieve the desired effect, all actions must be carried out under the strict supervision of a physician. The doctor's recommendations must be followed strictly.
Drug therapy
To relieve pain and swelling after surgery in the cervical, lumbar, and thoracic regions, the doctor prescribes:
- Analgesics
(Analgin, Lidocaine, Ketotifen) - relieve pain or reduce its manifestations. - Antibiotics
(Penicillin, Cefazolin, Vancomycin) are needed to prevent post-surgical infections. - NSAIDs
(Diclofenac, Diclak, Ketorol) - non-steroidal anti-inflammatory drugs prevent and relieve inflammation, swelling, pain. - Muscle relaxants
(Baclofen, Tolperisone, Tizanidine) - relax stiff muscles. - Chondroprotectors
(Teraflex, Artra) – strengthen bones and cartilage. - Vitamin-mineral complexes
– trigger metabolic processes, which promotes tissue healing.
Drugs prescribed during the rehabilitation period after hernia surgery
The course of drug therapy is selected by the doctor. You cannot independently reduce or increase the dosage, or shorten the course of rehabilitation after removal of a hernia. As healing progresses, the need for antibiotics, NSAIDs, and analgesics disappears. On the 10th day after removal of the hernia, antibiotics are discontinued if there are no bacterial complications.
Analgesics and NSAIDs are taken until the pain disappears. Chondoprotectors and vitamin complexes that strengthen bones and joints can be used in courses for the rest of your life.
Exercise therapy and gymnastics
The goal of exercise therapy is to restore lost functions of the spine. Exercises strengthen the back muscles, make the ligaments more flexible, without injuring or overloading them. They improve blood flow, and with it the supply of nutrients to the damaged disc, which accelerates tissue regeneration.
To achieve the desired effect, a set of exercises must be selected by the doctor taking into account the age, health, weight, and physical capabilities of the patient. Any attempts to independently adjust exercise therapy, without consultation with a rehabilitation specialist, can provoke an exacerbation of the hernia.
When performing exercises, remember these rules:
- Do not increase the load suddenly.
- Always wear a brace or collar during training.
- If an exercise causes pain, stop immediately or reduce the load. You are not ready for it yet. Contact your doctor for exercise correction.
- Do not do exercises that are prohibited at this stage of rehabilitation after surgery for a herniated disc.
- Avoid active, sudden actions. Swinging legs, jumping, strong bending, twisting exercises, and pull-ups on the horizontal bar are prohibited. Also, you should not make sharp turns of the body to the right or left.
- At the initial stage, the use of barbells, dumbbells, and any power loads is prohibited. If the doctor has approved push-ups, the exercise should first be done from the wall, and only then gradually move on to the classic version.
- Walk every day, preferably in a park or forest. Duration of walks is 30-60 minutes, rest periodically.
Best exercises
Immediately after surgery to remove a herniated disc, the doctor prescribes a gentle complex of exercise therapy. Exercises are done from a supine position:
- Rotation of hands and feet in a circle.
- Move your feet down/up.
- Bend your legs at the knee, bend your arms at the elbow.
- Pulling the right, then the left leg towards the stomach.
Over time, the complex becomes more complicated. The doctor gives more complex stretching exercises to strengthen muscle tissue. Depending on the situation, each action must be done from 4 to 10 (no more) times:
- Lying on your left side, lift your left leg straight. Bend your left elbow and place your hand behind your head. Then change the side.
- Lying on your back, lift your pelvis off the surface.
- Lying on your back, tuck your chin toward your chest.
What types of intervertebral hernias are most difficult to treat?
4 stages of treatment for intervertebral hernia