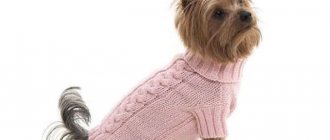
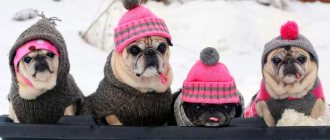
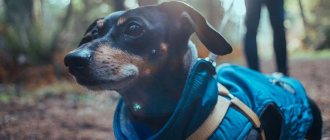
Sewing clothes for dogs is not a newfangled fad of modern dog breeders. Many veterinarians talk about its necessity. For miniature breeds with fine hair, clothing is guaranteed protection from the cold. Therefore, an insulated jumpsuit for a dog, made according to a simple pattern, is one of the most important components of a dog’s wardrobe. In addition to clothing, dogs also need shoes to protect the skin on their paws from hazardous substances that are sprinkled on roads in winter.
All this, of course, can be bought in the store. But will the finished average size take into account all the anatomical features of a particular dog? Sometimes the sleeves are short, sometimes the collar is wide and allows the wind to pass through, sometimes the armhole is narrow and the clothes rub against the armpits. But there is a way out. You need to sew clothes for your pet with your own hands.
Let's take a closer look at the main stages of making clothes.
Material selection
When choosing a material, you need to take into account the time of year for which the clothes are sewn, the age of the animal, the quality and composition of the fabric. For demi-season clothing, we choose breathable material without a greenhouse effect. For protection from rain - waterproof fabric. For young and active animals, the strength of the material is important. For any clothing, indelible coloring and hypoallergenicity are also important.
The materials used for insulation can be different - padding polyester, padding polyester, fleece. Lining fabrics must be smooth. Suitable viscose, satin, twill.
Clasps
When choosing a model, keep in mind that the most optimal place for the fasteners is the back. It's convenient and safe. Velcro, buttons (suitable only for small dogs; for large and medium-sized dogs, the clothes will unfasten when running), ties made of ribbons and laces, buttons, zippers with a limiting strip to prevent hair from getting into the teeth, and elastic bands are used as fasteners.
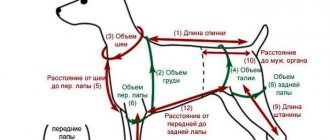
When sewing clothes for an animal, first of all you need to think about comfort, so we must ensure an ideal cut and high-quality seam processing. The anatomical correspondence of the pattern to the structure of the animal will be higher, the more accurately the necessary measurements are taken.
How to take measurements from a dog
The animal must stand upright.
When taking measurements, the centimeter should be pressed quite tightly to the dog’s body, but with the possibility of turning. Take a close look at the picture below, indicating the required measurements.
To sew clothes for a dog you need to measure:
- back length (1);
- chest volume (2);
- neck volume (3);
- waist size (4);
- distance from neck to front paws (5);
- front paw volume (6);
- sleeve length (7);
- hind paw volume (8);
- leg length (9);
- distance to the male organ (10);
- distance between the front paws (11);
- distance from front to back paw (12);
- distance between ears (13);
- horizontal head circumference (under the ears) (14);
- vertical head circumference in front of the ears (under the chin) (15);
- vertical head circumference behind the ears (16).
Now let's figure out how the basic pattern of overalls for a dog is constructed. Based on it, you can perform modeling, creating different styles for any time of year.
Step-by-step construction of a pattern
When constructing the pattern, the measurement designations shown in the photo were used.
General table of measurements with explanation - see below.
Let's decide on the overall dimensions. They are determined by the length of the back and the height at the withers. In the upper left corner of the sheet we mark point O. From it horizontally to the left we put the length of the back, we put point H. Down vertically we put the height at the withers, we put point B. We draw a horizontal line.
Horizontally to the right we put aside half the difference (Shg - Shpl), put point C. Draw a vertical straight line from it down.
From the bottom horizontal line, measure upward the distance to the collar in front, put point G. The lateral width of the overalls will be determined by the section of the pancreas. Its value is equal to half the difference in chest circumference and width between the paws (RV = Og - Shpl). The PO value is the distance from the collar to the line of the beginning of the front paw. We draw a smooth line for the neckline from point O to point G.
Let's start shaping the belly line. In the center of the segment PN we place point M. From it we lower the perpendicular, and put on it the value MF1 = 1/2 (From - Shpl). From point G1 at an angle of 45 degrees, draw a straight line until it intersects with the horizontal line drawn through point G.
Let's calculate the width of the front leg trousers at the bottom. To do this, add 4 to 6 cm to the girth of the wrist of the front paw for a loose fit (the amount depends on the type of fabric and processing method). We distribute the resulting value (=ЗЗ1) relative to point B. To the left we put 1/3 of the value (= ВЗ), to the right – 2/3 (= ВЗ1). We carry out sections GZ1 and ZZh.
We will provide a dart for a more precise fit of the product and maximum comfort for the animal in motion. From the point of intersection of the segment Z1G with the horizontal through the point G, we set the dart width upward to 3 cm. The depth is counted as three widths, that is, 9 cm. We extend the segment GZ1 downward by 3 cm, keeping the length of the trouser leg unchanged. We draw a smooth bottom line.
We draw down the vertical HH1. We mark the segment H1M1, equal to the height to the base of the tail. We connect point M1 with the middle of the segment NM.
The width of the wrist for the back leg P1P2 is equal to the same size for the front leg ZZ1. Its distribution is also similar: Н1Р1 = 1/3 Р1Р2, Н1З2 = 2/3 Р1Р2.
At the intersection of the horizontal through point ZH1 and the vertical through point P1 we place point M2. From it to the left we measure a horizontal segment equal to Н1Р2, put a point M21. From it we lower the perpendicular down to the bottom.
We draw a straight line through the center of the segment NM and point M2, extending it until it intersects with the vertical drawn down from point M21. We place the SK point at the intersection. This is the mark for the hock joint. After trying on, you will need to adjust the location of this point if necessary. We carry out segments P1SK and SKM2. We connect points P2 and G1 with a concave pattern line.
We draw segment M1M2. Above it we draw a convex line, repeating the shape of the dog. For a better fit, we will make a tuck. When sewing, it can be transformed into an assembly. Along the drawn line from M1 we set aside 3 cm, then the width of the dart is 3 cm. The depth of the dart is twice its width plus from 1 cm to 2 cm, that is, from 6 to 8 cm. We draw the dart.
From point P1 we extend the straight line by 3 cm (dart size) to maintain the length of the trouser leg. Draw the bottom edge of the trouser leg as shown in the figure.
Next, let's start cutting out the abdomen. Draw a rectangle with a width equal to the width between the front legs. The length of the rectangle is equal to the sum of the lengths of the segments indicated in red on the overalls pattern. We divide the rectangle into three identical parts and expand them by the amount indicated in the drawing. Draw the convex contours of the part. When making this pattern, you need to take into account the sex of the animal and make the appropriate length of the pattern.
Using the main pattern, we re-cut the pattern for the inside of the pants of the overalls. It copies the bottom part of the main pattern.
Clue
After making the pattern in full size, check that the lengths and widths correspond to the actual measurements.
Using this pattern, it is advisable to sew a mock-up jumpsuit from waste fabric and, if necessary, adjust the fit. We then make these adjustments to the drawings.
Materials
For a raincoat to perform its main function, it must be waterproof .
In addition, the fabric has the following requirements:
- Do not make unpleasant sounds - do not rustle.
- Don't blow away.
- Be light, preferably not wrinkled.
- Machine washable.
- Be noticeable, bright, it is advisable to have reflective elements that will help you see your pet at dusk.
- The fabric should not be slippery.
- Should not have strong odors.
What to make a raincoat from:
- Fabric with water-repellent impregnation.
- Different types of raincoat fabric.
- Used jackets, raincoats. One of the positive aspects is that such clothes smell like the owner and the dog will be calmer until he gets used to the new clothes.
Advice! If you need a raincoat urgently, then in less than half an hour you can make it from a thick garbage bag, the main thing is not to use such a raincoat all the time.
Product care
A raincoat, like other dog things, needs to be looked after. The raincoat must be washed regularly - every time after a walk in the rain. It is advisable to use laundry soap or a product without strong odors and chemicals. Can be washed in a washing machine. If your clothes are slightly dirty, you can wipe them with a damp cloth or use a soft brush.
Important: do not iron or steam these clothes.
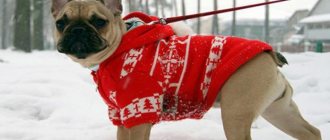
Cloaks vary in appearance, as well as in the presence or absence of collars and hoods
The owner does not have to buy one; you can make a raincoat for the dog with your own hands. This will require basic cutting and sewing skills, as well as a little imagination.
Types of raincoats for dogs
The following styles of raincoats are distinguished:
A cape is a cape fastened under the chest, without a hood or panties.
A classic raincoat is a cape complemented by a hood, often with an elastic band, and a clasp under the chest.
The overalls are a raincoat; for small breed dogs the clasp is on the chest, for large and medium breed dogs it is fastened on the back. Covers almost the entire body, there are trouser legs.
Vest
A vest is one of the most optimal clothing options for dogs. It does not restrict movement, like many overalls, the paws remain free, and the elastic band under the butt does not press! At the same time, the vest protects the torso from cold and slush. Even on frosty winter days, for many dogs it is enough to wear an insulated vest.
To sew such clothes for a dog, you only need to take three measurements:
- back length;
- chest girth;
- neck girth.
Divide the result obtained from measuring the length of the back for the vest by 10. This number will determine the side of the square of the pattern mesh. We draw a grid and transfer the contours of all the details onto it to scale.
Important Note
The pattern, marked in blue, is intended for a boy. For the girl, we lengthen the shelf detail, completing the pink image.
The proposed pattern shows two collar options - for the off-season and for frostier weather. You can choose any one you wish, but consider the size of the collar when purchasing a zipper.
In addition, patterns for sleeves are given on the grid. In our master class, the vest was made without them. The feasibility of their presence is determined by you at will, taking into account what weather the vest is intended for.
We need to prepare:
- water-repellent membrane fabric;
- lining fabric on padding polyester (stitch);
- zipper.
How to measure a dog?
For a raincoat, you need the simplest measurements of your dog:
- Neck volume – measured at the base of the neck; it is more convenient to do this along the line of the collar.
- Chest volume - measured at the widest point of the chest.
- Back length - measured from the base of the neck, more conveniently from the collar, to the root of the tail.
Important! We take all measurements with a small margin, about 0.5 centimeters, without stretching the measuring tape, the animal should be comfortable. If you have a fluffy dog, then we take all measurements without pressing the fur.
Standard jumpsuit pattern
Any master class on sewing clothes for dogs is based on a basic overalls pattern , with no legs.
To create a pattern we need:
- a sheet of paper or a piece of wallpaper;
- ruler;
- a simple pencil;
- fasteners;
- rubber;
- fabric cloth;
- threads with a needle.
Let's start sewing the overalls. First, we measure the pet’s parameters: the length from the neck to the butt and the semicircle of the widest part of the sternum. Afterwards, according to the measured parameters , we draw a rectangle onto the paper.
Visually divide this rectangle into three parts and in the second draw a cutout for the paws. At the same time, we retreat from the transverse lines by about 10 centimeters (based on the size of the dog). Next, draw the neckline and cut out our pattern with scissors.
We apply this template to our fabric, after folding it in half. We trace along the contour and cut the fabric , leaving room for allowances. We mark the seams and do the first fitting, after which it will be clear whether the armholes need to be enlarged or not.
After all the fittings and possible corrections, we sew the connecting parts on a machine. After stitching all the sections, we proceed to sewing Velcro or other types of fasteners. We stretch the elastic bands into the finished armholes and you're done.
Rain cover step by step
The simplest option is a do-it-yourself cape without a hood.
Required:
- Suitable fabric - raincoat fabric, vinyl, nylon, in extreme cases, a thick garbage bag will do.
- Bias tape.
- Threads to match.
- Velcro tape.
- Scissors.
- Sewing machine.
Pattern
This pattern can be made for a dog of any breed and size. You will need a sheet of wallpaper or whatman paper. Measurements are standard, measurements for a girl dog will be slightly different in length than for a boy.
- We measure the length of the back - from the base of the neck to the root of the tail.
- Divide the resulting number by 8.
- On a sheet of whatman paper or wallpaper we draw a 10 X 10 grid, the side of the cell is equal to the resulting number.
- We transfer the pattern details from the drawing to our Whatman paper.
- We remember that all dogs are different, we check our measurements, and make changes to the paper pattern.
- Blanket – 1 piece with a fold along the back.
Advice! Before sewing complex models, it is recommended to sew a test product from an unnecessary sheet or other material. Or baste the paper pattern pieces.
Progress:
- We transfer the pattern to the fabric, do not forget the allowances of 0.5 - 1.5 cm.
- We cut out the blanket detail.
- We trim it with bias tape.
- Sew on the Velcro tape.
- Let's try it on.
DIY overalls for dogs
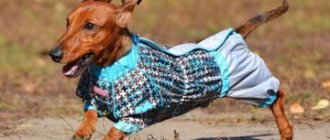
For a small dog, clothing is not a whim of the owner, but a justified necessity. Such breeds are not adapted to temperature changes; animals freeze when walking in the cool season. In summer, clothing will protect the animal from dangerous insect bites and ticks. Let's look at how to sew overalls for a dog yourself.
Sew for Yorkie
The basic pattern of clothes for a dog looks like this.
We take measurements and adjust the basic pattern. In our master class, the back part is sewn from parts.
After adjustments we get a working version of the pattern.
For sewing we will prepare:
- fabric - main and lining;
- accessories;
- threads, sewing accessories.
Description
We lay out the patterns on the fabric and cut them out taking into account the specified allowances.
We sew the parts from the main fabric with a backstitch.
We sew the lining fabric parts with a regular seam.
We fold the main and lining parts with the wrong sides facing each other.
We process the sections with bias tape or make a hem with stitching.
We install buttons, sew elastic band and cuffs onto the neck. The jumpsuit is ready!
Printing out key pattern elements
To complete this point, basic knowledge of office programs is sufficient:
- Download 2 patterns (right-click the bear on the link, select “Save as.”, indicate the path);
- Copy the pattern elements and paste them into the MSExcel document;
- Click on the picture and select “Size and Properties” in the menu that opens;
- Check the box - “scale by width and height” - 100% in the input window;
- Press the “Print” button or the hot keys CTRL+P.
The software will cut and print the template. Take glue, scissors, fold and glue it.
Scheme two:
The best option is below:
Pattern of a cap for a dog
First you need to take the necessary measurements: the length from the eyes to the base of the head along the top of the head. To this value add 2.5 centimeters for the bend of the fabric. The second measurement is similar, but measured between the ears. 5 millimeters of allowance are also added on each side. The last measurement is the circumference of the head with the forehead and chin. This parameter is divided by 4 and multiplied by 3. Also, an increase of 2.5 centimeters is added on each side for seams and bends of the material.
Pattern of a cap for a dog of any size
Important! Next, we begin making the pattern. It is shown in the picture below
It is applied on paper with a millimeter square. The visor and its length are made at will. After the drawing is ready, it is cut out and the pattern is ready.
Measurements for a dog vestKnitten things
Dogs have always been popular pets. These charming creatures require special care. Some of them are susceptible to adverse conditions and therefore require clothing.
There are a large number of stores for dogs that offer jackets, pants, and overalls from well-known brands. To save money, you can knit clothes for your pet yourself using detailed instructions and patterns.
Sweater
Pattern for knitting a sweater
The second version of a knitted sweater pattern with step-by-step instructions
The third version of a knitted sweater
A cap
Knitted hat pattern
The second version of the knitted hat pattern
The third version of the knitted hat pattern
Scarf
Pattern for a snood scarf
blanket
Pattern for a knitted blanket
Recommendations for choosing fabric
The fabric for overalls is selected depending on the season. If you are sewing a demi-season outfit, then the material should be:
- ventilated (so the skin can breathe);
- durable (then no bush branches or tall dead wood are scary);
- waterproof (wet fabric sticking to the dog’s body is a guarantee of pneumonia).
Membrane fabric is ideal for such tasks. A thin film is glued to the fabric of such fabric. For the winter version, you will also need a lining - preferably not on a mesh basis, otherwise the hair will get into the perforations, and putting on the outfit will be painful for the dog. It is better to take viscose, satin, twill, etc. As for summer overalls, they can be sewn from thin raincoat fabric or microfiber.
What basic measurements do you need to take to knit a sweater for a dog?
- Distance from the withers to the base of the tail. More likely, even the distance from the place where the collar will be to the base of the tail. In other words, the length of the product.
2. The distance between the front legs, measured across the back. That is, the width of the back. Measure approximately from armpit to armpit.
3. It is clear that the dog will have fun, spin, bite your hands and will not allow you to accurately measure the width of the front between the front paws. This will be a very inaccurate number. Therefore, we do this: we measure the full volume along the chest and back of the dog immediately behind the front paws. From the resulting figure, subtract the width of the back and get the width of the chest - everything is very simple.
4. Now the most interesting procedure. Stroke your dog, scratch behind the ears, back, and when she flops on her back and shows her tummy, pet him and scratch him too. And, having calmed your dog, slowly lay it on its side. Just make sure that the paws also lie calmly, preferably stretched out. Because you need to measure on the side the distance between the front and back paws.
5. Now let’s measure the volume “at the waist,” that is, immediately in front of the hind legs along the tummy and back. For what? And so that the sweater does not “hang” on your stomach. Since the volume on the stomach is almost always less than the volume near the front legs, i.e. on the chest line. At the same time, you leave the width of the back in numbers the same as that of the front legs. But the front width decreases.
6. Well, and one more thing - it would be good to measure the volume of the neck so that the collar is not very wide.
7. Well, and of course, the length and volume of the front legs. And if you sew or knit overalls, the back legs too.
Here I have laid out the basis for taking measurements
Give up the idea of simply tying a “pipe” with holes for the front paws. These are very uncomfortable clothes. I made this sweater for Zosechka the dog from my old knitted hat. It turned out to be uncomfortable. The collar turns out to be wide, but the sweater is narrow in the chest.
Those who know how to knit or sew have already roughly understood how they can now make clothes for their dog, judging by the basic standards.
How to take measurements correctly, choosing material
About taking measurements from an animal
For this purpose, measurements should be taken. Designing an outfit, modeling like people
Requires perseverance, attention and drawing skills
Taking measurements
Rules for taking measurements:
- Measurements of the animal are made in a “standing” position.
- Volumes are measured taking into account the width margin.
- If it is not possible to clarify the measured parameters (they fluctuate), then you should choose a larger value.
- The size is selected taking into account the modeling of clothing.
- The choice should be based on the length of the animal’s back.
- To determine the volume of the chest, the dog's chest is measured (more precisely, the widest part plus 2-4 centimeters is measured, taking into account the loose fit).
- The volume of the neck is determined (corresponds to the size of the collar).
- The back length is the length of the spine (the distance between the neck and the base of the tail).
Important! The main parameter when taking measurements is the length of the animal’s back
About the choice of material
The constructed pattern is transferred to the fabric from which clothing for the animal will be made. A crucial moment is the choice of material and accessories present in dog clothing models:
- lightning;
- fasteners;
- Velcro;
- finishing tapes;
- rubber bands
A variety of ribbons Material should be selected taking into account seasonality. On a hot summer day - no overheating, the animal should breathe freely. On cool days, clothing is essential to retain body heat. Therefore, natural fabrics are used, primarily cotton.
Inclement, rainy weather brings dampness, taking this into account, clothes are made from waterproof fabrics (Bologna, raincoat fabrics). For dressing “underneath”, wool and cotton jumpers, suits, sweaters are suitable, which you can knit yourself.
In frost and snow, the animal is saved from the cold by coats made of drape, wool, faux fur, fleece, padding polyester.
Insulated winter blanket
And here is the second blanket for the pet. This is a warmer winter blanket for a dog.
I also saw this model on the Internet.
And I decided to sew the same cool insulated winter blanket for my Jack.
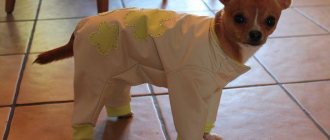
How to sew a winter overall for a Chihuahua
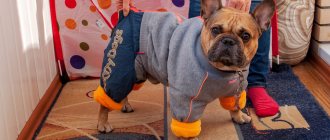
An unusual jumpsuit can be sewn not only for a Chihuahua, but also for a pug, spitz, poodle and other small dogs. Visually this outfit resembles a coat. By dressing your animal in such clothes, you don’t have to worry that he will be cold during a walk.
- Take the necessary measurements and draw a diagram on paper.
- Fold the fabric in half and cut out two halves of the future product. Be sure to make small seam allowances.
- Cut out the lining details in the same way.
- Sew the outer parts with the lining, leaving only the sleeves unfinished.
- Sew a strip along the bottom, the width of which should correspond to the width of the chest.
- Sew one of the top seams with a stripe, and sew a zipper into the remaining one.
- Knit a neat collar and sew it to the hem.
- Connect all remaining parts.
Advice: the length of the sleeves should not be short. It's better if they are a little longer. The cuffs equipped with elastic bands will prevent the fabric from drooping, and the animal will be much more comfortable in loose clothing.
Final preliminary fitting of the overalls
All corrections and adjustments have been made, now you need to re-sew a test copy from fabric that you don’t mind. When trying on, we focus on the length of the legs and adjust if necessary. We also need to finalize the cutouts for the tail and genitals. They are schematically applied with a marker on a test piece before trying on. All amendments are duplicated on the pattern.
As a result, you will be able to sew a jumpsuit with your own hands in which your pet will be comfortable sitting, walking, jumping, running and playing. It will be exclusive, not serial, and will make your pet stand out from the crowd.
Overalls for a miniature dog made from terry socks
From a pair of ordinary socks you can make two original overalls at once, each of which will be special and very comfortable. Even without having sewing skills, you can make such outfits without the slightest problem.
- socks;
- yarn for knitting “Grass”;
- elastic threads;
- needle;
- hook;
- paper;
- ruler.
- Place the sock with the heel up and draw a center line from the center of the heel to the toe.
- After this, draw a perpendicular line at a distance of about three centimeters.
- Measure ten centimeters from this line and draw another segment.
- On these perpendicular lines, mark the locations of future holes for the paws.
- On paper, make a template for future holes by drawing a pair of circles with a diameter of three centimeters and a pair of ovals, the diameter of which should be 6x3 centimeters.
- Secure the templates with threads in the designated areas on the fabric.
- Secure the knitwear around the perimeter of the template with an elastic thread using a machine stitch so that the fabric does not fray.
- Cut holes and remove templates.
- Using a hook and yarn, tie all the holes, making regular double crochets.
- Try the blank on the animal and mark all the necessary holes with chalk.
- Process and cut them in the same way as in the case of the slots for the paws.
Make a similar jumpsuit from the second sock, but additionally knit the sleeves, carefully cut and carefully process the holes for the ears.
Editing a pattern to size
If the length of the pet’s back is more or less than 47 cm, it is enough to make a simple calculation:
Where:
— the length of your pet’s back;
M is a percentage number that is set in the scaling window in the MSExcel file.
For example:
If = 50 cm, then M (according to calculations) = 50 * 100 47 = 106.4
It is advisable to initially sew a “test” jumpsuit from an old duvet cover or sheet. This will insure you against damage to the base material and will help identify errors in the pattern, because each dog is unique, it is impossible to create a universal pattern.
A little about fasteners
A comfortable cut for a dog jumpsuit pattern is only half the success. The second part depends on the correct fastener. For fastening the following are used:
- buttons (convenient for demi-season and summer clothes for small breeds);
- Velcro (suitable for any season, but require additional fasteners);
- ties (act as decorative fastenings, and only for small dogs);
- elastic bands (the fastener is universal, since depending on the thickness it can be used for “clients” of different weight categories).
Zipper insert with flap
We sew a zipper along the back line. It should be taken into account that it is more convenient if the movement of the zipper slider is carried out from the tail to the neck. Naturally, you need a strip under the zipper. We cut it out of the base material, and insert loose batting inside the plank. If you need a completely waterproof option, you can make a valve. It will prevent moisture from getting into the middle of the overalls in rainy weather.
The plank performs the following functions:
- Gives the product rigidity;
- Makes fastening easier;
- Helps avoid discomfort and friction on the skin of the back.
Cut out a rectangular strip. Its dimensions are 10 cm * back length + 2-3 cm margin (for transition to the collar and hiding the edge of the clasp). We fold the finished strip lengthwise, but not in the middle, but with a shift (it is necessary that the lower part is 2 cm wider than the upper). That is, the lower part is 6 cm, the upper part is 4 cm. The gap will allow you to wrap the zipper on the wrong side, hiding its edges and batting. This will also solve the problem of “wool collecting”.
The zipper should be shorter than the strap on both sides. The part of the strip that protrudes is placed edge to edge on top of the wrong side of the side along the back line and stitched. Then, with the right sides folded, the zipper itself and the side are sewn together. Turn the seam inward and sew an additional fastening seam at the edge of the zipper. The second part of the lock is sewn on in the same way, only without the bar.
If the dog is walked in a collar, then a hole for a leash is provided in the overalls. If the dog walks with a harness on, then it is more acceptable to make the bar long.