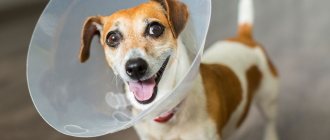
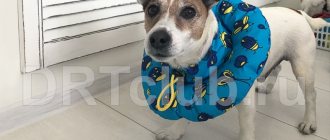
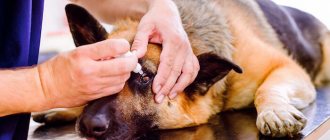
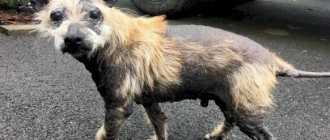
There are many situations when you may need a cone for a dog's neck. After all, animals, like people, are susceptible to various diseases, injuries, and operations. But unlike a person, a dog does not understand that the wound cannot be scratched, licked or disturbed in any other way. Otherwise, there is a risk of infection of the body. To discourage this behavior, a special collar was developed.
Protective Barrier for Dogs
When is a protective collar needed?
This device is necessary in order to protect problem areas on the animal’s body from external influences, to avoid their damage and infection in the wound.
A neck cap for a dog is made in the form of a cone - this shape eliminates possible contact of the pet (with the help of paws or tongue) with the injured area. The device frees the owner from the need to regularly bandage the wound, causing significant inconvenience to the animal. On a note! The dog gets used to the collar in 2-3 days.
Veterinarians advise training your pet to wear the accessory in advance (at least a week in advance) if surgery is planned soon. Indications for wearing a collar are:
- rehabilitation period after surgery (abdominal surgery, castration, sterilization);
- false puppyhood (so that the dog does not lick the nipples and does not stimulate milk production);
- diseases of the ears and eyes;
- skin pathologies;
- deworming (to prevent re-infestation);
- healing of cropped ears;
- burns;
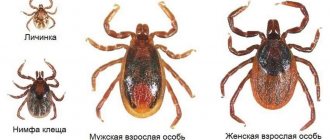
- treatment of fur to protect against skin parasites, such as ticks or fleas (if you do not wear a protective dog collar, the pet will lick the drug, which can lead to poisoning of the animal).
This is interesting! The medical headband for dogs was invented by veterinarian Frank L. Johnson in the 70s of the last century. He drew attention to the similarity of the device with a collar for ladies of the court. Thus the design received the name “Elizabethan collar”.
Manufacturing instructions
We cut a circle with a diameter of 30 cm from a sheet of foam rubber. We cut a hole in the middle so that the animal’s head can fit through. You should get something similar to a foam donut.
On the fabric we cut out 2 circles with a diameter of 30 cm. We leave seam allowances of 2-3 cm along the outer and inner diameters and cut them out.
We fold the fabric circles face to face and sew along the outer diameter. Turn it inside out.
We put a foam donut inside and carefully sew it up along the inside.
The base of the protective collar is ready, now you need to make the clasp:
- From the fabric intended for the fastener, cut out a strip 8-10 cm wide and a length equal to 2 lengths of the inner circumference of the foam collar.
- Sew the side sections together to make a ring.
- Now fold it in half lengthwise with the front side facing out. We sew off a little less than half along the entire length. This is where we will thread the lace.
- Sew the loose ends in a circle to the foam base (like a cuff on a sleeve). Insert the lace.
That's all, the collar is ready. All that remains is to put it on the animal’s neck and tighten the lace. It is very important to ensure that your finger fits freely between the tie and the pet’s neck. If tightened too tightly, your pet may suffocate.
Product options and their features
Collars for dogs differ according to the following criteria:
- Purchased at a pharmacy or veterinary clinic, or made independently (from fabric, plastic, for example, from a bucket or bottle).
- Material of manufacture, shape and other features.
The following options for protective collars are available:
- Elizabethan (classical);
- plastic tube (closes into a circle, and a removable cover is put on top of it, which does not allow the neck to move freely, fixing it securely);
- soft collars;
- inflatable;
- elastic neck corsets (made of soft foam, secured to the neck with Velcro, limiting its mobility) - recommended for protecting problem areas on the body, not on the head.
Elizabethan collar
Soft
The design is made of waterproof hypoallergenic material.
Product advantages:
- flexibility;
- ease;
- safety;
- strength;
- Suitable for reusable use (the item can be neatly folded and stored).
Flaws:
- the device is not suitable for large dogs, since the animal can reach the collar and crush the pliable material;
- if the dog has a long neck, this design will not protect the head well enough;
- lack of free view.
Another type of soft postoperative collar is a cone-shaped design made of waterproof nylon and equipped with a plastic insert at the bottom. The latter gives additional rigidity to the device. As a result, the pet cannot bend the barrier. The collar is fixed with Velcro.
On a note! The advantage of soft products is the most comfortable use: the animal can eat and sleep in it without any problems. This collar does not make sharp sounds when in contact with the environment. The fabric base ensures normal air exchange and thermoregulation.
Soft collar for dogs
Inflatable
This type of collar includes many variations, which differ in the type of material from which they are made. A common feature of all such structures is a shape reminiscent of a lifebuoy. The item is made of a soft and flexible material that can be transparent or include a nylon cover.
Advantages:
- comfortable use;
- free review;
- good fixation;
- easy transportation.
Flaws:
- rapid wear (dogs can easily tear the material with their claws when trying to reach the problem area) when used without a cover;
- not suitable for dogs with long limbs.
Inflatable collar
Plastic
This is a classic Elizabethan collar. The shape of the structure is a truncated cone. Material: transparent, translucent or colored plastic.
Advantages:
- transparency of the material (in most cases);
- flexibility;
- ease of care of the device (very easy to clean);
- low cost;
- availability (sold in every pet store).
Disadvantages of the product:
- noise when in contact with surrounding objects (the sounds are sharp and loud, which makes the dog scared);
- short service life (such a collar quickly becomes unusable because the plastic cracks and breaks).
How to choose a size
The correct size of the product is of great importance. This parameter determines the degree of collar fixation and the comfort of the animal (the ability to eat, sleep, walk normally). It is important that the structure does not come into contact with the problem area.
The size of the product depends on the width of the barrier (7.5-25 cm). For example, 10 and 12 are suitable for small breeds, 15 for medium-sized ones, and 20 and 25 are used for large animals (shepherds, St. Bernards, Great Danes).
On a note! It is not always possible to try on an item before purchasing, as some manufacturers pack the collar in film. In this case, you need to consult the seller.
Your doctor will help you choose the right option depending on the size, age, breed of your pet, purpose of use (limiting access to the body or head) and characteristics of the injured area.
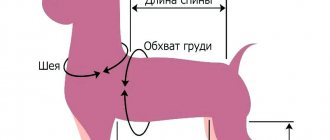
The main criterion when choosing the right size is neck circumference. You can measure it at home using a measuring tape.
Recommendation! If the animal has a long, mobile neck (this is typical for breeds such as Great Danes, Collies, Shepherds, and Spaniels), it is better to choose restraints that completely cover the nose. Low collars are suitable for dogs with short necks (bulldogs, pugs, Pekingese, boxers) - these pets do not require maximum fixation and limited mobility.
The height of the cone for dogs is selected depending on the location of the painful area on the animal’s body. For example, a low barrier will not allow you to touch your back, but it will not prevent you from scratching your face.
Collar for large dogs
Boots
Dog boots are necessary for those pets who live in cold regions. They will protect the dog's paws from frostbite. They are also necessary to protect the pads from the salt that is sprinkled on roads in many cities. Boots are made not only for small dogs, but also for large breed animals.
Sewing instructions
To make boots for a dog with your own hands, we will need thick fabric, material for the sole, elastic bands and fasteners. Let's start work.
- We take measurements - this is the diameter of the sole and the height of the paw to the wrist joint, as well as the thickness of the paw.
- The sole is a circle cut from thick leather or fabric along the diameter of the foot. We prepare two for the front legs and two for the hind legs.
- We cut out four rectangles from the fabric, the height of which is the length from the floor to the wrist, and the width is the thickness of the paw. We sew them together to make “socks”.
- Above the paw and in the area of the hock joint we make drawstrings into which an elastic band is inserted with clamps.
- We sew on the sole, and the shoes are ready.
We knit ourselves
Dog boots can also be knitted. To do this, we create ordinary stockings from any dense yarn. We use the same measurements as in the previous version. After knitting the stockings, we sew the sole to them and make drawstrings with an elastic band. For craftswomen who own knitting needles, knitting shoes will be even easier than sewing them.
Loading …
Terms of use
In order for a post-op dog collar to perform its task as effectively as possible, it must be used correctly. The main problem that owners face is the dog’s reluctance to wear a collar, since the thing is new and uncomfortable. At the first attempt to put a barrier on a pet, the owner encounters active resistance from the dog (the animal may growl or bite the hand). Even if you managed to fix the collar, the dog will certainly try to remove it and will become nervous and angry.
To speed up and facilitate the adaptation process, you need to prepare the dog in advance. This option is suitable for those cases when you do not urgently need to put on a collar. For example, before surgery.
Procedure:
- The pet needs to be shown the item and allowed to sniff it.
- Prepare the item for use (assemble, inflate, test fastenings, etc.) and demonstrate it to the dog again.
- Try on the product and make sure that the parameters are selected correctly - the collar does not press, does not fall off, or rubs the skin.
- Distract your pet with play, attention or food. Under no circumstances should you leave an animal unattended for a long time.
- The barrier should be periodically removed and put on again, each time extending the period of wear.
- When the funnel is removed, you must carefully monitor the dog's behavior and do not allow it to lick or scratch the wound.
On a note! Most often, dogs quickly adapt to new “things” and come to terms with the presence of a protective collar. If the pet refuses to eat, then the protection must be removed during feeding.
The collar is secured on the neck with Velcro or special strips that are attached to the collar.
Manufacturing process
Let's start building a pattern:
- Draw a small circle on paper. Its radius is equal to the circumference of the animal's neck divided by 6.28.
- To the resulting radius, add the length of the animal’s head and another 2-3 cm for reserve. This will give you the radius of the second circle. It needs to be set aside from the same point as the first one.
- Now let's build the third circle. It will lie inside the first one, its radius is 2-4 cm smaller. From here we will cut out the fasteners for the collar.
- We cut the pattern along the largest circle, taking into account the margin. If you doubt the correctness of the calculations, you can cut more and, if necessary, remove the excess.
- From the reference point (center), draw a vertical line and cut the workpiece along it.
- Cut out the smallest circle located inside.
- From the cut line to the second circle we make several perpendicular cuts and form 5-6 straps for the loops.
The pattern is ready. Now you should try it on your pet and make the necessary adjustments to the width. Using a marker and a ballpoint pen, transfer the finished pattern onto a plastic base. Cut it out. We fold the strips prepared for the loops in half and fasten them with a stapler. We glue all staples and sharp edges with adhesive tape or adhesive tape. We thread the collar through the loops and fasten the device on the cat/dog.
This collar is made very quickly, but has a significant drawback. It is quite suitable as an ambulance. As long as the cat is weak and does not show obvious activity, it will perform its function properly. A stronger animal will most likely easily crush the structure.
Wearing a collar after castration
Many owners are interested in the question of how long to wear a collar after castration. The protection is not removed until the stitches are removed (that is, within 10-12 days). In this case, the barrier must be on the dog for 24 hours without interruption. Many owners are misled into thinking that dog saliva has medicinal properties. After such contact, the seams begin to fester and fall apart. As a result, the rehabilitation period is delayed several times and the need for antibacterial therapy arises. You will also have to treat the problem area with medical means.
After 10-12 days from the date of the operation, the doctor removes the threads and assesses the animal’s condition. If the stitch has not healed sufficiently, wearing the dog collar will have to be extended for a few more days. An additional day will be needed for the thread marks to heal completely.
On a note! If the stitch was cosmetic, then wearing a dog collar after surgery is necessary for 7-10 days.
If a second appointment with the doctor is not planned, the moment to remove the collar is determined by the owner. You can remove the protection as soon as pink skin appears at the seam site. The problem area should be dry and clean, with signs of fresh growth.
A protective collar for a dog helps the animal to safely survive the rehabilitation period after surgery, as well as protect the pet from possible drug poisoning.
