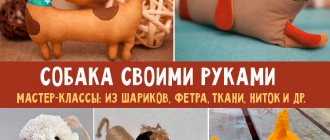
Soft toys are loved by both kids and adults. They can become not only interior decoration, but also real friends! If your child has been asking to get a dog for a long time, and you are not yet ready for this, the ideal option is a plush, felt or fabric pet that does not require a walk or significant expenses on food and treats.
Cute do-it-yourself dogs, patterns and descriptions of which are offered in today’s lesson, can serve as either a full-fledged soft toy - the object of a child’s inexhaustible love, or a small compact keychain for a bag, backpack or a bunch of keys. Today we will sew together several versions of dogs. Don't worry, it's not difficult at all - feel free to involve your children in this simple creativity!
Pom pom dog
Both children and adults will love this cute fluffy toy made from pompoms, and even a child can sew it!
For the lesson you need to prepare:
- medium thickness knitting yarn in cream and beige colors;
- two medium beads and one large or black yarn;
- scissors;
- beige felt for ears;
- cardboard “donuts”;
- glue.
Dog made from pompoms: step-by-step master class
We cut out two “donuts” of the same diameter from thick cardboard, then put them together and carefully wind the yarn (the tighter we do this, the fluffier the pompom will be). Having wound the circle to the end, hold the threads in the center and carefully cut the yarn between the “donuts” along the outer edge. Next, we pass a long thread between the templates and tie it into a knot. Remove the cardboard template and fluff the finished pompom.
In total, we need to make three such fluffy parts of the dog: two large ones (for the head and body) and one small one (for the tail).
We tie a small section of the pompom with a thread of a contrasting color and fix it.
Using scissors, we trim the future head of the dog, leaving a little “fur” on the face.
We carefully trim the pompom for the body, giving it a more elongated shape.
Next, glue two large pom-poms together.
We sew or knit the eyes and nose of the dog with thread.
Cut out long ears from beige thick felt.
Using glue, attach the ears and tail to the places provided for them. That's all, the do-it-yourself pom-pom dog is ready!
Coffee dog
Sew the symbol of 2022 - a cozy textile dog made using an unusual technique! This toy will be a wonderful gift for friends and will decorate any interior.
For the lesson you need to prepare:
- white calico 50x50 cm;
- any filler (holofiber, cotton wool, foam);
- PVA glue;
- regular instant coffee;
- tassels;
- acrylic paints;
- a needle;
- sewing threads;
- patterns.
DIY coffee dog: reduced pattern
Patterns need to be printed or redrawn.
You can take them life-size (mini version for a keychain) or scale them to the desired size. If we enlarge the pattern, we need to take more fabric.
We sew a dog from fabric with our own hands: master class
We transfer the pattern to the fabric and cut out two blanks. Having folded them face to face, we sew them together, leaving a little room for turning them inside out.
We turn the workpiece inside out and fill it with any filling to your taste. Sew up the hole using a blind stitch. We fill the dachshund's ears quite a bit.
We sew the ears in their proper place.
Dilute one tablespoon of granulated coffee in three tablespoons of hot water and wait until the coffee cools down. Add a small pinch of vanillin (do not confuse it with vanilla sugar!) and one tablespoon of PVA glue to the already cooled liquid. Using a small brush, we paint the toys, blot the excess “paint” with a napkin to avoid unsightly stains.
Dry the toys in an oven preheated to 75 degrees for about 10 minutes or simply dry them with a hairdryer.
Add 0.5 teaspoon of brown acrylic paint to the remaining coffee slurry and paint randomly shaped spots on the dog.
Again, thoroughly dry the textile toys and begin to design the faces: draw eyes, noses and mouths. Let the paint dry thoroughly and cover the eyes and nose of the toys with acrylic varnish for shine.
That's it, your attic coffee dogs are ready!
Cushion-dog with patterns
If you want to give yourself or your loved ones a more impressive pet than a small dog, then the next lesson is for you! An original interior sofa cushion in the shape of a sleeping dog will be a wonderful decoration in any interior!
DIY dog pillow: full-size patterns
Below are the patterns. You can redraw them on paper or print them in the desired format.
Master class on sewing pillows for beginners
To start working on the pillow, we need to select textiles. We choose the color and texture of the fabric to suit our taste, but keep in mind that the material must be quite dense.
Transfer the pattern to the fabric and carefully cut it out. We sew the blanks of the dog’s body and sew the halves of the tail to them.
We sew in or sew on a sewing machine the eyes, mouth and nose of the dog.
We process and sew the ears to the head of the pillow dog without stuffing them with filler.
We sew the parts of the body along the lower part, leaving a little space for filling the workpiece. We sew a hidden zipper into it.
We pass the top seam from the nose to the tail of the pillow dog.
We sew the paws together and stuff them with stuffing. We pin them in the right places to the body (don’t forget to turn it onto the face before doing this).
Turn the product inside out and sew all the seams. We cut and cut the allowances on the convex and concave elements, as shown in the photo.
We turn the pad inside out again through the zipper and stuff it.
Ready! The soft toy is waiting for its owner!
Pug sofa cushion: video master class
Making New Year's toys with your own hands with diagrams for beginners
Now I’ll step back a little from the topic and offer you different options for products; we’ll make not only dogs, but also other animals and heroes.
- The main beauty of the Christmas tree holiday
- Chickens and Sheep
- Cow
- Krosh and Kitty
- Funny owls
- Fawn
- Father Frost
- Snowman, Cookie and Santa Claus
All these lovely soft toys are made according to the same algorithm described above, and having the patterns, I think you will not have any difficulties in making them. And to help you, there is also a video plot, everything is shown and explained step by step, watch it quickly:
Brooch-dog
An unusual accessory in the form of a dog brooch will be an excellent gift for lovers of these pets! The size of the brooch allows you to attach it to a coat or jacket, as well as to a backpack, handbag or scarf.
For the lesson you need to prepare:
- a small piece of calico;
- sewing threads;
- a needle;
- scissors;
- filler (sintepon);
- foam sponge;
- acrylic paints white and brown;
- black and brown dry pastels;
- small black beads;
- baked plastic for spout;
- pin clasp;
- fabric for the back of the brooch.
Dog pattern
How to sew a dog with your own hands: master class on sewing a brooch
First we will need to transfer the pattern onto the fabric folded in half. After this, you need to stitch the template along the contour, leaving room for turning it inside out. Next, we cut it out, retreating 5 mm from the edge, with the exception of the place where we will turn the brooch inside out - here we leave a 1 cm allowance.
Now you need to turn the workpiece out and fill it evenly, but not too tightly, with padding polyester. The thickness of the part should not exceed 5 mm. Sew up the hole.
Then we need to transfer the internal lines of the dog onto the blank using a pencil.
Using a “back needle” stitch, we manually stitch the dog’s ears, chin and paws.
We tighten the areas under the eyes.
Having ironed the brooch with an iron, we proceed to painting: using white acrylic paint and a sponge, we evenly paint the workpiece from the front side, not missing the areas near the seams. Dry the fabric thoroughly.
Using brown acrylic paint, draw random spots on the dog’s “fur.”
Now it’s the turn of the nose: we sculpt it from baked black plastic or simply paint it with paint. Sew on the eyes.
Using brown pastel rubbed on sandpaper, we tint the product with an elastic brush in the places of transition from white to brown. We do the same in the places of tightening and stitching with black pastel.
Now the lining: trace the outline, adding 5 mm for allowances. From the inside of the product we mark the place and sew a pin fastener. Next, we cut out slots for a pin on the blank for the back of the brooch (after having previously greased these places with PVA glue).
Having placed the wrong part on the back part and folded the seam allowances inside the product, we sew it onto the brooch using a hidden seam. The fabric dog brooch is ready!
Felt puppy brooch
For the lesson you need to prepare:
- lilac felt + remains of brown and black;
- sewing threads (white, lilac, black);
- a needle;
- scissors;
- chalk or pencil;
- a simple pin.
Felt dogs: a simple pattern
We transfer the dog pattern from felt onto paper and cut it out.
Sewing a felt dog for a keychain with your own hands: master class
We cut out the body and tail from lilac felt (in two copies). We cut out the ear (x 2), nose and spot near the eye from the remains of black fabric. Now we cut the brown felt: for the handbag we cut out a strip of 3 x 1.5 cm and 3 x 0.4 cm.
We move one piece of the puppy’s body towards us, thread a white thread into the needle and sew in a squinted eye on the left. If you find it difficult to navigate the fabric, you can mark the eye lines in advance with a pencil. Place the stitches as close to each other as possible.
We embroider exactly the same eye on a black spot.
Place the stain on the dog's face and sew it on using an over-the-edge seam or through stitches.
In the central part of the muzzle we sew the nose with a couple of stitches.
Without cutting the thread, we begin to embroider the mouth.
We embroider the mouth: first one part of it, then the other.
We put the body parts together. Place the front part on top. We connect all the parts with an overcast seam. We stick the needle in first from the inside out, then pull it out and form a loop with the thread.
We thread a needle through it from behind and tighten the thread.
We connect all parts of the puppy’s body.
We sew the tail in the same way.
Sew it to the back of the puppy's body.
We position the tail so that when finished it is on the front side of the product.
Now we work with the ears.
We take the ear and sew it on using a seam “over the edge” where the head is slightly rounded.
Next, we bend the ear forward and sew it to the head.
We do the same with the second part.
Next we sew a handbag.
We fold the part in half and put a decorative stitch along the edge with black thread. We pierce the material right through, connecting both parts of the bag.
Sew the clasp to the center of the bag.
We take a narrow strip and make dotted stitches along the cuts. Next, sew the strap to one of the edges of the bag.
We attach the purse to the puppy’s body and pin it with a pin. We position the dog's handle so that it extends beyond the edge of the bag. We sew the handbag and strap in several places with hidden stitches.
We also attach all the details of the handbag to the back.
Cut a piece of lilac felt: it will cover the inside of the pin.
We apply this piece of felt to the back of the dog and sew it over the edge on one side, then put a pin inside and sew it on the back side. On the short sides we secure the pin inside the strip with several stitches.
We fasten the pin and check whether the clasp opens well.
That's it, the funny brooch is ready!
How to sew a dog from fur
This cute Dalmatian can be sewn from a piece of plush, fleece or fur - the main thing is that the fabric is dense and fluffy. It is important to note that the height of the finished toy in a sitting position, including the ears, is about 50 cm, so we advise you to be patient and have materials.
For a medium-sized dog you need to prepare:
- faux fur (white + dye or ready-made spotted) – cut 0.55 x 1.4 m;
- flesh-colored satin 20 x 30 cm;
- a small piece of leather (faux or natural) or suede 6 x 8 cm black
- colors for the nose;
- a little red felt - 4 x 23 cm;
- holofiber for stuffing the dog;
- sewing threads;
- two black beads or buttons for eyes with a diameter of 2 cm;
- small bell, 2 cm high;
- red ribbon 1.5 x 75 cm;
- glue "Moment" or similar.
Scaled pattern
Full size dog pattern
To sew a dog, we need to prepare the details:
- 2 x side body;
- 2 x lower torso;
- 1 x intermediate head part;
- 2 x dog ears made of fur fabric + 2 x satin; one half of the ponytail detail - when cutting, we will get a whole ponytail;
- 1 x satin piece for insertion on the muzzle;
- 1 x leather/suede trim spout;
- 1 x felt tongue.
The outline is indicated by a dotted line: ———.
How blanks are cut according to patterns
First, we will need to transfer the details from the pattern sheet onto any translucent paper, then we will proceed directly to cutting.
It is necessary to transfer the contours of the pattern to the wrong side of the fur so that the pile of the fabric is in the same direction. Each piece is cut out separately, the tail is added from the fold line.
Important! Remember to translate seam numbers!
When cutting out the parts, make seam allowances of 1 cm, cut with well-sharpened scissors, trying to cut only along the fabric base, without touching the pile.
Important! We cut all felt, satin and leather parts without adding seam allowances!
DIY fur dog: master class
Stage one
We proceed directly to combining the parts.
First you need to grind off the seams of the blanks, matching the seam numbers, retreating 1 cm from the cuts and hiding the fur inside using scissors or an awl.
Next, you need to shallowly undercut the cuts at the rounding points and right down to the stitches - the corners of the parts, so that later there will be no problems with turning the dog right side out.
Now we cut off the allowances on the outer corners.
The next stage: connecting the satin and fur parts of the ears with stitches, grinding the tail along the outer cut. We turn the product inside out and smooth it out.
Stage two
We stitch the blanks number 2 between seams 1 and 2 on both sides only 8 cm, then between seams 1 and 2 we grind between parts number 1.
Having gathered workpiece 3 on both sides, we sew it on one side with the first part No. 1 from seam 6.
Next, we make a cut for the muzzle, carefully turning the top and bottom of the jaw with part No. 6. After this, we begin stitching from seam 6 through seams 4-2 to the 2nd part No. 1, inserting the tail.
Now we need to turn the dog right side out and stuff it with holofiber, putting more stuffing into the chest and legs so that the dog can sit. We connect the incision along the abdomen with a hidden seam.
Stage three
All we have to do is sew on the ears in a semicircle, sew in the eyes and glue on the nose, folding the bottom edge, following the arrows. Sew on a red felt tongue. We tie a red ribbon with a bell around the toy's neck.
Material selection
For the manufacture of each model, it is recommended to select appropriate textiles. Options can be very diverse: plush, jeans, felt, chintz, knitwear, corduroy and other durable fabrics. Fur is used as decoration.
To ensure that parts can be sewn together without problems, you should choose high-quality textiles:
- The fabric should be dense.
- The quality of the textiles will affect the appearance of the toy, so it is advisable to choose a good base.
- The fabric should not crumble at the cut point.
- It is recommended to use natural fabrics to avoid problems during operation.
Fabrics for sewing
When choosing, you should pay attention to the appearance, color design and tactile sensation of touching the fabric.
Felt dog: Scotch Terrier
Simple Scottish Terrier dogs will be a great decoration for a bag or backpack! Sewing them is not at all difficult, so you can involve children in the process.
For a lesson on sewing toys you need to prepare:
- the remains of beige felt and quite a bit of white;
- sewing threads;
- pins;
- holofiber or any other filler;
- a needle;
- scissors;
- translucent paper;
- chalk or pencil;
- bright ribbon;
- two black buttons or beads for eyes;
- glue.
We prepare patterns for the dog:
How to sew a dog: master class
So, first we need to print out the patterns. We cut them out using scissors and lay out the patterns on felt, securing them with pins. We cut out a total of two blanks for the sides and paws, one for the forehead and ears.
We pin the parts using pins. We make a primary basting and connect it together with stitches, while leaving a small area unstitched for stuffing the toy with holofiber (immediately after filling we will sew it together).
Sew or glue black eye beads.
We make a collar for the dog from a piece of bright satin ribbon, cut out a flower from white felt and glue or sew it onto the ribbon. Wrap the collar around the Scotch Terrier's neck and glue the edges together.
Required Tools
To sew a textile dog, you need to prepare the appropriate tools and materials. Standard set for work:
- Needles and threads. If the material is hard, an awl will also come in handy.
- Scissors, chalk, pencil and paper to form a pattern.
- Sintepon or holofiber for filling the figure.
- Beads for making eyes or nose.
- The main material for making the body.
- Safety pins for securing parts during assembly.
Tools and Materials Required
Additional tools and materials may come in handy when making complex dog toys.
This is interesting: Pattern of a soft toy – Snoopy the Dog
Felt dogs: a puppy with a spot on its face
For a lesson on sewing a small dog you need to prepare:
- felt (beige, brown, white, pink, blue);
- sewing pins;
- threads in color plus black;
- holofiber for stuffing toys;
- a needle;
- scissors;
- tracing paper or some other paper;
- chalk or pencil;
- thin ribbons;
- black beads or buttons;
- glue.
The simplest dog: master class
During the sewing process, we adhere to the given work pattern.
We transfer all the details of the future dog onto tracing paper. We cut out two pieces of the body, a pair of ears and one spot.
Transfer the design to sheets of felt. It is important here that one of the ears is contrasting, matching the color of the spot.
Sew or glue the spot onto the dog's face. We embroider the mouth, nose and eyes with dark threads. To make the nose voluminous, you can simply glue a piece of black or brown felt. Eyes can be made from buttons or beads.
We connect the parts of the toy with stitches, while sewing in the ears. We leave some space to fill the puppy with holofiber. Having stuffed the product, sew up the hole with a hidden seam.
If the dog becomes a decoration for the Christmas tree or a keychain, then at this stage you can sew a small loop into the central part of the head.
Cut a thin ribbon and wrap it around the dog’s neck and glue on the collar. The toy is ready!
How to make the symbol of the year with your own hands
In addition to the usual softly printed products, I would like to suggest that you also make toys in the style of a keychain, for example, or a pincushion, or a backpack bag.
- Pincushion “Cute puppies with spots”
We will need: several sheets of felt in beige, chocolate, white, pink, blue; pins for fastening; threads; padding polyester for filling; needle; scissors; paper; gel pen or chalk; thin ribbons; small black beads; glue gun
Manufacturing process:
1. Print out the pattern and transfer all the details onto paper. Cut them out.
2. Transfer the design to felt sheets in the colors of your choice.
3. Sew a spot on the muzzle, and use dark threads to embroider the nose, eyes and mouth. Or you can make eyes from beads.
4. Sew both parts of the dog, not forgetting that you need to sew in the ears. We leave room for filling the puppy.
5. From a thin ribbon, cut pieces equal in length to the circumference of the puppy’s neck, and glue a collar on him.
- New Year's keychain "Pug"
We will need: several sheets of beige, chocolate and blue felt; pins for fastening; black and beige threads; padding polyester for filling; needle; scissors; paper; chalk; two small black beads; key ring; glue gun
Manufacturing process:
1. Transfer the patterns for the toy onto paper and cut them out.
2. Next, we trace the drawings onto felt sheets. You need two pieces each of the body, head, clothes, tail, ear, spot, and also one piece of the muzzle. Cut them out.
3. Sew spots on the face and embroider the mouth and nose with dark threads. We glue or sew beads in place of the eyes.
4. We sew both parts together and stuff them with filling, put on the clothes and fasten them with threads. We sew and stuff the tail and head with padding polyester. Don't forget that you need to attach the key ring while sewing.
For more experienced craftsmen, I advise you to make a soft pencil case like this:
For those who love to knit, there are many ideas for amigurumi animals, here is an example:
Felt dog: keychain in the shape of a pug
For the lesson on sewing a pug dog we need to prepare:
- sheets of felt (beige, chocolate, blue);
- pins for securing the fabric to the template;
- black and beige sewing threads;
- any filling for a soft toy;
- a needle;
- scissors;
- thin paper or tracing paper;
- chalk or pencil;
- two small black beads;
- ring for keychain;
- glue.
How to sew a funny pug: master class
We transfer the blanks onto tracing paper and cut them out.
Next, we transfer the design onto sheets of felt of the corresponding colors. We will need to cut out two elements of the body, head, clothes, tail, ears, spots, as well as one piece of the muzzle.
We sew spots on the dog's face. We embroider the mouth and nose with dark thread, and sew black beads in place of the eyes.
We connect both parts of the body with stitches, stuffing them with holofiber or some other filler, put clothes on it, and fasten it with threads. We sew and stuff the tail and head with holofiber. Don't forget to add a key ring while sewing. That's it, the keychain is ready!
Possible problems at the cutting stage
The pattern of a soft toy dog can turn out skewed or disproportionate if mistakes are made in the process of preparing the patterns. Any beginning seamstress may encounter such problems. The pattern pieces may initially be of different sizes. During the sewing process of such elements, overlaps or misalignments may occur.
Advice! If you use a ready-made template, such troubles can be avoided.
An additional nuisance can be low-quality fabric, which can dissolve into fibers during the formation of individual parts.