A dog bed is an indispensable attribute for the owner of a four-legged dog if the owner does not want the pet to sleep on the bed or sofa. After all, most dogs, like people, prefer to rest on something soft and comfortable. In pet stores, beds are quite expensive, even those designed for small dogs. And it’s much more profitable to make a place for the animal to rest yourself, you just have to spend a little of your time. We'll tell you how to make simple dog beds with your own hands.
DIY dog bed
Basic recommendations
Before you start making a bed, it’s worth studying a little theory, especially if you are making a bed for the first time and don’t even know which side to approach the manufacturing process.
Simple DIY dog bed
The basic requirements for a dog bed and recommendations for its creation are given below:
- It should be sewn from a fairly dense material that the animal will not damage with its claws the first time it is used. Dog claws are thick and strong and will easily damage thin fabric;
- The material for the bed should either be easy to wash or difficult to get dirty . Any dog emits a specific smell and, after sleeping for some time on its bed, will transfer part of the smell to it. In addition, the four-legged animal walks on the street, moves along the floor, carrying sand and garbage on its paws. Even if you regularly wash your animal’s paws, dirt will still appear on the bed;
It is desirable that the bed is easy to wash
Advice! To make it easier to keep the bed clean, we recommend making a couple of covers for it, which can be changed and washed when it gets dirty.
It is advisable to take care of removable covers
- The size of the dog matters . For a small dog, you can make a house-bed or a basket, and from the simplest materials: the weight of the animal will not push through even a very soft and thin filler. With large pets it is more difficult: here the bed should be designed a little differently. The body weight of some dogs reaches the weight of an adult human; try sleeping on the bare floor yourself and you will understand why the following requirements are imposed on the bed of a large four-legged animal: you need to use a dense filler, and it is also recommended to raise the horizontal surface of the bed above the floor and make an elastic bottom;
Several dog bed options
- think about where the bed will stand : will it fit in the chosen place, will it fit into the interior;
- The choice of the type of bed and materials for it is also influenced by the type of animal's fur . Almost all materials are suitable for short-haired dogs, but for long-haired dogs you should not use fleecy fabrics;
The material of the bed depends on the type of wool
- age of the animal : if the bed is made for an aged pet, then it should be more comfortable and soft than for a young dog. If a bed is created for a puppy, then it can be made “for growth”, that is, taking into account the growing up of the pet;
- watch your dog sleep . Some people like to stretch out to their full height, while others like to curl up in a ball. Based on this, you also need to choose the size of the crib.
DIY pet bed
On a note! If the dog finds the bed uncomfortable, he simply will not sleep on it. Therefore, it is important to try to make the crib so that your pet will like it. And it’s not about beauty - it should, first of all, be very comfortable for the dog.
Almost all materials are suitable for short-haired dogs
Bedding for the booth
If your pet lives on the street, he needs bedding all the more. Especially in winter.
An old rug is best suited for these purposes. Simply cut out the bedding to the required size and finish the edges with a thick needle and overcast stitch. This model is also suitable for a pet living in the house.
Hay and straw are environmentally friendly, smell good and retain heat. A significant drawback is that they cannot be disinfected, and they contain ticks, fleas, E. coli, eels, etc. To prevent infection, herbs with an antiparasitic effect (thyme, wormwood, sage) are added to the hay/straw. Rye, reeds, and wheat are most suitable for bedding. But it’s better not to use oats. He quickly turns to dust. And the litter needs to be shaken every day.
Cedar or pine sawdust is an excellent material for warm dog bedding. They are soft, fragrant, repel fleas and ticks, and easily absorb moisture and unpleasant odors.
In this case, you can replace only the place of contamination, and not the entire litter at once. But the sawdust quickly gets crushed. They need to be loosened regularly. Another drawback is that small particles can get into the dog’s eye or ear, causing inflammation. They are used with caution on puppies and small breeds.
The shavings are larger than sawdust. At the same time, it is soft and smells good. However, it retains heat worse than sawdust. Therefore, they lay it in a thick layer.
Some dog breeders use buckwheat husks as bedding for kennels. It is especially useful for sick animals, since it does not harbor parasites, is not hot in summer, and warm in winter. It also doesn't clump together.
Materials and tools
Let's talk a little more about the materials and tools that will be required to make the lounger. Basic tools:
- scissors;
- fabric marker or soap - for marking;
- measuring tape and ruler;
- needles and threads. The latter must be durable;
- tailor's pins;
- sewing machine (ideally, although the bed can be sewn by hand if desired).
Tailor's pins
We choose the material depending on the animal’s fur type and size. And special attention should be paid to padding . So, all kinds of holofiber and padding polyester can be used, but they are better suited for beds intended for small dogs. These materials are bad because they absorb odors easily and quickly, and they also quickly lose volume. We recommend replacing them with foam rubber, or even better, with coconut fiber. The latter hardly wrinkles, is easy to clean, and dries quickly.
Foam rubber as padding
Exterior finishing materials may vary. Denim, cotton and linen, tapestries, and a number of synthetic materials are ideal options. They are easy to wash, they are dense and durable, which means they are durable, and they practically do not create static electricity.
Advice! Avoid fleece, microfiber, flock. These materials have a pile that quickly gets dirty, is difficult to wash off dirt and is difficult to clean from wool. Although for smooth-haired breeds such fabrics can be safely used.
Cotton (fabric)
Color matters too. It is best to make a bed from a material of a dark color or with a small print. Too light options will quickly get dirty, and the bed will require frequent maintenance, and in between it will look untidy.
For a lounger, it is better to use dark material with a small print.
Do not decorate the bed! Beauty is not important to a dog, the main thing for it is to be comfortable. And all sorts of bows and beads will only disturb the pet. In addition, some animals begin to chew the decor and may choke.
For small breeds
The usual dimensions of bedding for small breeds (Spitz, Yorkshire terrier, etc.) are 50 x 40 cm, for small and medium breeds (American cocker spaniel, Welsh corgi, pug, etc.) – 70 x 50 cm. Cat beds are also suitable for them.
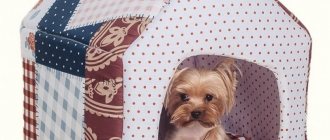
“Kids” are sensitive to drafts, which are very dangerous for them. Therefore, it is advisable that the beds be located on a slight elevation. Cribs, sofas, and baskets are suitable for them.
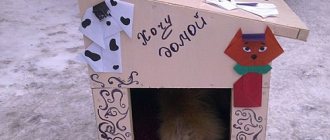
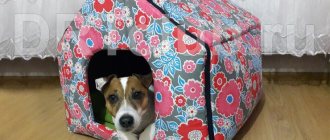
Small representatives of burrowing breeds (dachshunds, fox terriers, etc.) and “hairless” dogs (Mexican, Peruvian, etc.) prefer closed houses. Moreover, you can find “breed” houses. For example, for dachshunds they are elongated, burrow-like.
Types and patterns
A do-it-yourself dog bed can be different, and depending on the type chosen, you need to choose or build a pattern yourself. The most common options are given in the table below.
Bed with sides and ties
Classic rectangular bed
Round bed with drawstring
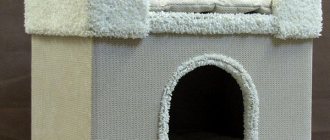
Dog house bed
In fact, if you use your imagination, you can come up with a lot of options for beds. There are cradle beds, bed beds and even sofa beds. Your choice will depend only on your desire and your capabilities. Now let's look at some photo instructions for creating beds with your own hands.
Model selection
The model of a dog bed depends on:
- dog size;
- personal skills of a seamstress (a square lounger without sides is easier to sew than a round one with sides).
A dog bed can be:
- round without sides;
- round with sides, like a basket;
- square or rectangular (with or without sides);
- in the shape of a house;
- in the form of a blanket or rug, one edge of which is not stitched so that the dog can climb inside.
Small dogs prefer houses, big dogs love freedom; a large and soft pillow is enough for them.
With sides
Round bed with drawstring
This transformable bed easily turns into a soft pillow or a comfortable bed for your pet - just tighten or loosen the drawstring at the top of the side of the product. This is a very simple option for a place to rest and sleep, suitable for pets of all sizes.
Step 1 . Prepare the material. This master class uses two colors of gabardine. The amount of fabric you need to take is sufficient to create a bed for a particular dog. In this case, holofiber is used for padding. You will also need a long cord to create a drawstring.
Cord for creating a drawstring
Two colors of fabric are used
Step 2 . Create a pattern based on the desired size of the bed. An example diagram looks like this.
An example of a pattern for a bed with a drawstring
Step 3 . Let's start cutting the fabric. To make the job easier, first cut out two squares of fabric.
Cutting fabric
Step 4 . Now each square needs to be divided into 16 sectors - markings must be applied. Find the middle of the square and draw vertical and horizontal lines through it, strictly parallel to the edges of the fabric. You will get 4 sectors. Then divide these sectors into two more parts with markings, and the next smaller sectors into another half (refer to the pattern diagram).
Marking
Step 5 . When the sectors are marked, make a mark at the same distance from the center along each line. Connect all the marks with one line - you get a circle. Draw three circles: outer, middle and inner.
You need to draw 3 circles
Step 6 . Cut a circle of fabric around the outer circumference. Make the same circle from the second piece of fabric.
A circle of fabric is cut
Finished circle
Step 7 . Place both circles with right sides facing out and pin together with tailor's pins.
Circles are pinned together
Step 8 . Using a machine, sew all the marked lines of the sectors, except for one going to the center - the stuffing of the bed will be carried out through it. Also, do not stitch the outermost circle yet.
Lines are sewn on a machine
Step 9 . You can start stuffing. First, fill the bottom (inner circle) with holofiber and immediately sew up that part of the sector around the perimeter that was left unsewn for stuffing.
The inner circle is filled with holofiber
Step 10 . Next, fill the sides of the future bed with filler, each sector with the same amount of filler.
The side sectors are filled
All sectors are filled
Step 11 . Sew the fabric along the middle circle, sealing the holofiber inside.
The fabric is stitched in the middle circle
Step 12 . All that remains is to make the drawstring. Fold the edges of the fabric along the very edge of the bed inward to the very seam.
The edges curl inward
You need to fold it all the way to the seam
Step 13 . Sew along the edges 2cm from the outer edge, making sure to leave room for the lace to be threaded through.
Space left for lanyard
Step 14 . Now insert the lace into the bed and let the edges out. The bed is ready.
The edges need to be let out
This bed can be used either unfolded or by tying it with a cord and turning it into a crib.
The bed can be turned into a crib
Your pet will be very comfortable
Articles on the topic
Do-it-yourself scratching post for cats - TOP 9 master classes
Video - A very simple bed-pillow
How to make your own cooling mat
It’s easy to make a simple cooling mat with your own hands, which you can then place on the floor of your house, booth, inside a carrier, car, or take with you to a picnic or the beach. The easiest way to make such a bed is according to these instructions:
- Measure your dog while lying down (add at least 10 cm in width and length).
- Take a dense, smooth material (the composition should contain the maximum percentage of polyester). Cut two rectangles according to the dimensions measured earlier.
- Cut a rectangle of any foil insulating material (ordinary culinary foil or foil insulation material will do) - this will be a layer of the mat that will retain coolness.
- Sew the pieces of fabric on both sides, place the interlayer inside, smooth it out and connect the remaining two edges of the fabric.
The cooling mat is ready. Before use, you need to keep it in the refrigerator for a while (but not in the freezer). The litter will remain as cool as possible for about 2-3 hours, after which it can be re-cooled. Since there is foil inside, the product cannot be washed or ironed. To put the bedding in order, you will have to rip it open at one end, take out the interlayer, and after putting the thing in order, put it back and sew it up again (for convenience, you can not sew one edge, but make a zipper, buttons, and Velcro on it).
A homemade cooling mat for dogs will cost 4–5 times less than buying a finished product
Spending time on a cooling mat helps the animal cope with extreme heat. This is very important, since overheating threatens the life of the animal. Cool bedding can be used at home or taken with you on the road (lay it on your pet in the car, on the grass or sand during a picnic, etc.).
Source
DIY sweatshirt lounger
If you have a small dog and have an old sweatshirt and a small pillow at home, then you can easily turn it into a pet bed in half an hour. Let's see how to do this.
Step 1 . First, prepare your materials. In addition to a sweatshirt and a pillow, you need needles, threads, scissors, and a piece of fabric to cover the junctions of the sleeves.
Tools and materials for work
Step 2 . Next, turn the clothes inside out and then sew the collar, but leave a small hole.
The collar is being sewn
Step 3 . Straighten the jacket and draw a straight line from one armpit to the other. Pin the sweatshirt along this line.
Pins along the marked line
Step 4 . Now sew the sleeves of the sweatshirt to the sides, but just short of the bottom of the sweater. These are the future sides.
Sleeves are sewn to the sides
Step 5 . Now fill the sides with soft filling. By the way, you can use an old blanket.
The sides are filled with filler
Step 6 . Inside the “body” of the sweatshirt - in the future this will be the bottom of the bed - insert a small pillow. You can sew it yourself.
A pillow fits inside
Step 7 . Sew the bottom edge of the sweatshirt, “sealing” the pillow inside.
Bottom edge is sewn up
Step 8 . Sew the sleeve cuffs together.
Sleeves are sewn
Step 9 . Wrap a piece of decorative fabric around the cuffs and sew it shut to hide the appearance of the cuffs.
A piece of decorative fabric is used
Step 10 . This is such a cute bed. It’s very easy to make and you don’t even need to own a sewing machine to make it work.
DIY sweatshirt lounger
Video - DIY dog bed from an old jacket
Option 1, the simplest
It's easier to just throw an old blanket to the dog. You will need two pieces of fabric: the top is nice, soft and cozy, the bottom is denser, since the bottom rubs against the floor. To hold the two pieces together, stitch along the edges and across them several times (diamonds or waves). To prevent the edges from fraying, cover them with a edging made of a strip of durable material. No pattern, no complex calculations or manipulations - why reinvent the wheel when your pet needs a banal mattress?
This bedding can be washed, it does not deform and retains its decent appearance for a long time, even if the dog is not too neat. Of course, if the fabric is good quality and not shabby.
Bed with sides and ties for a small dog
This is one of the simplest tutorials on how to create a dog bed. This crib is suitable for any size pet, but small dogs feel best in it.
Step 1 . The first step is to make a pattern. The basis is shown in the figure below. Be sure to consider the size of your animal when creating your diagram.
Pattern of a dog bed with sides
Step 2 . Transfer the pattern onto a piece of paper. Then you need to cut the fabric, transferring the pattern to the material, and then cutting out the necessary parts. You will need two parts of this format.
Required parts cut out
Step 3 . Place both pieces with right sides of the fabric facing each other and sew around the edges. Don't forget to leave room for sewing in ties - they will help you assemble the bed later. You can immediately sew in straps, one for each corner. You also need to leave a hole for stuffing and turning the couch inside out.
You can sew the straps in right away
All edges are stitched
Step 4 . Turn the bed inside out through the stuffing hole.
The bed turns inside out
Step 5 . Fill about a third of the sewn bed with soft filling (in this case, padding polyester is used, since the bed is designed for a small dog). Carefully spread a layer of stuffing inside. Sew several seams around the perimeter of the bottom of the bed to secure the padding inside the product and form the lines of the bottom.
Seam pattern around the bottom perimeter
Step 6 . Add more filler after stitching the seams around the bottom. By the way, you can simply make seams around the perimeter before the stuffing, but leave gaps in them through which the stuffing will be placed in the bottom of the bed. These places can then be additionally stitched after the final stuffing.
The bed is almost ready
Step 7 . The bed is almost ready. All that remains is to tie bows on the corners of the product, and you will get a crib like this.
Ready bed for a small dog
Useful tips
If the owner does not know how to sew a dog bed, it is better to seek recommendations from specialists. So:
- round beds for large dogs must have sides;
- the side for the oval-shaped lounger is sewn separately, attached to the main product at the end;
- A cover is required, it’s better to have several at a time;
- if the sleeping bag is filled with sheepskin, then it must be ventilated in the snow in winter;
- straw and hay harbor insects and need to be changed frequently;
- The bed is regularly fluffed to make it more comfortable for the dog to sleep.
Dog bed
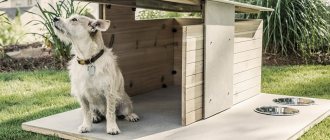
But this DIY dog bed is more difficult to make. Here, not only fabrics will be used, but also wood, and even carpentry tools. This bed is ideal for a large dog. However, if you make it small, then it will be good for a small pet to rest on it.
Step 1 . First, we prepare all the materials and tools. You will need a jigsaw, tape measure, drills, screws, and glue. We will make the base of the bed from plywood sheets, install it instead of furniture legs, and lay a soft pillow inside. You need to immediately make markings on the sheets of plywood: the bed will have a bottom, three full sides (back and side) and one side with an entrance. All of these are rectangular elements cut from plywood.
Plywood sheets are marked
Step 2 . Use a jigsaw to cut out parts of the required size. Drill all the necessary holes for the screws.
Parts are cut out with a jigsaw
Step 3 . Next, when all the pieces for the base are ready, start assembling the bed. You need to screw all the sides to the bottom using regular self-tapping screws.
The sides are screwed to the bottom
Step 4 . Screw 4 furniture legs to the finished frame from the bottom with self-tapping screws.
Screwing furniture legs
Step 5 . For beauty, the edges of the plywood around the perimeter of the bed can be decorated with pieces of boards, gluing them with glue.
This is what the bed will look like
Step 6 . Prime the surfaces and let the primer layer dry, and then paint with the paint of your choice.
Surfaces need to be primed and painted
Step 7 . Sew a rectangular soft pillow of a suitable size and color and place it inside the bed. The pet's bed is ready.
Ready-made dog bed
Video - Wooden bed
Modernization
Many owners know the pleasant feeling of stepping on a mat and riding it across the room! The dog can also get injured - it will take a running jump or jump up sharply when it smells an inviting sandwich. Such somersaults often end in fractures and dislocations, not to mention bruises and other minor things. We'll tell you how to sew a bedding so that you won't end up riding a magic carpet.
- a rug or piece of carpet with a rubber backing;
- tailor's Velcro (contact tape, Velcro) with medium-hard tabs. Small soft paws will not hold the bedding;
- a piece of carpet or rubber-backed mat.
We sew the part of the Velcro that catches along the perimeter of the mattress, from the bottom side. And a few pieces in the center to make it hold more securely. We press the bedding onto the rubberized mat, the pile of which replaces the second part of the Velcro - ready! The mattress can be removed for washing, the rug can be knocked out. Velcro is easy to replace if, over time, hair and dust reduce its grip.
DIY bedspread
Let's look at another interesting option for a dog bed. This is a blanket that is placed on a sofa or other upholstered furniture especially for your pet. But the bedspread is not a simple one, but with sides. This option is suitable for those whose pets flatly refuse to sleep in a crib on the floor, but strive to take a liking to the owner’s favorite chair.
Step 1 . Buy fabric that doesn't stretch. For a small dog you will need to buy a piece of approximately 2x1.5 m.
The fabric should not stretch
Step 2 . You will also need to buy filler, two types: sheet padding polyester for the bottom of the bed and holofiber for the sides.
Bed filler
Step 3 . The bed pattern should look something like this (but you need to choose the sizes that are optimal for your pet). The lower part is indicated at the top, the sides are schematically shown at the bottom.
Pattern example
Step 4 . Cut two square pieces of fabric for the future bottom (if you decide to make the bottom of the bed square).
Fabric cutting
Step 5 . Cut out a piece of suitable size from sheet synthetic padding. For example, if the dimensions of the squares for the bottom were 1x1 m, then the piece of padding polyester should be 1x1 m.
Cutting padding polyester
Step 6 . Lay the pieces of fabric on top of each other with the right sides inward, place them on top of the padding polyester and pin them together.
Fabric laid on top of padding polyester
Step 7 . Sew the fabric and padding around the perimeter at a short distance from the edge. Leave a small hole to turn the mat inside out.
Sewing fabric and padding polyester
Step 8 . Turn the rug inside out and sew up the hole you left earlier through which you turned it inside out.
Small hole left
Step 9 . Now you need to secure the padding polyester inside the rug. To do this, make a stitch around the perimeter of the product at a short distance from the edge. And then draw the entire surface of the rug into diamond shapes and stitch the product along the drawn lines.
The rug is drawn into diamond shapes
Step 10 . Now you can do the sides. To do this, you will need one long piece of fabric or several small ones of the same size, which will need to be sewn together. In this case, a strip of 40x200 cm is cut out.
Cutting fabric for border
Step 11 . Now just fold the blank of the future side along the length and sew the long edge on a machine.
The long edge is sewn
Step 12 . The edges of the sides can be covered with beautiful round caps. Cut them out of fabric too. You can measure the resulting circle from the end of the side, select a suitable template and cut neat circles along it.
A small bowl will serve as a template.
Cutting out a round plug
Step 13 . Pin the circle along the edge of the side pipe and sew it on a machine. Don't forget to leave a hole on one side for stuffing the side with filler.
The circle is pinned to the side pipe
Step 14 . Fill the side with holofiber.
Side filling
Step 15 . Place the border along the edge of the previously made blanket and sew the product by hand.
Side attached
Ready bed-bedspread
Video – Bed house
For those who like to knit
If you don't like to sew, a knitted bed mat is a great alternative. Take large yarn (woolen is better for dogs) and large knitting needles (10-12). For a round bed with a diameter of 50-55 cm with sides of approximately 18 cm you will need (with a knitting density of 10 X 10 cm = 8 loops X 15 rows):
- 950 grams of yarn of the main color;
- 200 grams of yarn extra.
Knit in garter stitch - all stitches in knit and purl rows are knit.
Cast on 44 loops with the main color yarn and knit in short rows, following the step-by-step instructions:
- # in the first row – 41 loops;
- in the 3rd - 38 loops;
- in the 5th - 35 loops;
- in the 7th - 32 loops;
- in the 9th – 29;
- in the 11th – 26;
- in the 13th – 23;
- in the 15-16th on all 44 loops;
- two rows of yarn in an additional color.
Repeat from #19 times. At the end of the work, all loops are closed and pulled together in the middle. Connect the set row with the last (closed) one, forming a circle.
It is necessary to wash the finished bedding in a washing machine at 60 degrees so that the wool becomes felted.
Spread the product well into shape and dry. Fold down the side and invite your pet to a new place.
You can clean a knitted bed with a vacuum cleaner. To wash, select a wool cycle at lower temperatures. Otherwise, the bed will shrink further in size, and you absolutely don’t need that.
Has a four-legged friend appeared in the house? It is necessary to immediately determine a separate place for him, not forgetting to notify the pet about this. And, in addition, you need to make the corner cozy and comfortable, providing a bedding for the dog on which it will rest with pleasure. In addition, a dog bed is an island of safety where the pet feels calm and relaxed. What should a pet bed be made of and what should you look for when choosing?